-
Coffee Martini

A long day at a desk sometimes calls for something with a little more pick up at 5 p.m. than a glass of wine, like a coffee martini. Coffee-based cocktails comes in handy when you’re a little tired but still want to party. A little booze, a little caffeine, a little sugar, a lot of flavor.

Coffee Martini How to make the coffee martini
This drink is fairly simple. There’s no squeezing of fruit or muddling of herbs. Just straightforward shaking all of the ingredients until they make that perfect beige foam on top. You’ll need:
- 2 oz vodka
- 1/2 oz Kahlua or coffee liqueur
- 1/2 oz chocolate liqueur
- 1/8 tsp almond extract
- 1/4 tsp vanilla extract
- 3 oz cold coffee or espresso
Instructions
- Add all ingredients to a shaker filled with ice.
- Shake very, very vigorously.
- Strain into your most gorgeous coupe or martini glass. Let a few ice cubes sneak in if you’re drinking it outside.
Coffee Martini
- 2 oz vodka
- 1/2 oz Kahlua or coffee liqueur
- 1/2 oz chocolate liqueur
- 1/8 tsp almond extract
- 1/4 tsp vanilla extract
- 3 oz cold coffee or espresso
Add all ingredients to a shaker filled with ice.
Shake very, very vigorously.
Strain into your most gorgeous coupe or martini glass. Let a few ice cubes sneak in if you're drinking it outside.
For more cocktails, visit me here.
-
Vesper martini with lemon and lavender

I’ve been thinking about making this lavender lemon vesper martini for awhile. I’ve wanted to make a vesper martini since I tried one at a local restaurant in January (when I first fell in love with Lillet). I finally put one together, with a couple of twists. I used Empress gin, added about a tablespoon of Meyer lemon juice, and added some garden lavender along with some ground cooking grade lavender. I also upped the amount of Lillet juuuust a tidge because I am not quite used to drinks as strong as this one. But it’s been a week, and something strong was in order!
Vesper martini recipe
3 oz Empress gin
1 oz vodka
1 tablespoon Meyer lemon juice
1 oz Lillet Blanc
1 tsp ground cooking lavender (grind it in a mortar & pestle)
1 sprig blooming lavender for garnish
A 2 inch section of lemon peelHow to make it:
Put all ingredients in a shaker over ice and twist the lemon peel before dropping it in. Shake vigorously, then double strain into a coupe glass (I used a cube of ice, which isn’t normally done with a martini). Garnish with the lavender sprig.
Enjoy!


For more cocktail recipes, click here.
-
Leek and potato soup with garlic

Leek and potato soup is super simple, nourishing, and easy to make. There is something so soothing and perfect about a simple soup. This one is the perfect combo of spring veggies and starchy potatoes, and can make a great side dish or a meal in itself. If you really want to jazz it up, you can add some chili flakes or shredded chicken. Here’s how to make it:
What you’ll need for leek and potato soup:
- 2 large leeks, trimmed and chopped
- 6 small gold potatoes, washed well and chopped
- 10-12 cups water
- 6 cloves garlic, finely chopped
- 2 tsp salt (or more, to taste)
- 1 tsp cracked pepper (to taste)
How to make it:
- Fill a large pot about halfway with water. This will be roughly 10 cups, a little less or a little more depending on the size of your pan, potatoes and leeks. Bring the water to a boil. Meanwhile, rinse the leeks, chop off the wilted ends (about an inch) and the root piece. Slice them lengthwise, then chop in inch-long pieces. Place in a colander and rinse well, assuring that all of the dirt is gone. Clean the potatoes well, then slice lengthwise and chop the halves into inch-long pieces. Toss all of the pieces into the pot, and turn the water down to a simmer.

- Add the salt, pepper, and let everything simmer about 30 minutes, or until the potatoes and leeks are soft. Add the garlic, and let it simmer about another five minutes. Turn the heat off and serve hot.


For more soup ideas, visit me here.
Leek and potato soup with garlic

- 2 large leeks, trimmed and chopped
- 6 small gold potatoes, washed well and chopped
- 10-12 cups water
- 6 cloves garlic, finely chopped
- 2 tsp salt (or more, to taste)
- 1 tsp cracked pepper (to taste)
Fill a large pot about halfway with water. This will be roughly 10 cups, a little less or a little more depending on the size of your pan, potatoes and leeks. Bring the water to a boil. Meanwhile, rinse the leeks, chop off the wilted ends (about an inch) and the root piece. Slice them lengthwise, then chop in inch-long pieces. Place in a colander and rinse well, assuring that all of the dirt is gone. Clean the potatoes well, then slice lengthwise and chop the halves into inch-long pieces. Toss all of the pieces into the pot, and turn the water down to a simmer. Add the salt, pepper, and let everything simmer about 30 minutes, or until the potatoes and leeks are soft. Add the garlic, and let it simmer about another five minutes. Turn the heat off and serve hot.
-
Easy Shepherd’s Pie

This easy Shepherd’s Pie recipe is one of our favorite dinners. It doesn’t take long to make, it’s filling, and it’s healthy. I don’t use the traditional flour thickener, but I do add a bit of cream to thicken the filling. If you have extra herbs experiment with them in this recipe! You can use almost anything from the garden in this one — make it your own! Chives, parsley, marjoram, or even oregano or basil would be great additions. This is a great idea for a fun and nourishing St. Patrick’s Day dinner, but stands on its own as a regular weeknight meal too. Bonus — the leftovers are even better than when it comes straight out of the oven. Here’s how to make it:
Ingredients for Easy Shepherd’s Pie
- 1 lb ground beef or lamb
- 4 medium potatoes (or six small)
- 2 tbsp avocado oil
- 1 small onion
- 2 stalks celery
- 2 carrots
- herbs, to taste parsley and chives work well
- 8 tbsp heavy cream (four for the filling and four for the topping)
- salt and pepper to taste
- 4 cloves garlic, chopped finely
- 2 tbsp grass-fed butter
- 1/2 cup grated white cheddar cheese
Easy Shepherd’s Pie Filling

- Sauté the chopped onion in the avocado oil about three to four minutes on medium-high heat, until it is translucent. Add the beef or lamb, salt and pepper, chopped celery and chopped carrots, salt and pepper. Sauté until the meat is just browned, but not cooked all the way. Add the cream and mix thoroughly, then add the garlic and herbs. Turn off the heat.
Potato topping
- Peel and boil the potatoes until they are soft. Drain them, then add four tablespoons of cream and two tablespoons of butter, and salt and pepper to taste. Mash them with a hand mixer until fluffy.

Putting it together
- Spread the filling in a casserole dish (9×13 or smaller). Drop the potatoes on top in four to six spoonfuls. Spread it evenly to cover the filling. Cover lightly with the shredded cheese, and bake at 400 degrees Fahrenheit for 20 minutes, or until the cheese is browned.

Easy Shepherd’s Pie
- 1 lb ground beef or lamb
- 4 medium potatoes ((or six small))
- 2 tbsp avocado oil
- 1 small onion
- 2 stalks celery
- 2 carrots
- herbs, to taste (parsley and chives work well)
- 8 tbsp heavy cream ((four for the filling and four for the topping))
- salt and pepper (to taste)
- 4 cloves garlic, chopped finely
- 2 tbsp grass-fed butter
- 1/2 cup grated white cheddar cheese
Filling
Sauté the chopped onion in the avocado oil about three to four minutes on medium-high heat, until it is translucent. Add the beef or lamb, salt and pepper, chopped celery and chopped carrots, salt and pepper. Sauté until the meat is just browned, but not cooked all the way. Add the cream and mix thoroughly, then add the garlic and herbs. Turn off the heat.
Potato topping
Peel and boil the potatoes until they are soft. Drain them, then add four tablespoons of cream and two tablespoons of butter, and salt and pepper to taste. Mash them with a hand mixer until fluffy.
Putting it together
Spread the filling in a casserole dish (9×13 or smaller). Drop the potatoes on top in four to six spoonfuls. Spread it evenly to cover the filling. Cover lightly with the shredded cheese, and bake at 400 degrees Fahrenheit for 20 minutes, or until the cheese is browned.
For more easy dinner ideas, click here.
This post contains affiliate links.
-
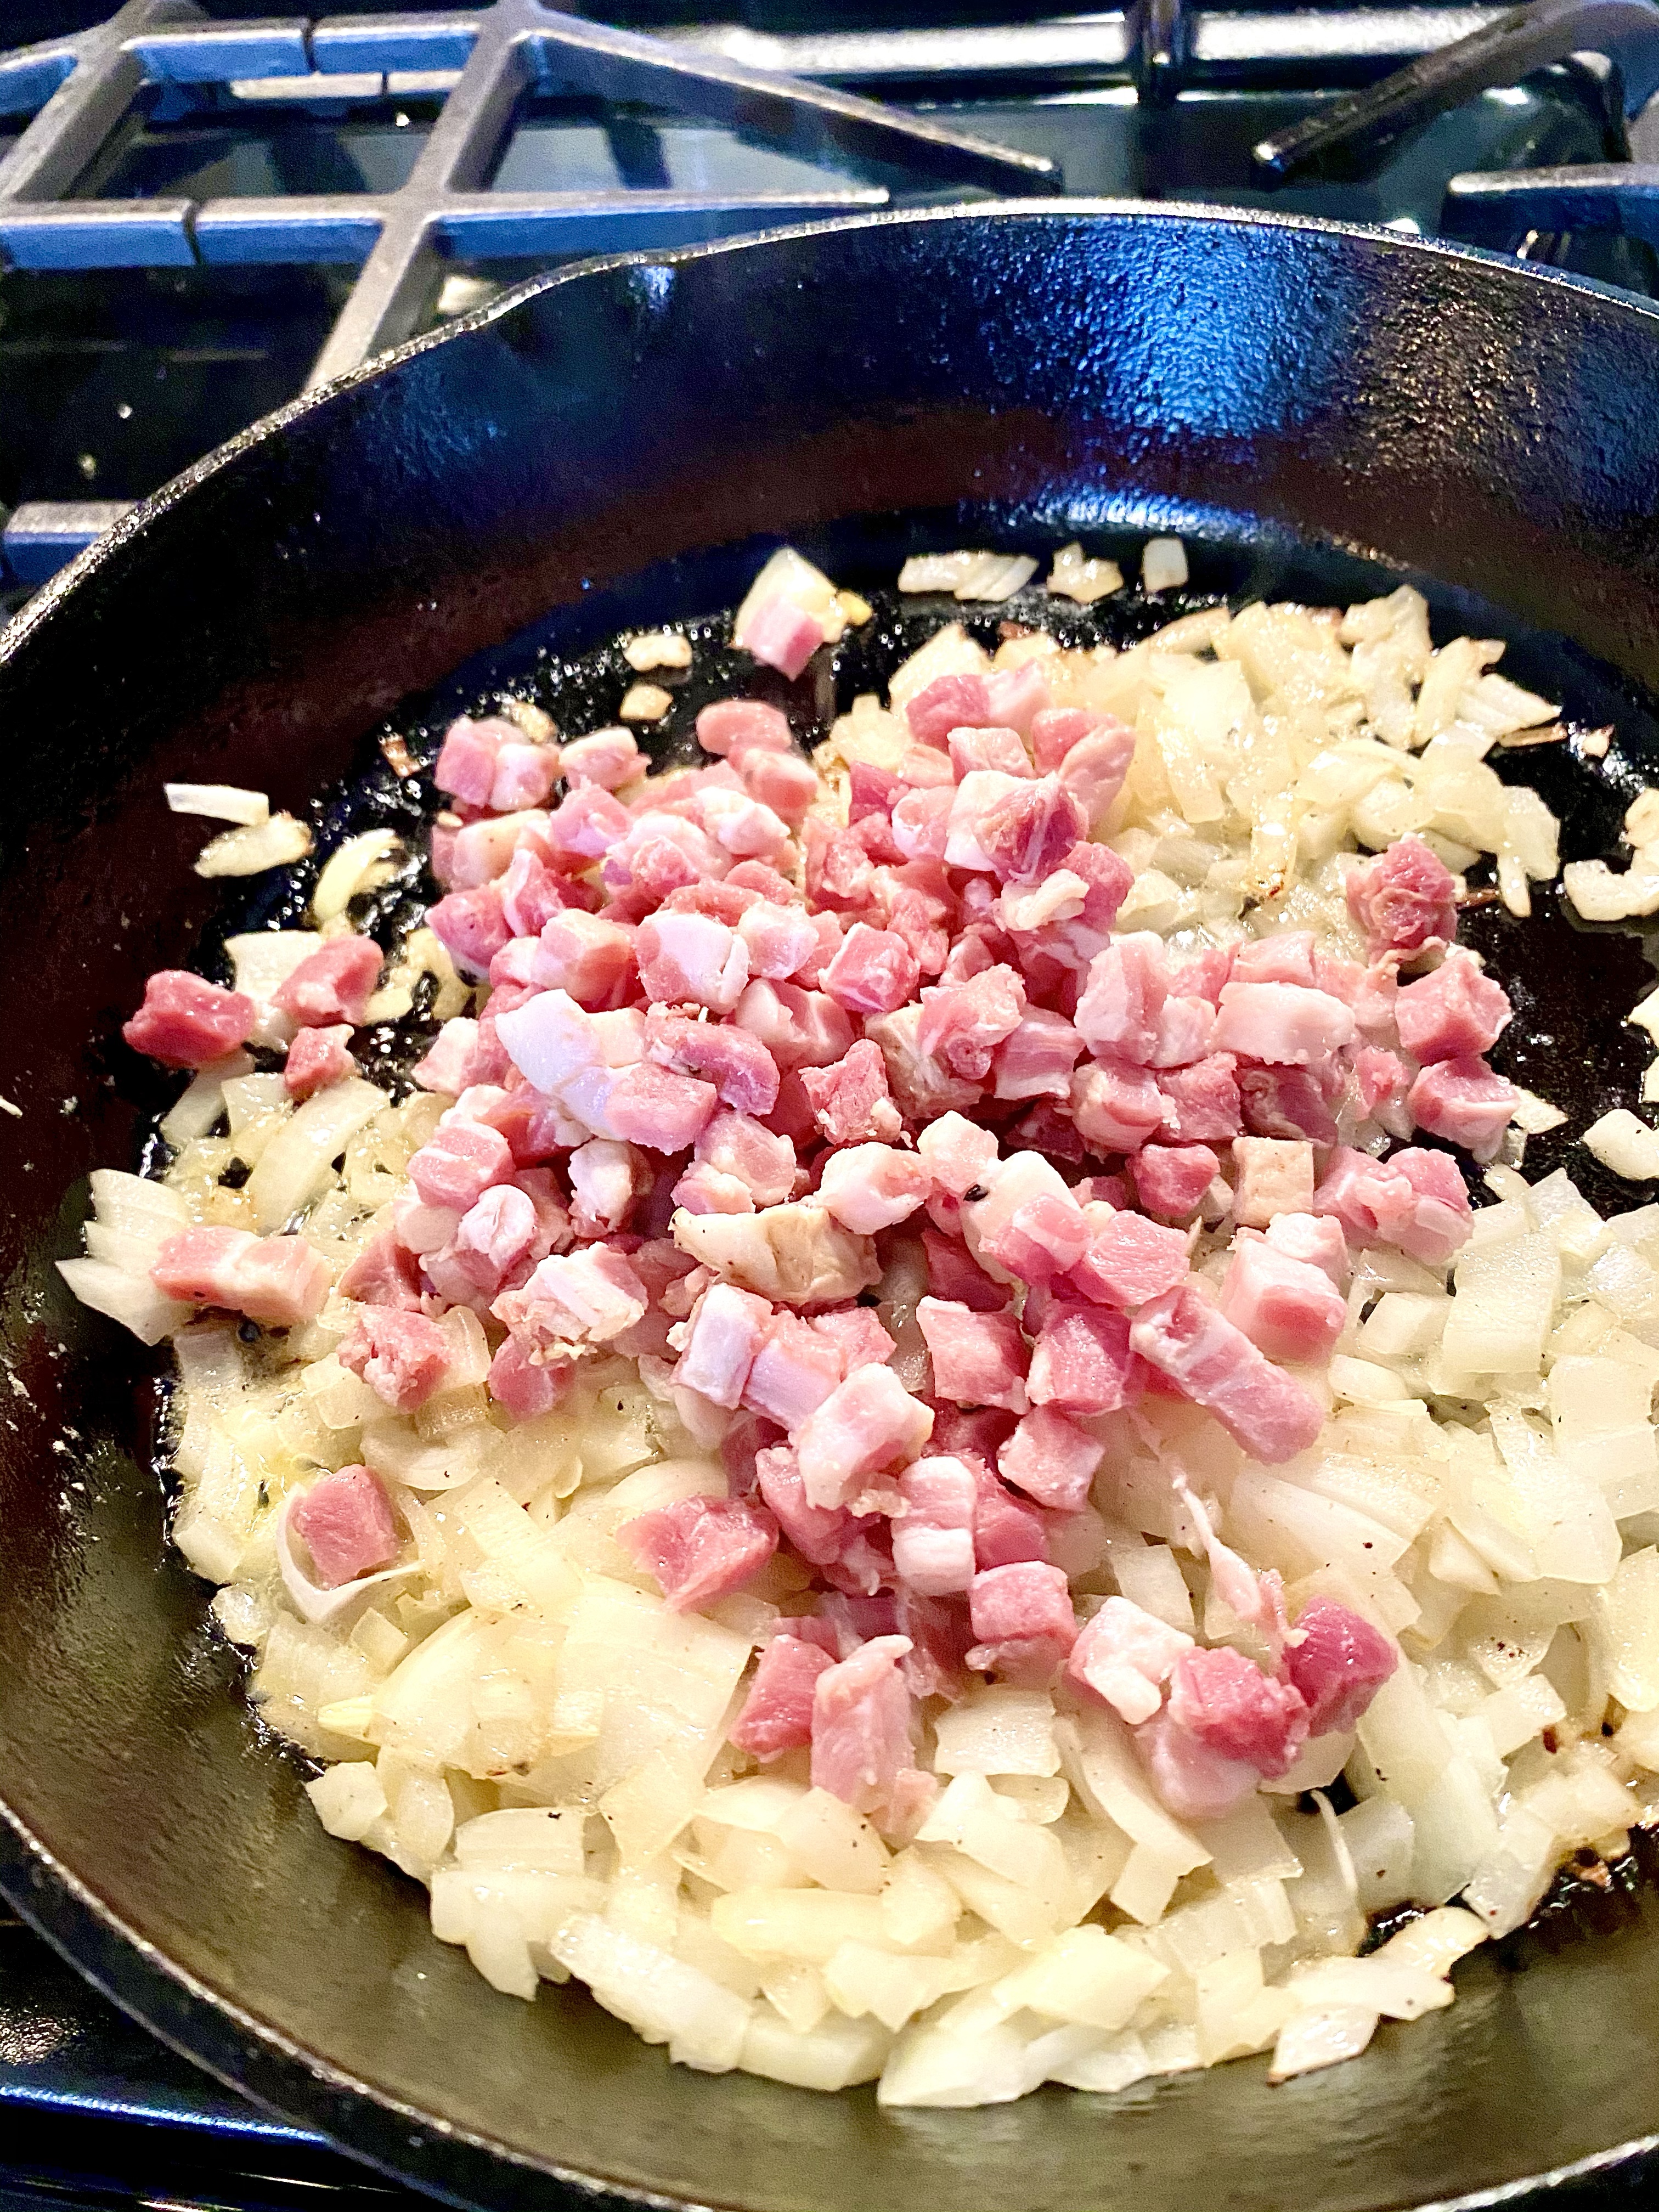
Frittata with broccoli and pancetta

A frittata is maybe the easiest way to make a fancy breakfast. They are so easy and so good. Recently I discovered that you can cook a frittata in one pan too, which is a game changer over here (I’m all about less cleanup). I use a seasoned cast iron skillet similar to this one for this recipe. I used broccoli, pancetta and goat cheese for this because that’s what I had on hand. You can use any veggie and meat combo, though (bacon and potatoes? Ham and bell peppers? The options are endless). This will make four to five small servings or two to three larger breakfasts.
Other ways to prepare this breakfast
If you have a large group, perhaps for an Easter brunch, double it and cook it twice as long in a larger pyrex like a casserole. For a more decadent brunch, add some extra goat cheese on top and sprinkle with fresh chives. You can also make this in a pie crust for more of a quiche-like dish.
Ingredients:
- 5 eggs
- One onion, chopped
- About a cup of broccoli florets, chopped
- One 4 oz package of diced pancetta
- Three tablespoons of grass fed butter
- Salt and pepper, to taste
- Two cloves of garlic or a half teaspoon of garlic powder (optional)
- About 1/4-1/2 cup goat cheese crumbles (optional)
Melt the butter in the pan, then sauté the onion until it is soft. Add the pancetta, then the broccoli, and cook about three minutes, stirring frequently. Add the garlic, if you are using it, and let it cook for about a minute. Whisk the eggs with the salt and pepper, and pour the mixture over the veggies in the pan. Allow the pan to sit on medium heat for about 90 seconds, then add the cheese evenly on top. Place the whole pan in the oven (preheated to 350) for ten minutes. Allow to cool for about five minutes before serving.


For more breakfast recipes, click here.
-
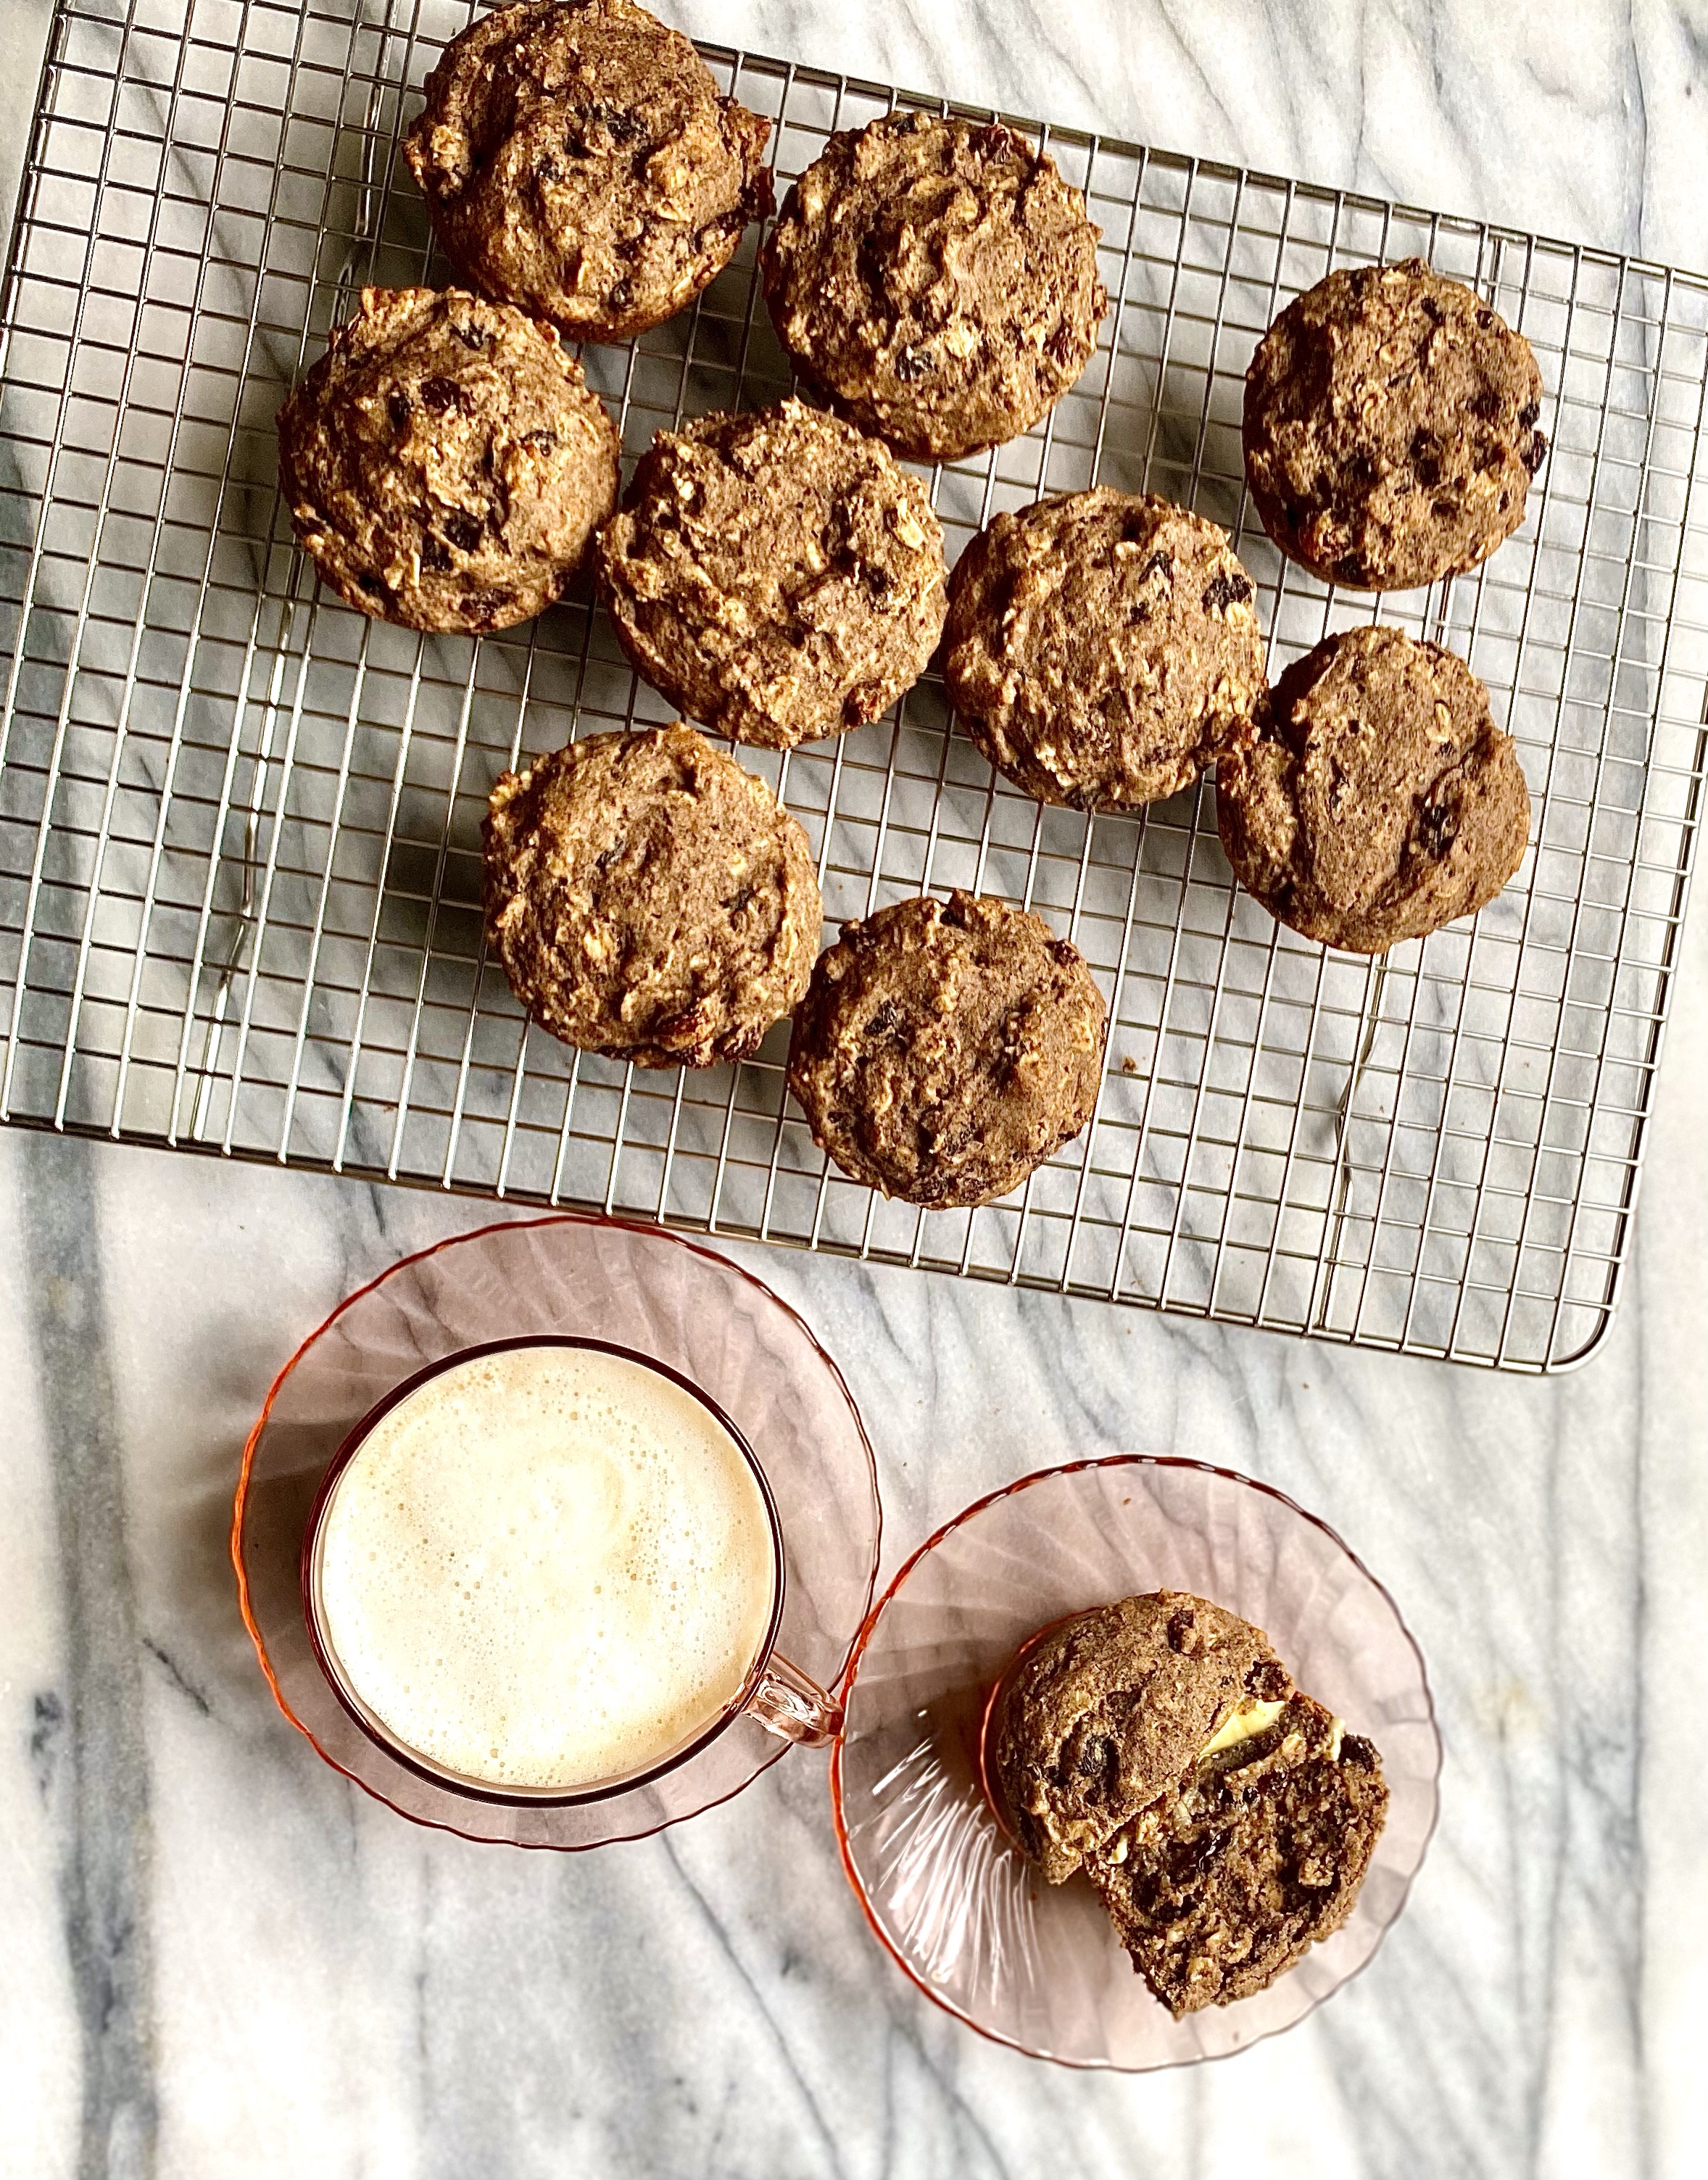
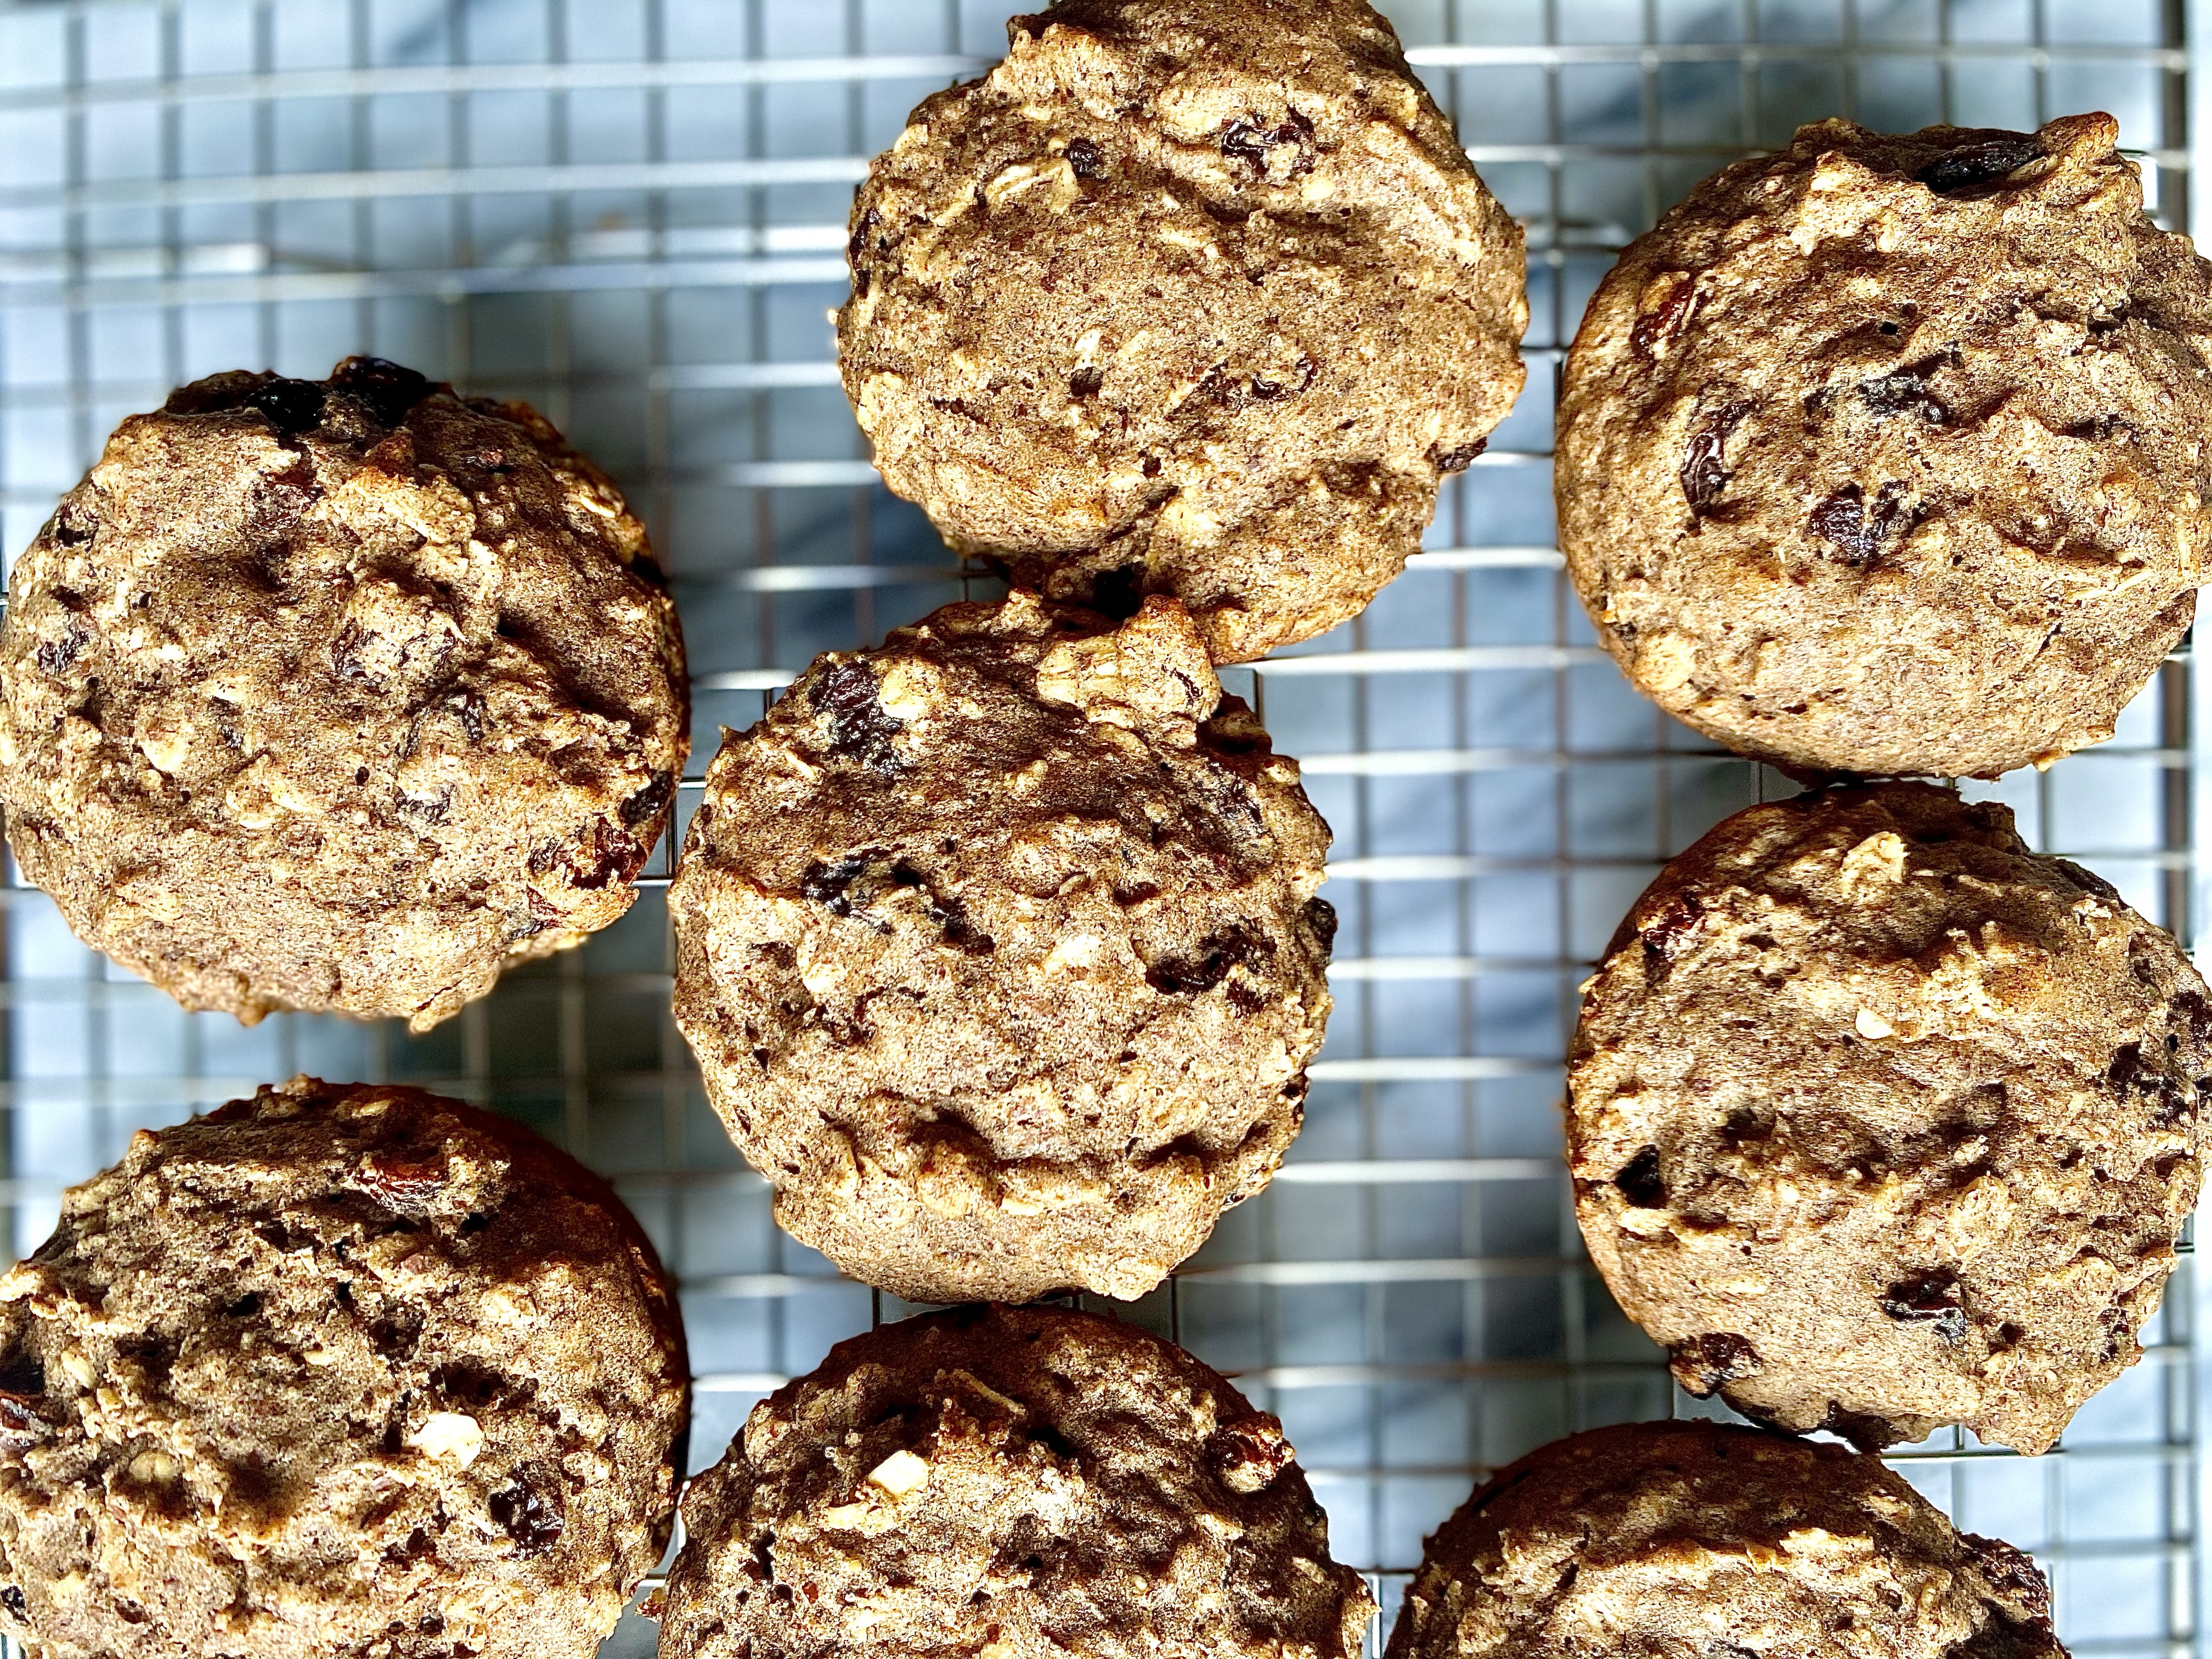
The perfect morning muffins

What could be better than coffee and a muffin? There are not that many combos that are better. These muffins are gluten-free and made with buckwheat, oats and raisins. Recipe below:
Makes 12 standard size muffins:
1/2 c gluten free flour (I use @pillsburybaking)
1 cup old fashioned oats
1/2 c. Buckwheat flour (I used @bobsredmill)
1/2 c. Ground flax seed
1/2 cup raw or coarse sugar
1/4 tsp sea salt
1 tsp. Baking soda
1.5 tsp cinnamon (I use Vietnamese cinnamon and it really makes a difference)
1 and 1/4 c. buttermilk
1 egg
1 tablespoon white vinegar
1/4 c. avocado oil
1 tsp. Butter extract
2 tsp. vanilla extract
1 c. RaisinsPreheat your oven to 350 degrees Fahrenheit and grease a standard sized muffin tin. Mix the dry ingredients thoroughly. Add the wet ingredients and mix until just blended. Fold in the raisins. Spoon into the muffin tin and bake for 20 minutes, or until a fork comes out clean. Enjoy!


-
Edible Crops to Plant in Your Yard Now – the Top 5
Gardening (mostly edible crops) is my second favorite activity (to cooking). There is nothing like deciding what to have for dinner and heading into my front yard to pluck the ingredients. My kids like to join in too — they love to try each kind of lettuce and then spit it out and tell me it’s gross (joke’s on them- they’re trying it!). They especially adore pulling carrots they’ve planted and helping me pick green beans, cherry tomatoes or blackberries. Below I’ve outlined the things you can plant right now, in March, for an early harvest. I like to plant about half of what I want now and save the rest for later in the month so my harvest is stretched out a bit longer.
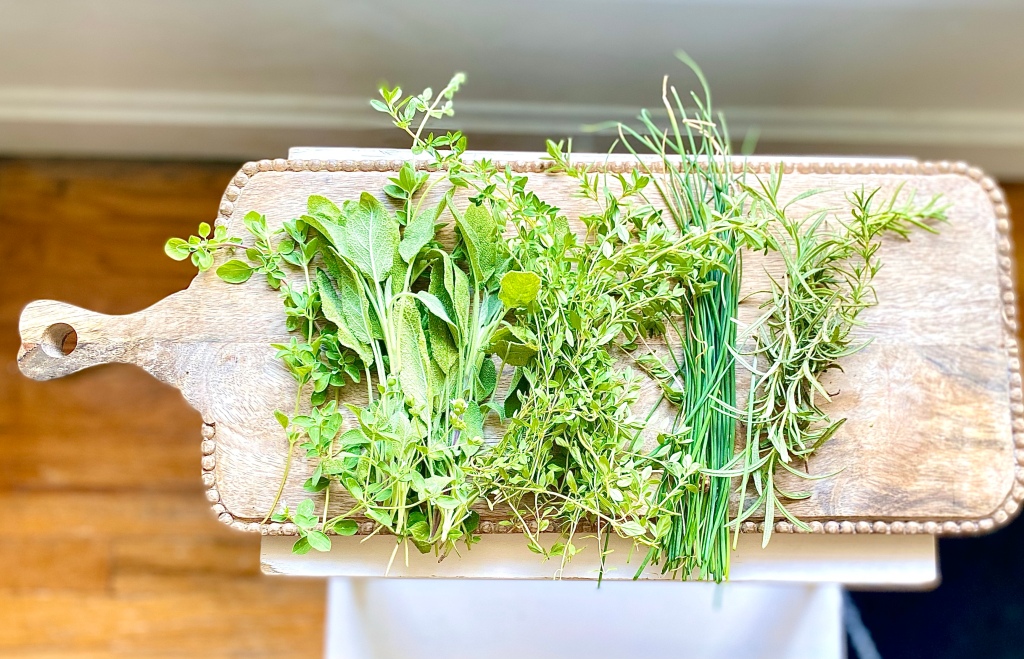
Herbs
- In my garden, herbs perform better than any of the other edible crops. I plant everything I can get my hands on that will fit in my small space — cilantro, oregano, basil, lavender, dill, and more. And you bet I use them every day, like in this gin and rosemary cocktail.

Root Veggies
2. Root veggies, like carrots and radishes, are a real crowd pleaser if you have kids who like to help in the garden. There is something so satisfying about watching them pull up veggies that they planted and will actually eat! You must till your soil deeply for success and sow them very shallow, not more than 1/4 of an inch. Edible crops can be hugely satisfying and a great way to involve the kids in cooking and eating healthy.

Beans and Peas
3. Beans and peas are so easy, they are the go-to for kindergarten teachers to have classrooms full of 5-year-olds plant in cups with wet paper towels. Seriously, if you have a little bit of decent soil, a trellis of some sort, sunlight and water, you will be kept in fresh beans/peas/snap peas all spring and sometimes into the fall if your summers are mild. Plant more than one variety for the best crop, and be sure to harvest these as they become ripe to allow the plants to produce as many as possible.

Greens
4. Lettuces, chards, kales, cabbages and other greens tend to do well in cooler early spring weather, and may even survive one last frost. I’ve already done spinach and several lettuces and will get cabbage and chard in the ground towards the end of March. And you’ll have plenty for this classic Italian soup.

Potatoes
5. Potatoes are another fun one because they are deceptively easy. I use a grow bag, which eliminates the need for laborious digging to harvest. I saved a potato from a bag of organic gold potatoes last spring and let it sprout on my windowsill (place the potato in a cup of water halfway up the side of the potato, using toothpicks to keep it above the water line). Once it sprouted, I was able to cut it into slips and plant them in a grow bag. We had tiny, fresh, yummy gold potatoes for weeks. Roast them in duck fat like I do here.

I know this varies a bit based on what zone you are in, but most of these are fairly common to North America for this time of year (especially if you have cold frames or a greenhouse for your seedlings). Here are a couple of links to help you determine what’s right for your garden and your area. I also love Brooklyn Farm and Garden Betty for inspiration and tips!
Happy digging!
-
Easy Chili with Cocoa

Chocolate is amazing. It has antioxidant properties and can reduce inflammation, among other health benefits. But most of all, it tastes good — even in savory dishes like chili. This easy chili with cocoa is no exception. Just two tablespoons of regular cocoa powder transforms a normal stew into something with a rich, deep flavor you just can’t get from a baggie of chili mix from the store.
How to make easy chili with cocoa
Below is a very easy way to prepare this dish, which has enough for two or three family dinners during the week. This takes less than 15 minutes to prep and can simmer for as little as 30 minutes and as much as 3 hours.

Ingredients:
- 1 tablespoon avocado oil
- 1 large yellow onion, diced
- 2 lbs grass fed ground beef
- 3 tablespoons chili powder
- 2 tablespoons cocoa powder
- 2 tablespoons cumin
- 2 teaspoons (more or less to taste) sea salt. I start with one teaspoon and work up after that.
- 1 teaspoon white pepper
- 1 teaspoon garlic powder
- cracked pepper, to taste
- 2 large cans Italian Style tomatoes, either whole or diced (with the juice)
- 1 small can of green chilis, diced (heat level is up to you, I use hot!)
- 1 bag of cubed sweet potatoes (16 oz). You can dice your own, but this makes it so easy.
- 1/2 cup brown sugar, but only if you don’t care if it’s paleo! If you are a paleo person this can be omitted.
- Cilantro, for garnish
- Chopped red or green onion, for garnish
Heat the oil in a large pan or dutch oven. Add the onion and saute until soft, about two to three minutes. Drop in the beef and chop it down to small chunks. Then, add the spices and cocoa, and stir for three to four minutes, chopping the meat to small chunks all the while. Toss in the tomatoes and beans and let simmer about ten minutes on medium. Taste and correct for salt and pepper. Spoon in the brown sugar. Cover the pot and simmer on low for at least 30 minutes and up to two hours. Serve in bowls and garnish with chopped cilantro and cheese of your choice. I also like to add a little bit of chopped red onion.
Easy chili with cocoa
- 1 tbsp avocado oil ( )
- 1 large onion, white or yellow – diced
- 1 lb grass fed ground beef
- 2-3 tbsp chili powder (adjust to taste)
- 1-2 tbsp cocoa powder (adjust to taste)
- 1 tbsp cumin
- 1 tsp sea salt
- 1 tsp white pepper
- 1 tsp garlic powder
- 1 large can of stewed tomatoes
- 15 oz can of black beans
- 1/8 cup brown sugar
- handful cilantro (for garnish)
- handful white cheddar or goat cheese (for serving on top)
- 1/4 cup red wine (for deglazing the pan)
Heat the oil in a large pan or dutch oven. Add the onion and saute until soft, about two to three minutes. Add the beef and chop it down to small chunks. Add the spices, and cocoa and stir for three to four minutes, chopping the meat to small chunks all the while. Deglaze the pan with about 1/4 cup or less of red wine. Cook down until it's absorbed. Add the tomatoes, and beans and let simmer about 10 minutes on medium. Taste and correct for salt and pepper. Add the brown sugar. Cover the pot and simmer on low for at least 30 minutes and up to two hours. Serve in bowls and garnish with chopped cilantro and cheese of your choice. I also like to add a little bit of chopped red onion.

This chili topped with crispy roasted Brussels sprouts -
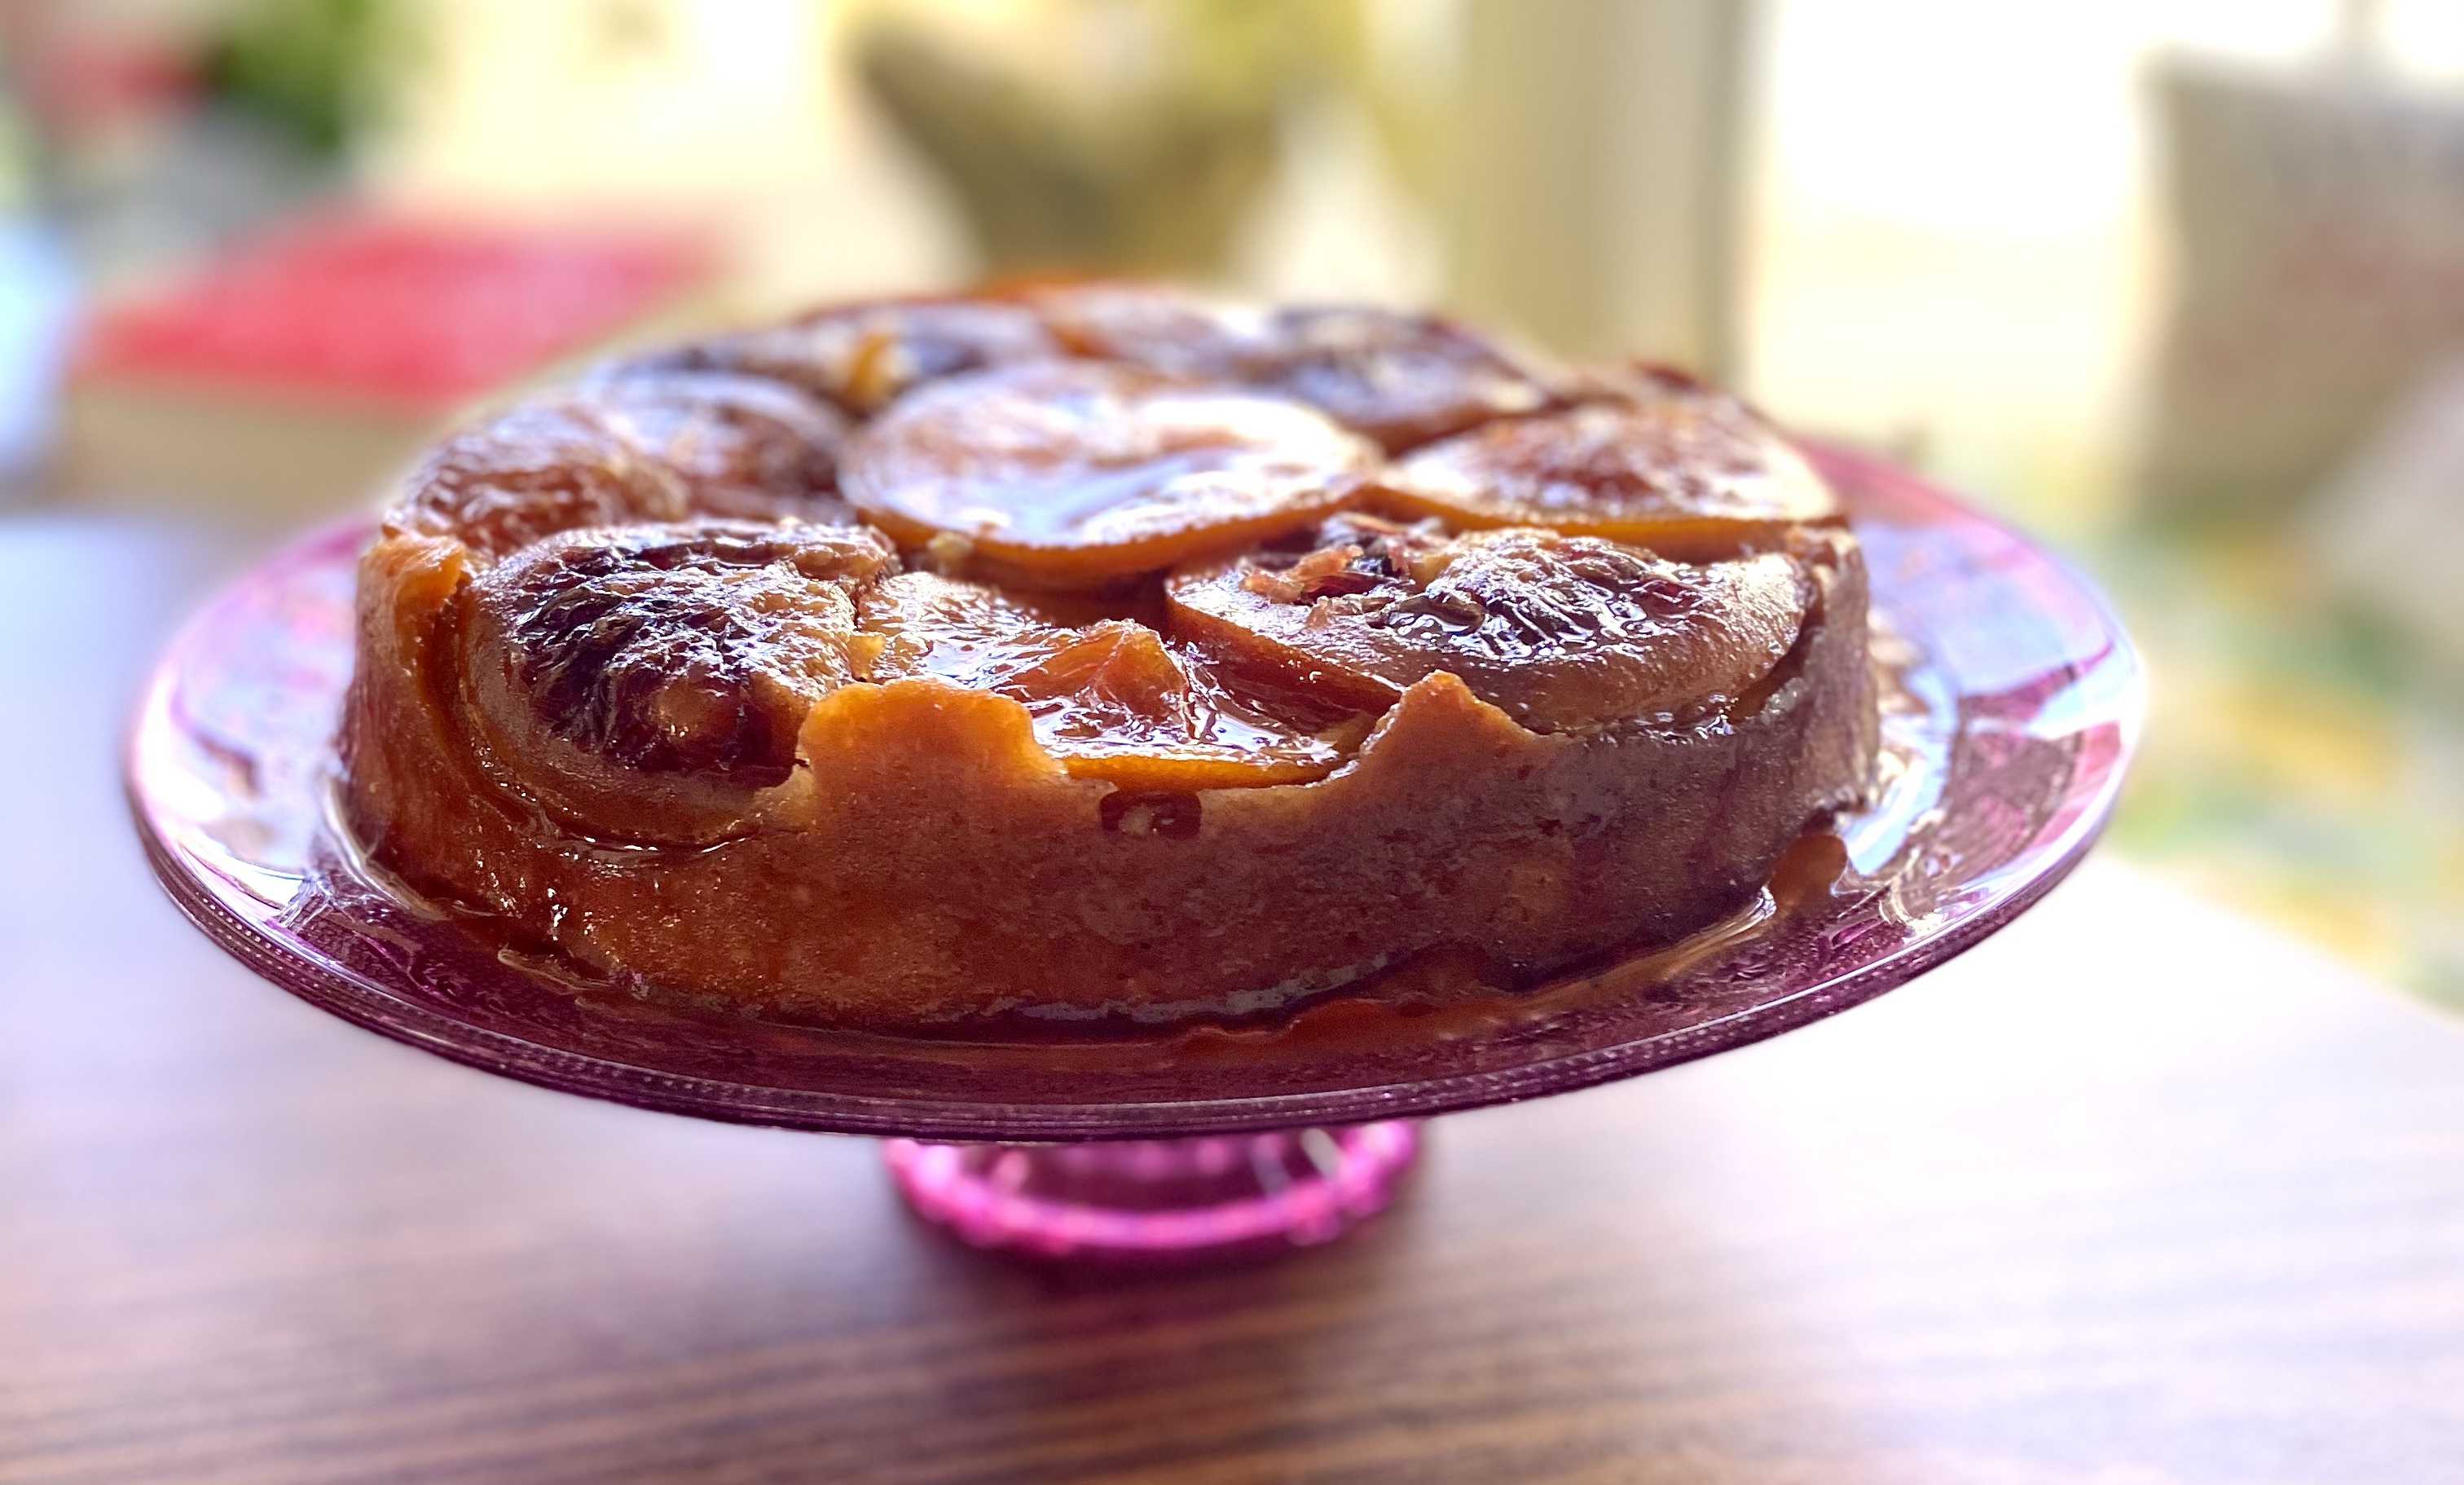
Orange Upside-Down Cake

If you’ve followed this blog for long, you know I’m obsessed with citrus. I’ve wanted to create a winter citrus cake for awhile, and this orange upside-down cake proves it. I love citrus. At night if I’m making a cocktail, more often than not it has a whole lemon and at least half an orange juiced in it. And in the winter, the citrus is so good and there are so many varieties. Blood oranges, lemons, Meyer lemons, Cara Cara oranges, juicy limes, raspberry oranges (which are really just blood oranges but I swear they taste more delicate), minneolas, mandarins, and even your run of the mill naval orange is juicer and well, just better. I can eat them for breakfast, lunch, in salads at dinner and in literally anything for dessert. Don’t even get me started on fresh-squeezed orange juice (or other citrus juices) or how you can use lemon curd between cake layers to create something truly special.
Why this cake?
As I was perusing articles about the many different ways to use winter citrus since I can’t help myself from buying pounds and pounds of it at a time, and an orange upside-down cake from Epicurious caught my eye. This is slightly different from the popular cake recipe known as Pineapple Upside-Down Cake due to the flavor of the oranges and lessened sweetness that comes with eating the orange peeI. knew it would pair well with the cakey-cookiness of my coconut Madeline recipe and I just had to have something to pair with this lemon curd recipe I came across on Instagram.
After thinking — no, dreaming — about this cake for a few weeks, I finally put together a plan. My cakey Madeline recipe made into the cake, the caramel recipe from Epicurious’s recipe, Kitchen Confidante’s lemon curd (where you combine lemon juice, lemon zest, eggs, butter and sugar) and my stash of Cara Cara and blood oranges were going to come together to make something perfect. And they did.
Here’s how.
How to make orange upside-down cake
I made one recipe of my coconut Madeline recipe with a flour mixture of gluten-free all purpose flour and almond flour, and used an 8-inch round pan. If you don’t care for gluten-free, you can use cake flour. If you wanted to make this a layer cake, double or triple the Madeline recipe. You can add citrus flavor to this in the form of lemon extract or orange zest if desired. The mascarpone can also be subbed with cream cheese if needed.
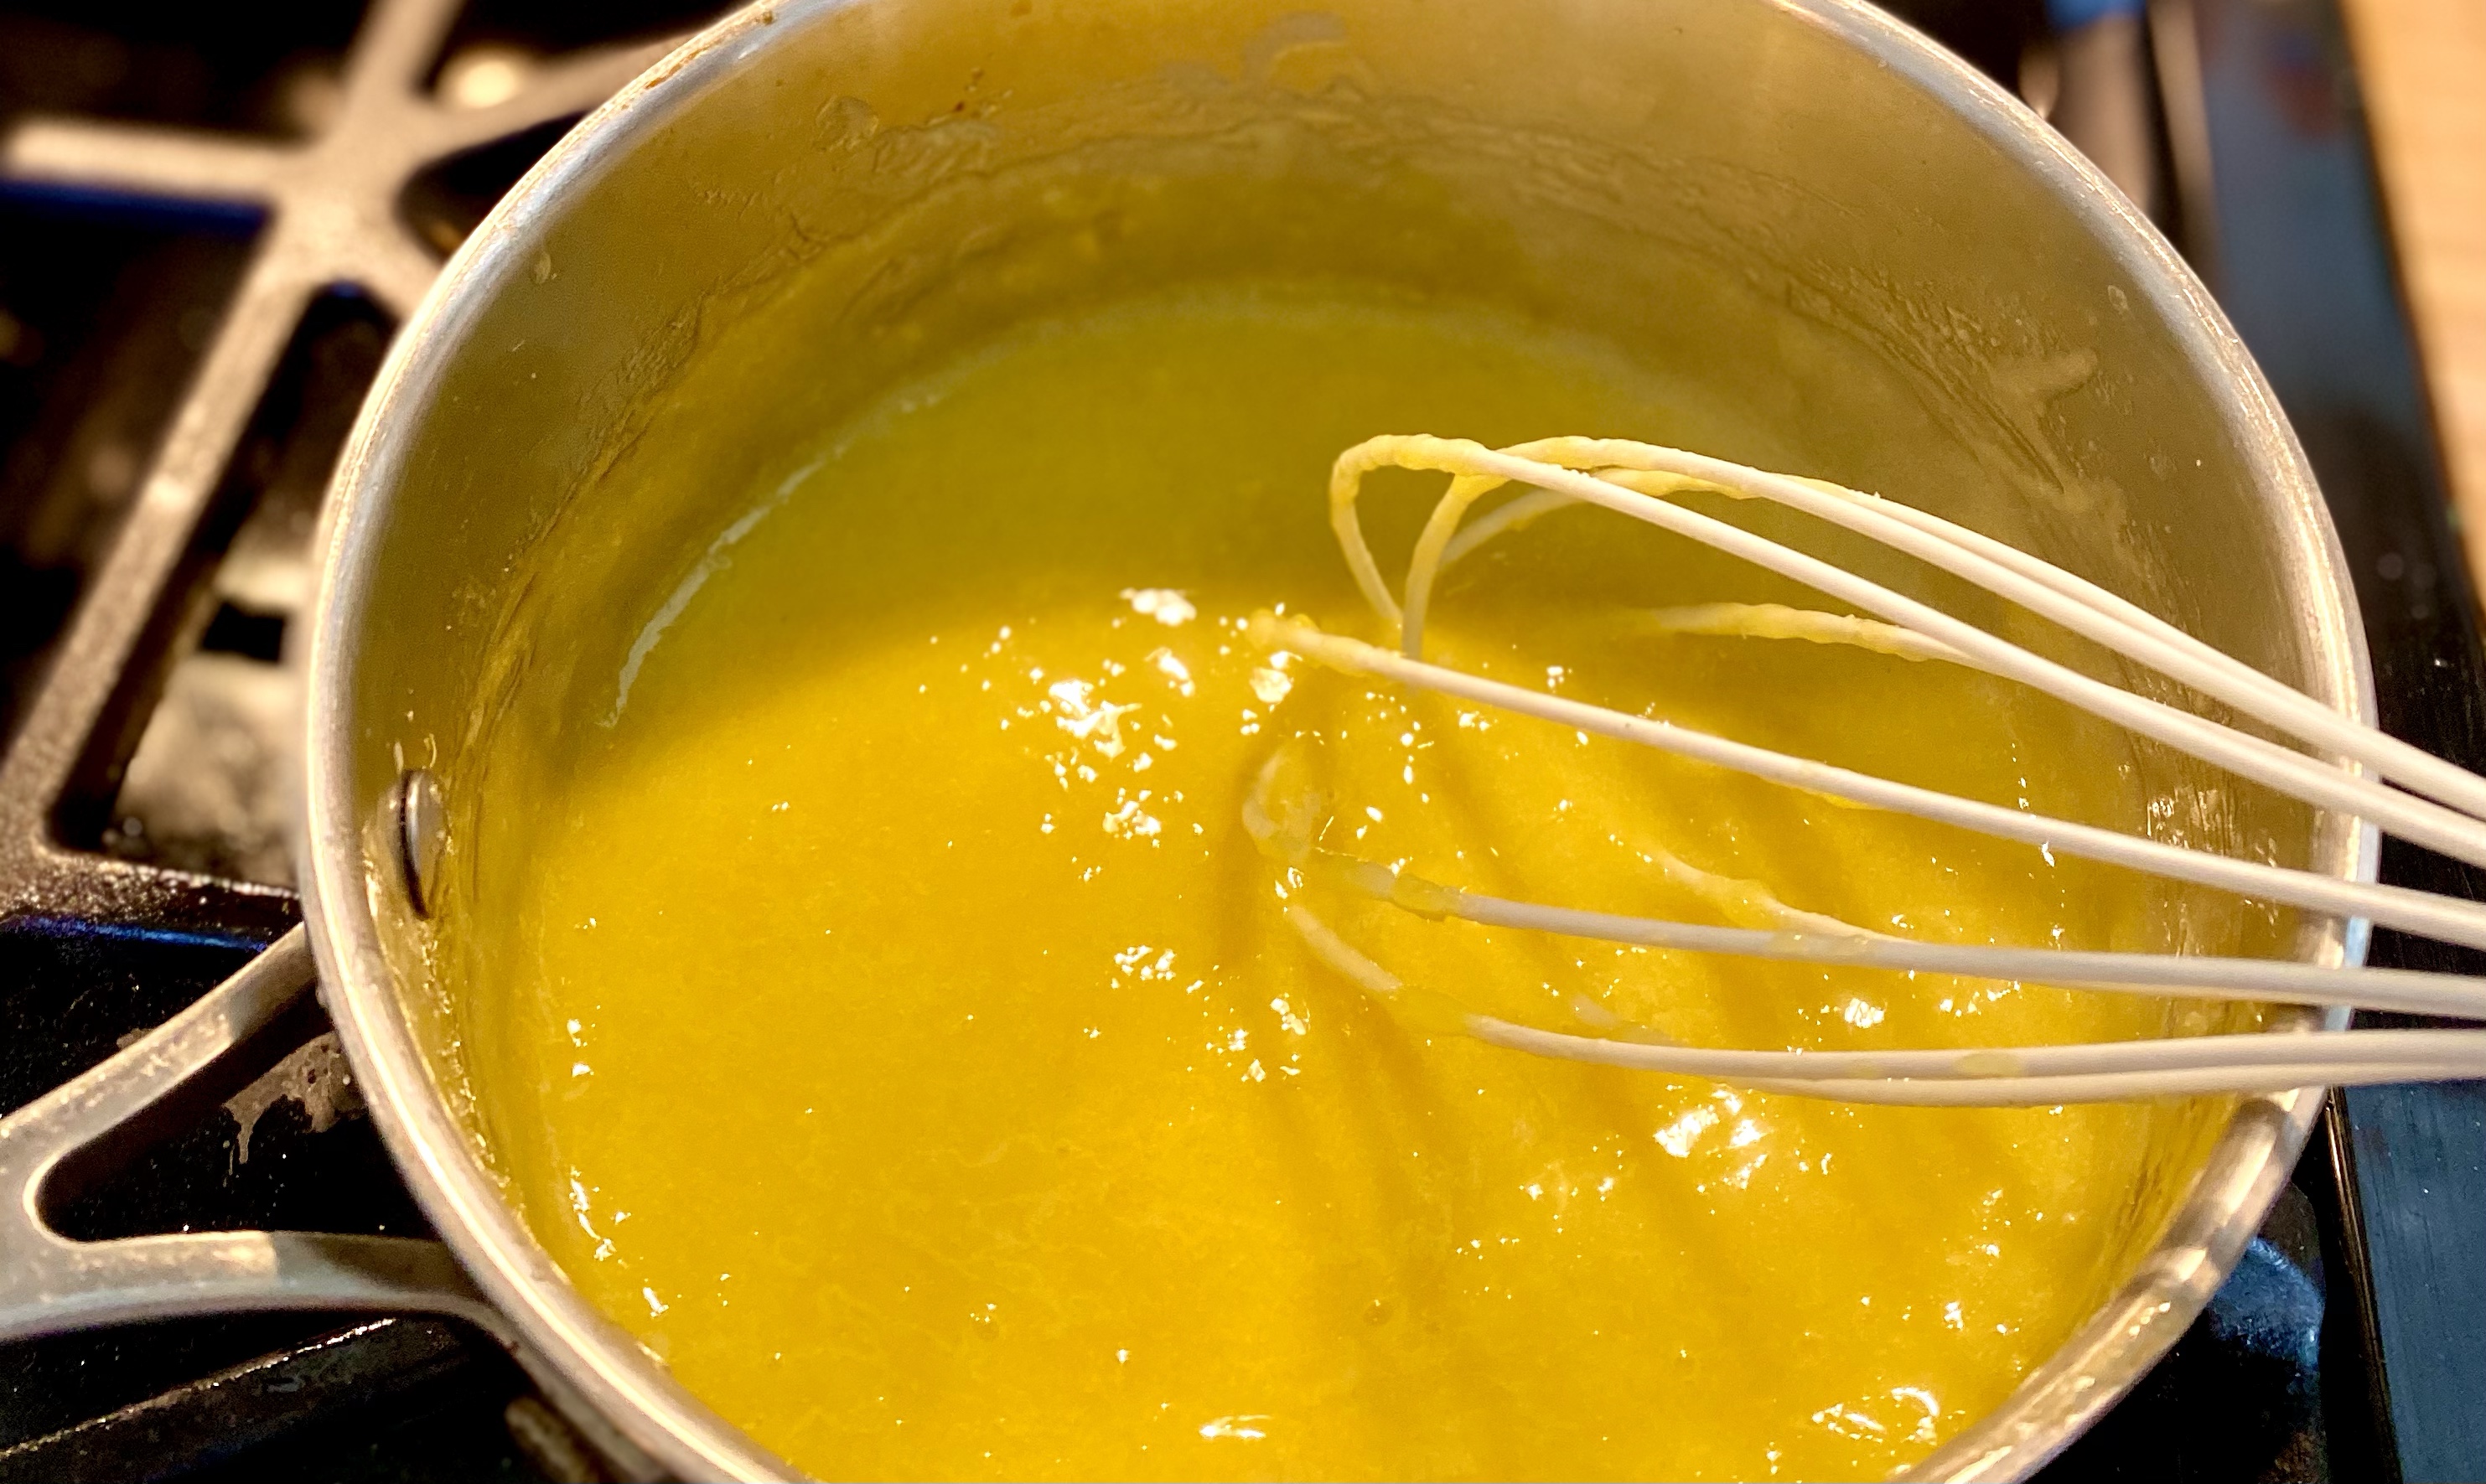
The caramel
The caramel recipe, came from Epicurious and it was my first time making caramel without condensed milk, and I will say it was a trick. You put about 3/4 cup sugar into a small saucepan with six tablespoons of water, cook it while stirring for ten minutes and then add 4-5 tablespoons butter and some salt.
Caramel at the final cooking stages Once the caramel is done, you use a rubber spatula to scrape it out and pour it into a buttered pan (I used an 8-inch nonstick round layer pan). Do not use a springform pan, unless you are prepared to clean burnt caramel out of the bottom of your oven.
Putting it together
After that’s done, you layer your oranges in how you like them. I alternated very thinly sliced Cara Cara oranges and blood oranges. Some recipes suggest using a mandolin, but I use my classic global vegetable knife.

Cara Cara and blood oranges layered in an 8-inch cake pan The cake
Then, I get out my medium bowl and make the Madeline batter, found here. I use a batter bowl, but you can also use a regular mixing bowl. You can use a stand mixer (if you do, be sure to use the paddle attachment and not the whisk attachment). I prefer to hand mix this cake, as it can dry out if over-blended. I do use a small electric mixer on medium speed to beat the egg portion of this recipe.
Let the cake cool and pour batter over the orange and caramel concoction and bake at 350 for 30 minutes.
Once the warm cake is sufficiently cooled (this is not a cake to cool on a wire rack, due to the caramel topping) so that you can handle the pan, slip a knife around the sides of the cake to make sure it’s loose enough to pop out.
While it cools, make the lemon curd.
When you are ready to place the cake, spread a bit of the lemon curd onto your favorite cake plate or serving plate and place the plate over the cake pan, then flip the pan over. Release, and then stop holding your breath. It will work. The oranges and caramel will be on the top of the cake and beautiful. Just make sure the pan has cooled for at least 20 minutes.
After you’ve cut into this lemon orange cake, serve with a spoonful of the lemon curd. You can even dust it with confectioners’ sugar if you’d like. You can cover this with aluminum foil or parchment paper and store in a cool place. This is probably the tastiest way to use your citrus fruit.
Lemon curd when it is juuuust about finished. When you are ready to place the cake, spread a bit of the lemon curd onto the cake plate and place the plate over the cake pan, then flip the pan over. Release, and then stop holding your breath. It will work. Just make sure the pan has cooled for at least 20 minutes.
Flipping the orange upside-down cake Orange Upside-Down Cake
An indulgent, gluten-free, coconut-filled cake topped with caramel and beautiful orange slices.
- 1/2 cup gluten-free flour ((I used Pillsbury))
- 1/2 cup almond flour (finely ground)
- 1/8 tsp sea salt
- 1/2 tsp baking powder
- 1/2 cup granulated sugar
- 2 large eggs
- 1/4 cup lavender simple syrup ((regular simple syrup or maple syrup will also work))
- 1/4 cup mascarpone cheese
- 4 tbsp coconut cream
- 1/2 stick butter ((4 tablespoons))
- 1 tsp vanilla extract
- 1.5 tsp coconut extract
- 1 tsp. butter extract
- 1 cup unsweetened coconut flakes (I love Bob's Red Mill )
For the caramel
- 3/4 cup sugar
- 6 tbsp water
- 4.5 tbsp butter
- 1/8 tsp sea salt
For the orange topping
- 1 large orange (or two, if you are using different varieties (you might not use all of it))
Start by beating the eggs with a hand mixer and slowly pour in the lavender simple syrup, beating until creamy. While still mixing add the mascarpone cheese, coconut cream and butter.
Once that mixture is creamy, add in vanilla, coconut and butter extracts.
Mix together all of the dry ingredients, except the coconut flakes.
Fold the dry mixture into the wet mixture gently and stir until just blended. Add the coconut flakes and stir until just blended.
Preheat your oven to 350 Fahrenheit. Follow the directions below, adding the caramel and oranges to the pan before baking for 30 minutes, or until a toothpick comes out clean.
For the caramel
Place the sugar and water in a small sauce pan and stir on medium heat for about ten minutes, or until it is a little thicker and coats a spoon. Take it off the heat and add the salt and butter, stirring to combine.
To combine it
Lightly butter an 8-inch nonstick round pan, and pour the caramel into the pan. Layer the oranges how you want them to look. I chose a round pattern, alternating Cara Cara oranges and blood oranges.
Pour the cake over the oranges. Bake at 350 for 30 minutes, or until a toothpick comes out clean.
Wait for the pan to cool, and then make the lemon curd.
Lemon Curd
Place two egg yolks and an entire egg in a sauce pan. Whisk them. Add 3/4 cup sugar and whisk. Add the zest from two lemons and 1/2 cup fresh juice. Whisk it until creamy, and then place it on medium heat, whisking until its thick enough to coat a spoon, about 8 minutes. Stir in the butter. This part of the recipe came from Kitchen Confidante.
To plate the cake
Spread a thin layer of the lemon curd on your cake plate. Invert the plate over the cake pan, then flip it over to let it pop out onto the plate.


-
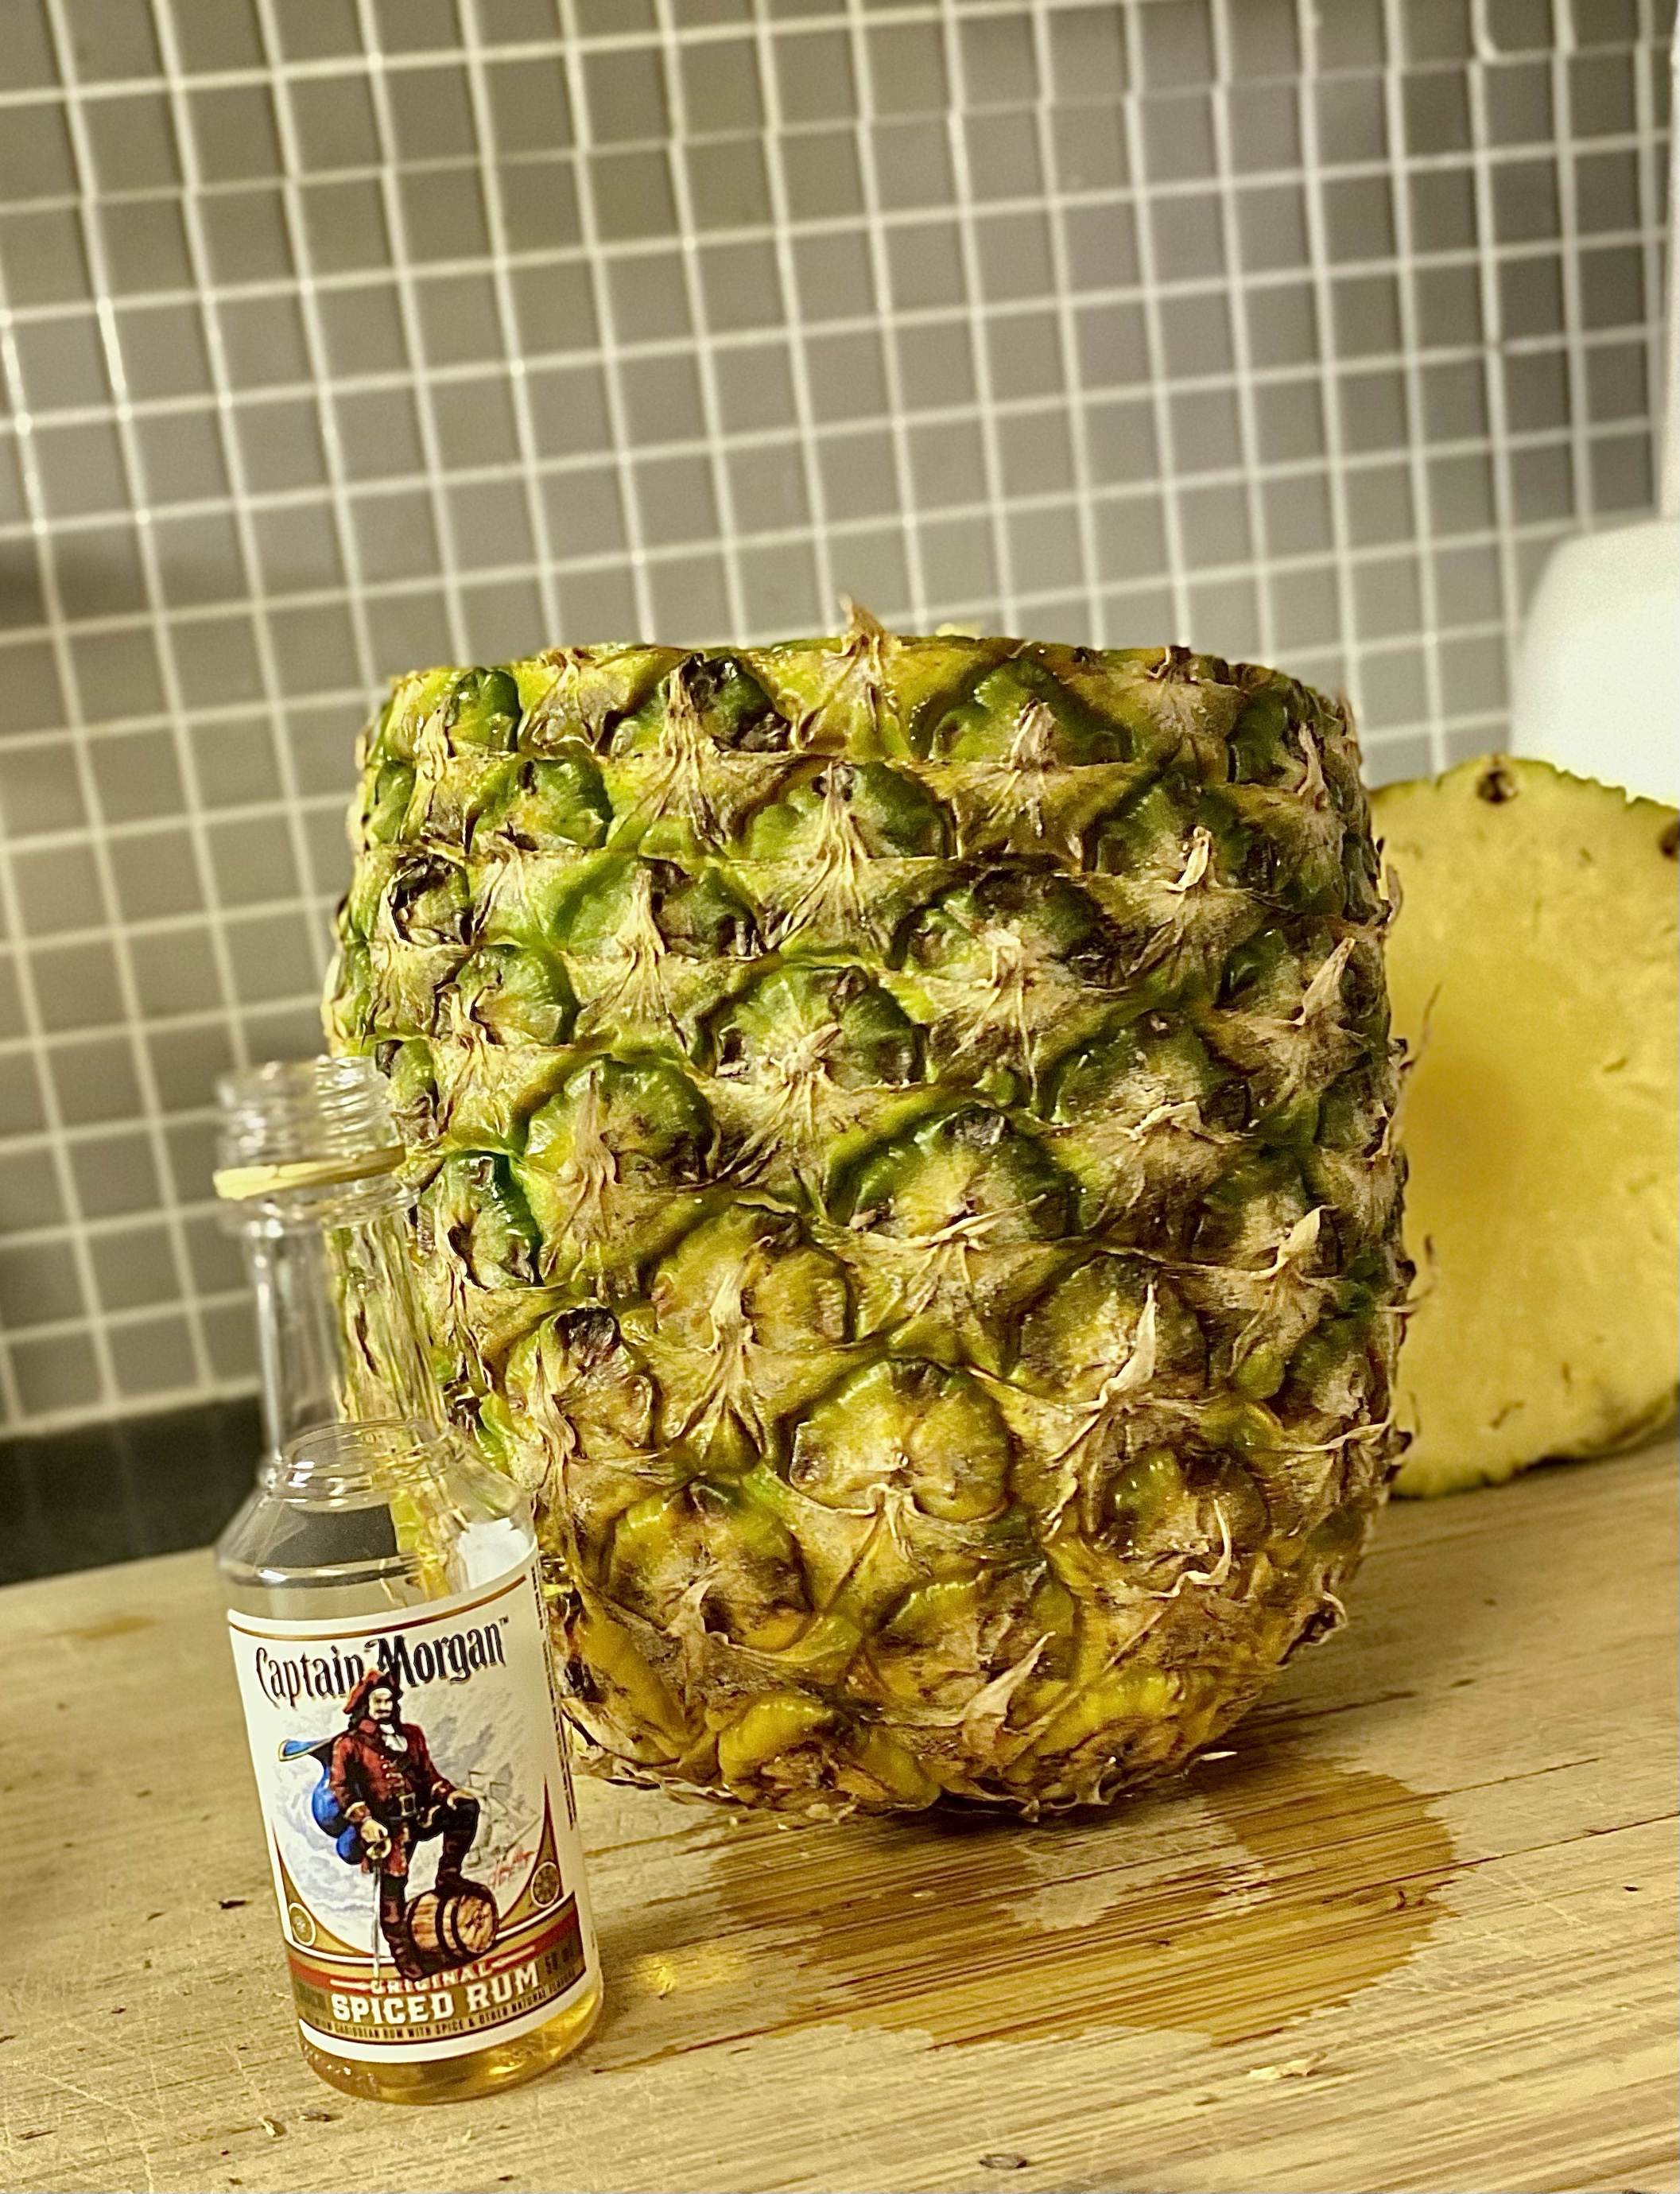
Pineapple rum cocktail with whipped cream

This pineapple rum cocktail is something I put together while I was researching foods from the Fort Worth Stock Show and Rodeo and I stumbled on this gorgeous concoction from Fruteria Cano and knew it had just inspired a simple but fun cocktail recipe.

I stumbled on this gorgeous concoction from Fruteria Cano.
I decided to use rum (although it would make a great mocktail recipe too, just omit the rum and sub in 1/4 tsp. rum flavored extract) and so I found a bottle and went to work.
How to make this easy pineapple rum cocktail recipe
This cocktail recipe was pretty easy (though messy). All I did was slice off the top and pulverize the insides with a sharp knife. I removed some of the fruit and added about 2 oz lime juice and 2 oz Captain Morgan spiced rum. I muddled it up some more with the knife to blend, and added the whipped cream. Add a straw and you’re good to go, or spoon the mixture into glasses for a less-messy way to drink.


For more cocktail recipes, click here.
Modern Hippie Kitchen
Recipes and Kitchen Blog
