-
Homemade Spicy Green Chile Salsa

If you’ve been reading this blog for long, you know I am originally from New Mexico and that I use green chile a lot. Like – a whole lot. I love it and when I can get a big quantity of it I’m all in. I found this 3 lb. bag of it recently and tucked it away in my freezer for just the right occasion. I woke up last weekend craving a big bowl of green chili salsa, so I figured the time was right. The heat of this salsa obviously depends on how hot your green chili is, and it can really vary. I usually find that it is not as spicy as a jalapeno or a chipotle salsa, but if it’s too spicy for you, it can be tamed by cutting it with a can of tomatoes or some roasted tomatillos for a true salsa verde. My recipe is pretty basic and goes well with everything. This made enough to fill several jars at my house, so it’s great if you want to make someone a homemade gift or freeze some. I did link to the exact green chili I used in this recipe and it is an affiliate link.
Ingredients:
- 3 lbs chopped and peeled green chile (Click here for the kind I used)
- 2 large onions
- 3-4 tablespoons avocado oil
- 2 tablespoons salt
- 2 tablespoons garlic (or about four to six cloves)
- Juice of two limes
Directions:
Chop the onions finely and saute them in the avocado oil in a heavy bottomed pan on low heat for about ten to fifteen minutes, until they are very soft. Add the green chili (defrosted if yours was in the freezer like mine). Bring the mixture to a simmer and allow it to cook for at least 25 minutes, or until the chilis and onions are soft and most of the liquid is gone. About ten minutes in, add the garlic and the salt. Once it is cooked thoroughly, add the lime juice and stir.
This would go great with chips but we liked it as a veggie dip. This salsa shines when you put it on top of eggs or on a baked potato, too!


-
Top 5 Edible Crops to Plant Now for an Early Urban Farm Harvest
Gardening is my second favorite activity (to cooking). There is nothing like deciding what to have for dinner and heading into my front yard to pluck the ingredients. My kids like to join in too — they love to try each kind of lettuce and then spit it out and tell me it’s gross (joke’s on them- they’re trying it!). They especially adore pulling carrots they’ve planted and helping me pick green beans, cherry tomatoes or blackberries. Below I’ve outlined the things you can plant right now, in March, for an early harvest. I like to plant about half of what I want now and save the rest for later in the month so my harvest is stretched out a bit longer. If you need seeds, click here to try out Seeds Now. This is an affiliate link, which means I make a small commission on a sale at no extra cost to you.
- Herbs. In my garden, herbs perform better than anything. I plant everything I can get my hands on that will fit in my small space — cilantro, oregano, basil, lavender, dill, and more. And you bet I use them every day, like in this gin and rosemary cocktail.

2. Root veggies, like carrots and radishes. These are a real crowd pleaser if you have kids who like to help in the garden. There is something so satisfying about watching them pull up veggies that they planted and will actually eat! You must till your soil deeply for success and sow them very shallow, not more than 1/4 of an inch.

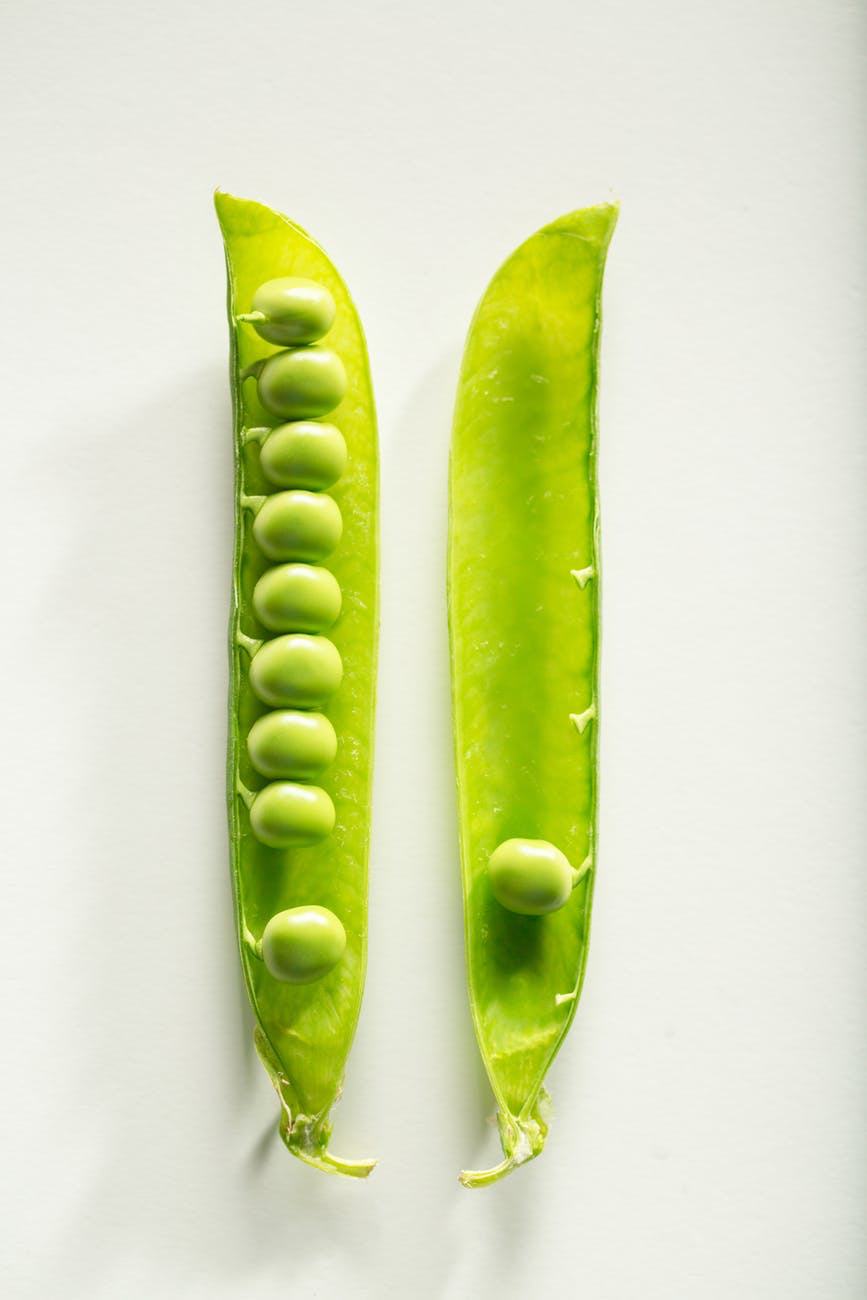
3. Beans and peas: These are so easy they are the go-to for kindergarten teachers to have classrooms full of 5-year-olds plant in cups with wet paper towels. Seriously, if you have a little bit of decent soil, a trellis of some sort, sunlight and water, you will be kept in fresh beans/peas/snap peas — whatever your preference — all spring and sometimes into the fall if your summers are mild. Plant more than one variety for the best crop, and be sure to harvest these as they become ripe to allow the plants to produce as many as possible.

4. Lettuces, chards, kales, cabbages and other greens tend to do well in cooler early spring weather, and may even survive one last frost. I’ve already done spinach and several lettuces and will get cabbage and chard in the ground towards the end of March. And you’ll have plenty for this classic Italian soup.

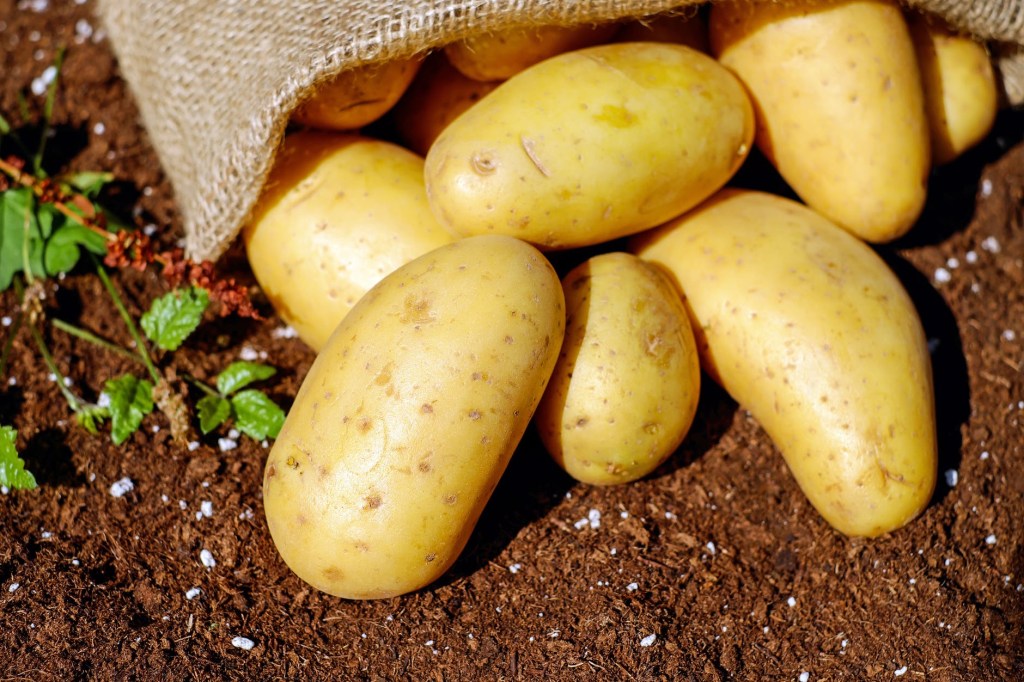
5. Potatoes: These are another fun one because they are deceptively easy. I do mine in a grow bag, which eliminates the need for laborious digging to harvest. I saved a potato from a bag of organic gold potatoes last spring and let it sprout on my windowsill (place the potato in a cup of water halfway up the side of the potato, using toothpicks to keep it above the water line). Once it sprouted, I was able to cut it into slips and plant them in a grow bag. We had tiny, fresh, yummy gold potatoes for weeks. Roast them in duck fat like I do here.
I know this varies a bit based on what zone you are in, but most of these are fairly common to North America for this time of year (especially if you have cold frames or a greenhouse for your seedlings). Here are a couple of links to help you determine what’s right for your garden and your area. I also love Brooklyn Farm and Garden Betty for inspiration and tips!
Happy digging!
-
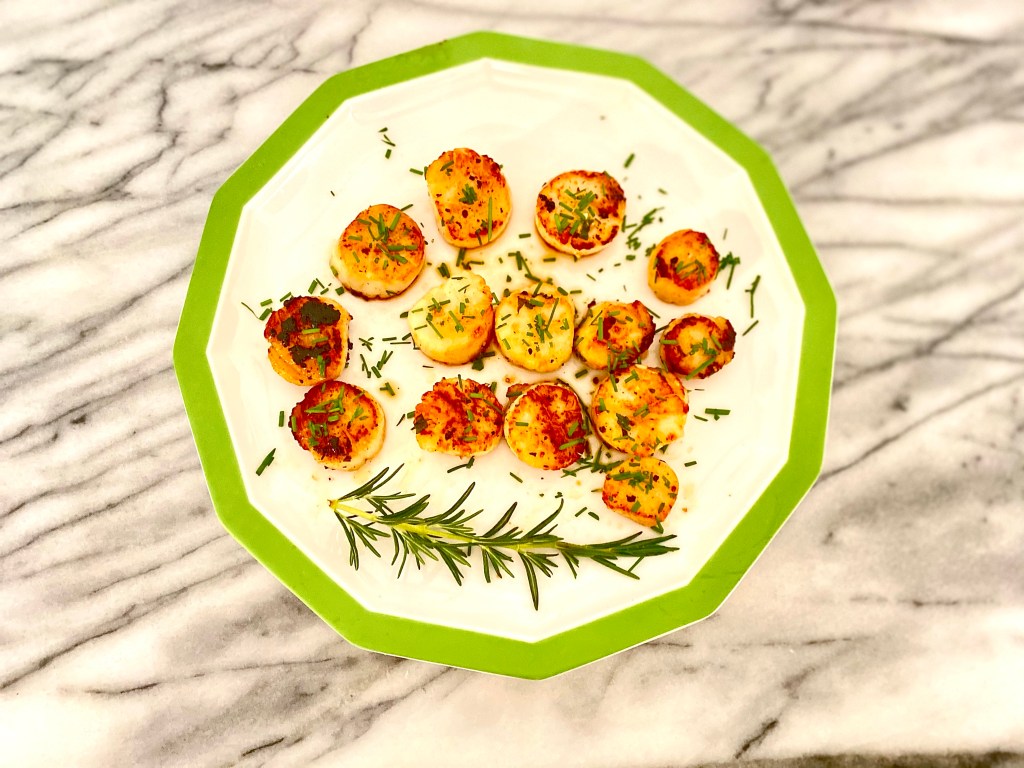
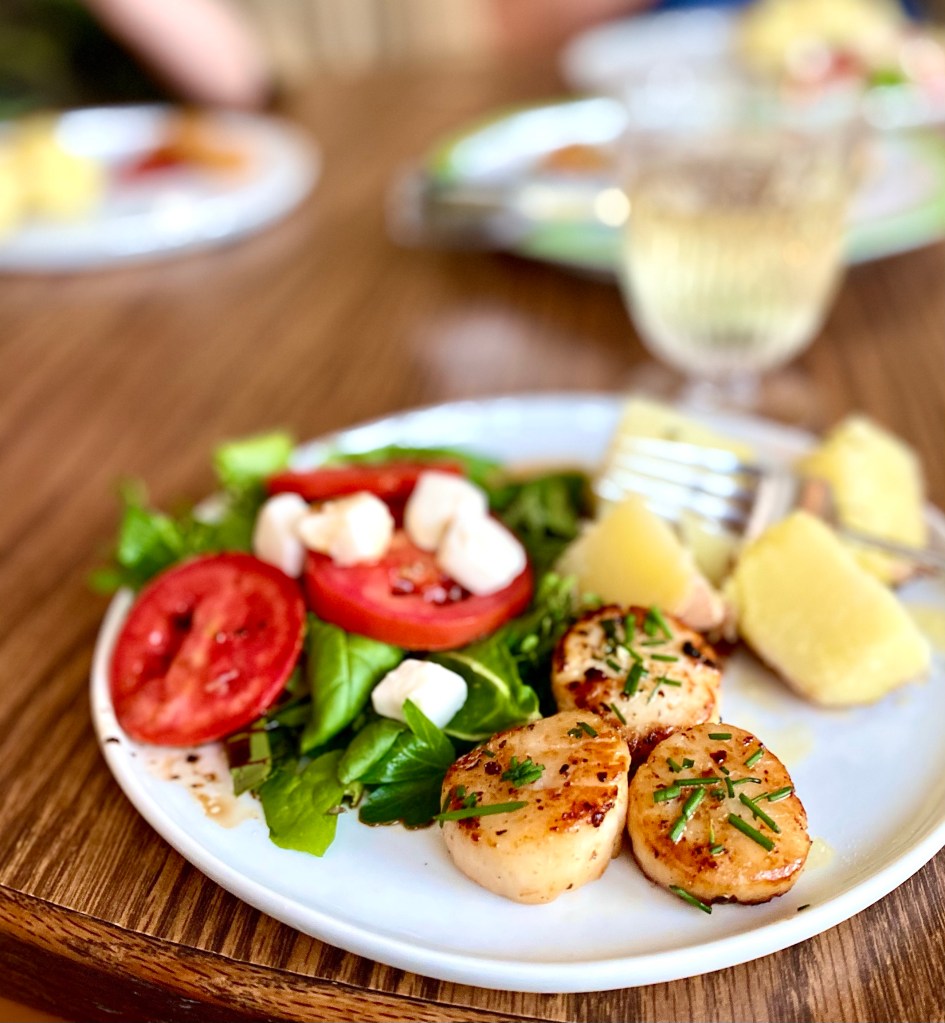
Perfect Herbed Scallops with Butter and Garlic

Scallops are one of our favorite sea foods, but when we mess them up they are almost inedible. These take a very light hand on the spices and a precise cooking time, and then a big ol’ dump of butter at the end. We ate these with a baked red potato and a fresh garden salad topped with mozzarella.
Ingredients:
- Roughly 12 oz sea scallops (if frozen, defrost them). These are what we used.
- Two tablespoons avocado oil
- 1 tablespoon garlic, or 2-3 cloves
- Salt and pepper, to taste
- 1/4 cup butter and a handful of chopped herbs of your choice (I used oregano and parsley)
- A small handful of chopped chives
- Sprig of rosemary
Directions:
Pat the scallops dry with a paper towel and salt and pepper both sides. Set a cast iron pan or other heavy bottomed skillet on high heat with the avocado oil. Wait for the oil to get hot enough to smoke a little bit, and then set the scallops in the pan to sear. Sear for about two minutes, then flip. After another minute, add the butter and herb mixture. Spoon the butter over the scallops continuously for about a minute. Remove from the heat and lightly tap each piece several times with the rosemary. Sprinkle the chives on top. Serve immediately.
-
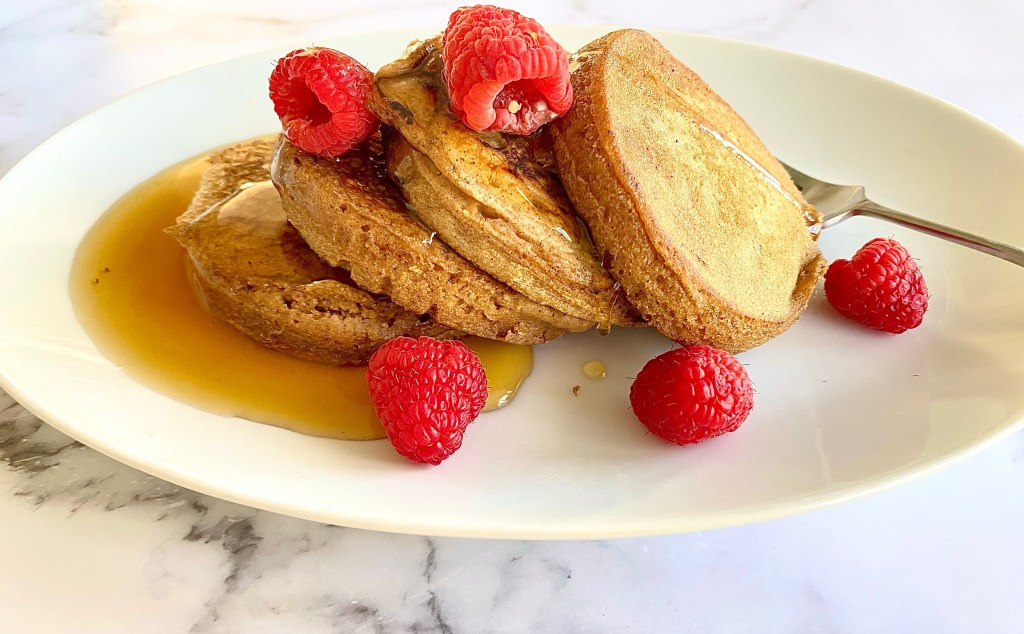
Gluten free pancakes made with oat flour (the perfect weekend breakfast)

Pancakes are a holiday staple around our house, but they always make me feel a bit sluggish—even gluten free ones. I discovered that oat flour doesn’t have that effect on us and this recipe is a little bit indulgent with the almond extract and salted butter.
Ingredients:
- 1.5 cups oat flour
- 4 tablespoons sugar (or coconut sugar)
- 1/4 tsp. Sea salt
- 1 tablespoon baking powder
- 1.5 teaspoons cinnamon
- 2 eggs
- 2 tablespoons avocado oil
- 1 cup coconut milk
- 2 teaspoons vanilla extract
- 1 teaspoon almond extract
- Salted butter (for the griddle)
- Pure maple syrup (for serving)
Directions. Combine all of the dry ingredients thoroughly in a batter bowl. Add the wet ingredients and mix. Batter will be slightly lumpy. Pour four-inch circles of batter onto a hot griddle or pan, flip when batter becomes bubbly. These will cook just a minute or two, depending on your pan. I used a cast iron griddle and biscuit forms to make these perfectly round, but any pan will do.

-
Blood orange vinaigrette

Sometimes lunch needs to be simple but leftovers are scarce and sandwiches are boring! This dressing (which is really kind of a salsa-dressing combo) really amps up an easy salad.
Ingredients (to dress and top two salads)
- One blood orange, peeled and diced
- Two tablespoons avocado oil
- Two tablespoons white wine vinegar
- One jalapeño, seeds removed and diced
- One tablespoon honey
Add all ingredients to a bowl and stir to combine. Allow to sit for a few minutes to let the flavors mingle. Drizzle the juice over your salad and top it with the orange and pepper mixture.
-
Brussels Sprouts With Sweet Roasted Glaze

This side dish really goes with anything, but the last time I made it I accidentally discovered that it is the.best.chili.topping.period. I already think there is little better in the food world than a super crisp, almost burned Brussels sprout, but when you add them to the chili it created a whole new texture and taste combo that really worked. We had planned to serve this dish with pork chops, but they were spoiled when we opened them, so after already having the sprouts in the oven we took a quick assessment of the rest of our ingredients and chili became dinner. The sprouts were already cooked so we tried it together and the result was … just really good.
Ingredients:
- 1 bag of shaved or halved Brussels sprouts. If they are halved and not shaved, chop them lightly to break them up a bit.
- 4 tablespoons white wine vinegar
- 2 tablespoons course organic sugar (regular or brown will also work)
- Salt and pepper to taste
- Steak seasoning, to taste
- 2 tablespoons avocado oil, ghee, duck fat or lard. (Any high-quality fat with a high smoke point will do)
Directions: mix all ingredients in a bowl until thoroughly covered. Pour the sprouts into a parchment lined baking sheet and spread into a single layer. Bake at 400 for 20 minutes, or until the small sprout leaves are crispy. Serve alongside your favorite meal, on top of a chili, or alone as a snack.


-
Coconut milk tapioca pudding (with fruit purée)

I love puddings of all kinds and tapioca is no exception. Tapioca is one of those things I always plan to make but rarely do, so when I saw that I had some in the pantry I went to work. This recipe has fruit, and you can sub it for any type or omit it completely. You can also add spices like cinnamon or nutmeg if you like.
Ingredients :
- 1/3 cup tapioca pearls (I used this kind)
- 3/4 cup water
- 1 can full fat coconut milk
- 1 tablespoon grassfed gelatin plus four tablespoons water
- 1 cup frozen or fresh peaches
- 1 cup frozen or fresh strawberries
- 1/3 cup sugar
- 1 tsp. Vanilla extract
- Two eggs, separated
- 2 tablespoons butter
Directions:
Add the tapioca, water and coconut milk to a sauce pan. Let the pearls soak for 30 minutes. Meanwhile, set the fruit (defrosted) in a bowl with the sugar and let them sit for a few minutes. Beat your egg whites until they are stiff. Then, add four tablespoons of water to your gelatin and stir it up a bit to dissolve. Let it bloom for five minutes.
Purée the fruit mixture, either with an immersion blender or a regular blender. Set aside.
Once the 30 minutes is up, turn your burner to medium heat and start whisking the tapioca mixture. Before it gets hot, add the egg yolks and whisk them in. Add the gelatin and whisk it really well so no gelatin pieces remain. You’ll bring the mixture to a simmer, while constantly whisking. Don’t let it fully boil or it will scald. This process takes about ten minutes. Add the butter and stir until it melts.
Turn the heat off and add the puréed fruit, folding it in to combine. Add the vanilla, and allow the mixture to cool about ten minutes.
Add about 1/3 cup of it to the egg white and stir to temper them (so they don’t cook when you add them to the pudding). Fold this mixture into the pan and whisk until completely combined. Serve and enjoy!
-
Salmon With Gochujang Glaze

A couple of months ago we visited a local restaurant that served a sriracha-glazed salmon that was so good we’ve been thinking about it ever since. I’ve tried a couple of times to recreate it, without much luck. This recipe is definitely different, and I subbed a Korean Gochujang sauce for the sriracha, but it’s my best attempt yet. This only takes a couple of minutes to prepare and goes well with roasted asparagus and rice.
Ingredients:
- Four tablespoons honey
- Two tablespoons minced garlic
- One tablespoon hoisin sauce
- Three tablespoons granulated sugar
- One tablespoon rice vinegar
- Two tablespoons soy sauce
- Three tablespoons Gochujang sauce
- One tablespoon sambal olek
- About a two-inch section of fresh ginger, peeled and minced
- A squeeze of fresh lime juice
- Four to five small to medium salmon fillets
Directions:
Pat the salmon dry and place it on a baking sheet prepped with parchment paper or in a shallow roasting pan, oiled. Mix all of the other ingredients together and spoon an equal amount on each fillet. Flip the fish, and spoon equal amounts on the other side. Brush with a pastry brush to evenly coat each piece. There will be leftover sauce on the tray, that’s ok because it bakes into more glaze.
Bake the fish at 400 degrees for ten to 15 minutes depending on the thickness of the fish. When it flakes off easily, it’s done. Move the pan to the upper rack and broil on high for one minute.
Spoon the sauce in the pan over the fish and serve immediately.
-
Chicken Recipe: Sweet Potato With Chicken Chili
This might be my favorite new chicken recipe. While there are many white chicken chili recipes out there, somehow I’ve never made it until this week. I decided to use this version as a sweet potato topping, but it would be good on its own or rolled into a tortilla as a taco or enchilada.
How to make this chicken recipe
Ingredients (makes six servings):
- Six boneless skinless chicken thighs
- One large white onion, diced
- Two four-ounce cans of green chili
- One fresh jalapeno (seeds removed if you want to tone down the spice, leave them in if you like it hot)
- One can white beans, drained –navy or cannellini work best
- 1/2 cup heavy cream
- 3 tablespoons grass fed butter
- 1 teaspoon cumin
- Salt and pepper, to taste
- Six sweet potatoes
- About 1/4 cup water
- About 1/4 cup avocado oil
- Sea salt, enough to coat the potatoes in (about a tablespoon)
- Cilantro, for garnish
Directions for the chicken recipe
For the potatoes: Preheat the oven to 400 and prep a baking sheet with foil. Wash the potatoes and set on a paper towel to dry. Once they are dry, coat them with the avocado oil then roll them in the sea salt. Poke them each with a fork twice and place them in the heated oven for about 40 minutes, or until they are soft and can be easily pierced with a knife.
For the chicken chili: While the potatoes are cooking, saute the onions in a tablespoon of avocado oil in a large, heavy pot. Add the green chili and the water and bring to a simmer. Add the chicken thighs whole, then dust with salt. Add the cumin and allow to simmer for a few minutes, turning the thighs occasionally. Add the beans and the heavy cream, and turn the heat to low.
Cover and simmer until the thighs are cooked through and tender, about 20 minutes. Remove the chicken thighs and shred them or cut them into small chunks. Place the chicken back into the mixture. Add the butter, and allow to simmer about five more minutes, until the butter melts. Correct for salt and pepper.
Remove the potatoes from the oven and allow them to sit for five minutes. Slice them open lengthwise and top with about a cup of the chicken mixture. Sprinkle with cilantro.
For another chicken recipe, click here.
-
Sweet Potato With White Chicken Chili Topping for an Easy Weeknight Meal
There are many white chicken chili recipes out there, and yet somehow I’ve never made it until this week. I decided to use this version as a sweet potato topping, but it would be good on its own or rolled into a tortilla as a taco or enchilada.
Ingredients (makes six servings):
- Six boneless skinless chicken thighs
- One large white onion, diced
- Two four-ounce cans of green chili
- One fresh jalapeno (seeds removed if you want to tone down the spice, leave them in if you like it hot)
- One can white beans, drained –navy or cannellini work best
- 1/2 cup heavy cream
- 3 tablespoons grass fed butter
- 1 teaspoon cumin
- Salt and pepper, to taste
- Six sweet potatoes
- About 1/4 cup water
- About 1/4 cup avocado oil
- Sea salt, enough to coat the potatoes in (about a tablespoon)
- Cilantro, for garnish
Directions:
For the potatoes: Preheat the oven to 400 and prep a baking sheet with foil. Wash the potatoes and set on a paper towel to dry. Once they are dry, coat them with the avocado oil then roll them in the sea salt. Poke them each with a fork twice and place them in the heated oven for about 40 minutes, or until they are soft and can be easily pierced with a knife.
For the chili: While the potatoes are cooking, saute the onions in a tablespoon of avocado oil in a large, heavy pot. Add the green chili and the water and bring to a simmer. Add the chicken thighs whole, then dust with salt. Add the cumin and allow to simmer for a few minutes, turning the thighs occasionally. Add the beans and the heavy cream, and turn the heat to low. Cover and simmer until the thighs are cooked through and tender, about 20 minutes. Remove the chicken thighs and shred them or cut them into small chunks. Place the chicken back into the mixture. Add the butter, and allow to simmer about five more minutes, until the butter melts. Correct for salt and pepper.
Remove the potatoes from the oven and allow them to sit for five minutes. slice them open lengthwise and top with about a cup of the chicken mixture. Sprinkle with cilantro.
Modern Hippie Kitchen
Recipes and Kitchen Blog


