
If you’ve followed this blog for long, you know I’m obsessed with citrus. I’ve wanted to create a winter citrus cake for awhile, and this orange upside-down cake proves it. I love citrus. At night if I’m making a cocktail, more often than not it has a whole lemon and at least half an orange juiced in it. And in the winter, the citrus is so good and there are so many varieties. Blood oranges, lemons, Meyer lemons, Cara Cara oranges, juicy limes, raspberry oranges (which are really just blood oranges but I swear they taste more delicate), minneolas, mandarins, and even your run of the mill naval orange is juicer and well, just better. I can eat them for breakfast, lunch, in salads at dinner and in literally anything for dessert. Don’t even get me started on fresh-squeezed orange juice (or other citrus juices) or how you can use lemon curd between cake layers to create something truly special.
Why this cake?
As I was perusing articles about the many different ways to use winter citrus since I can’t help myself from buying pounds and pounds of it at a time, and an orange upside-down cake from Epicurious caught my eye. This is slightly different from the popular cake recipe known as Pineapple Upside-Down Cake due to the flavor of the oranges and lessened sweetness that comes with eating the orange peeI. knew it would pair well with the cakey-cookiness of my coconut Madeline recipe and I just had to have something to pair with this lemon curd recipe I came across on Instagram.
After thinking — no, dreaming — about this cake for a few weeks, I finally put together a plan. My cakey Madeline recipe made into the cake, the caramel recipe from Epicurious’s recipe, Kitchen Confidante’s lemon curd (where you combine lemon juice, lemon zest, eggs, butter and sugar) and my stash of Cara Cara and blood oranges were going to come together to make something perfect. And they did.
Here’s how.
How to make orange upside-down cake
I made one recipe of my coconut Madeline recipe with a flour mixture of gluten-free all purpose flour and almond flour, and used an 8-inch round pan. If you don’t care for gluten-free, you can use cake flour. If you wanted to make this a layer cake, double or triple the Madeline recipe. You can add citrus flavor to this in the form of lemon extract or orange zest if desired. The mascarpone can also be subbed with cream cheese if needed.
The caramel
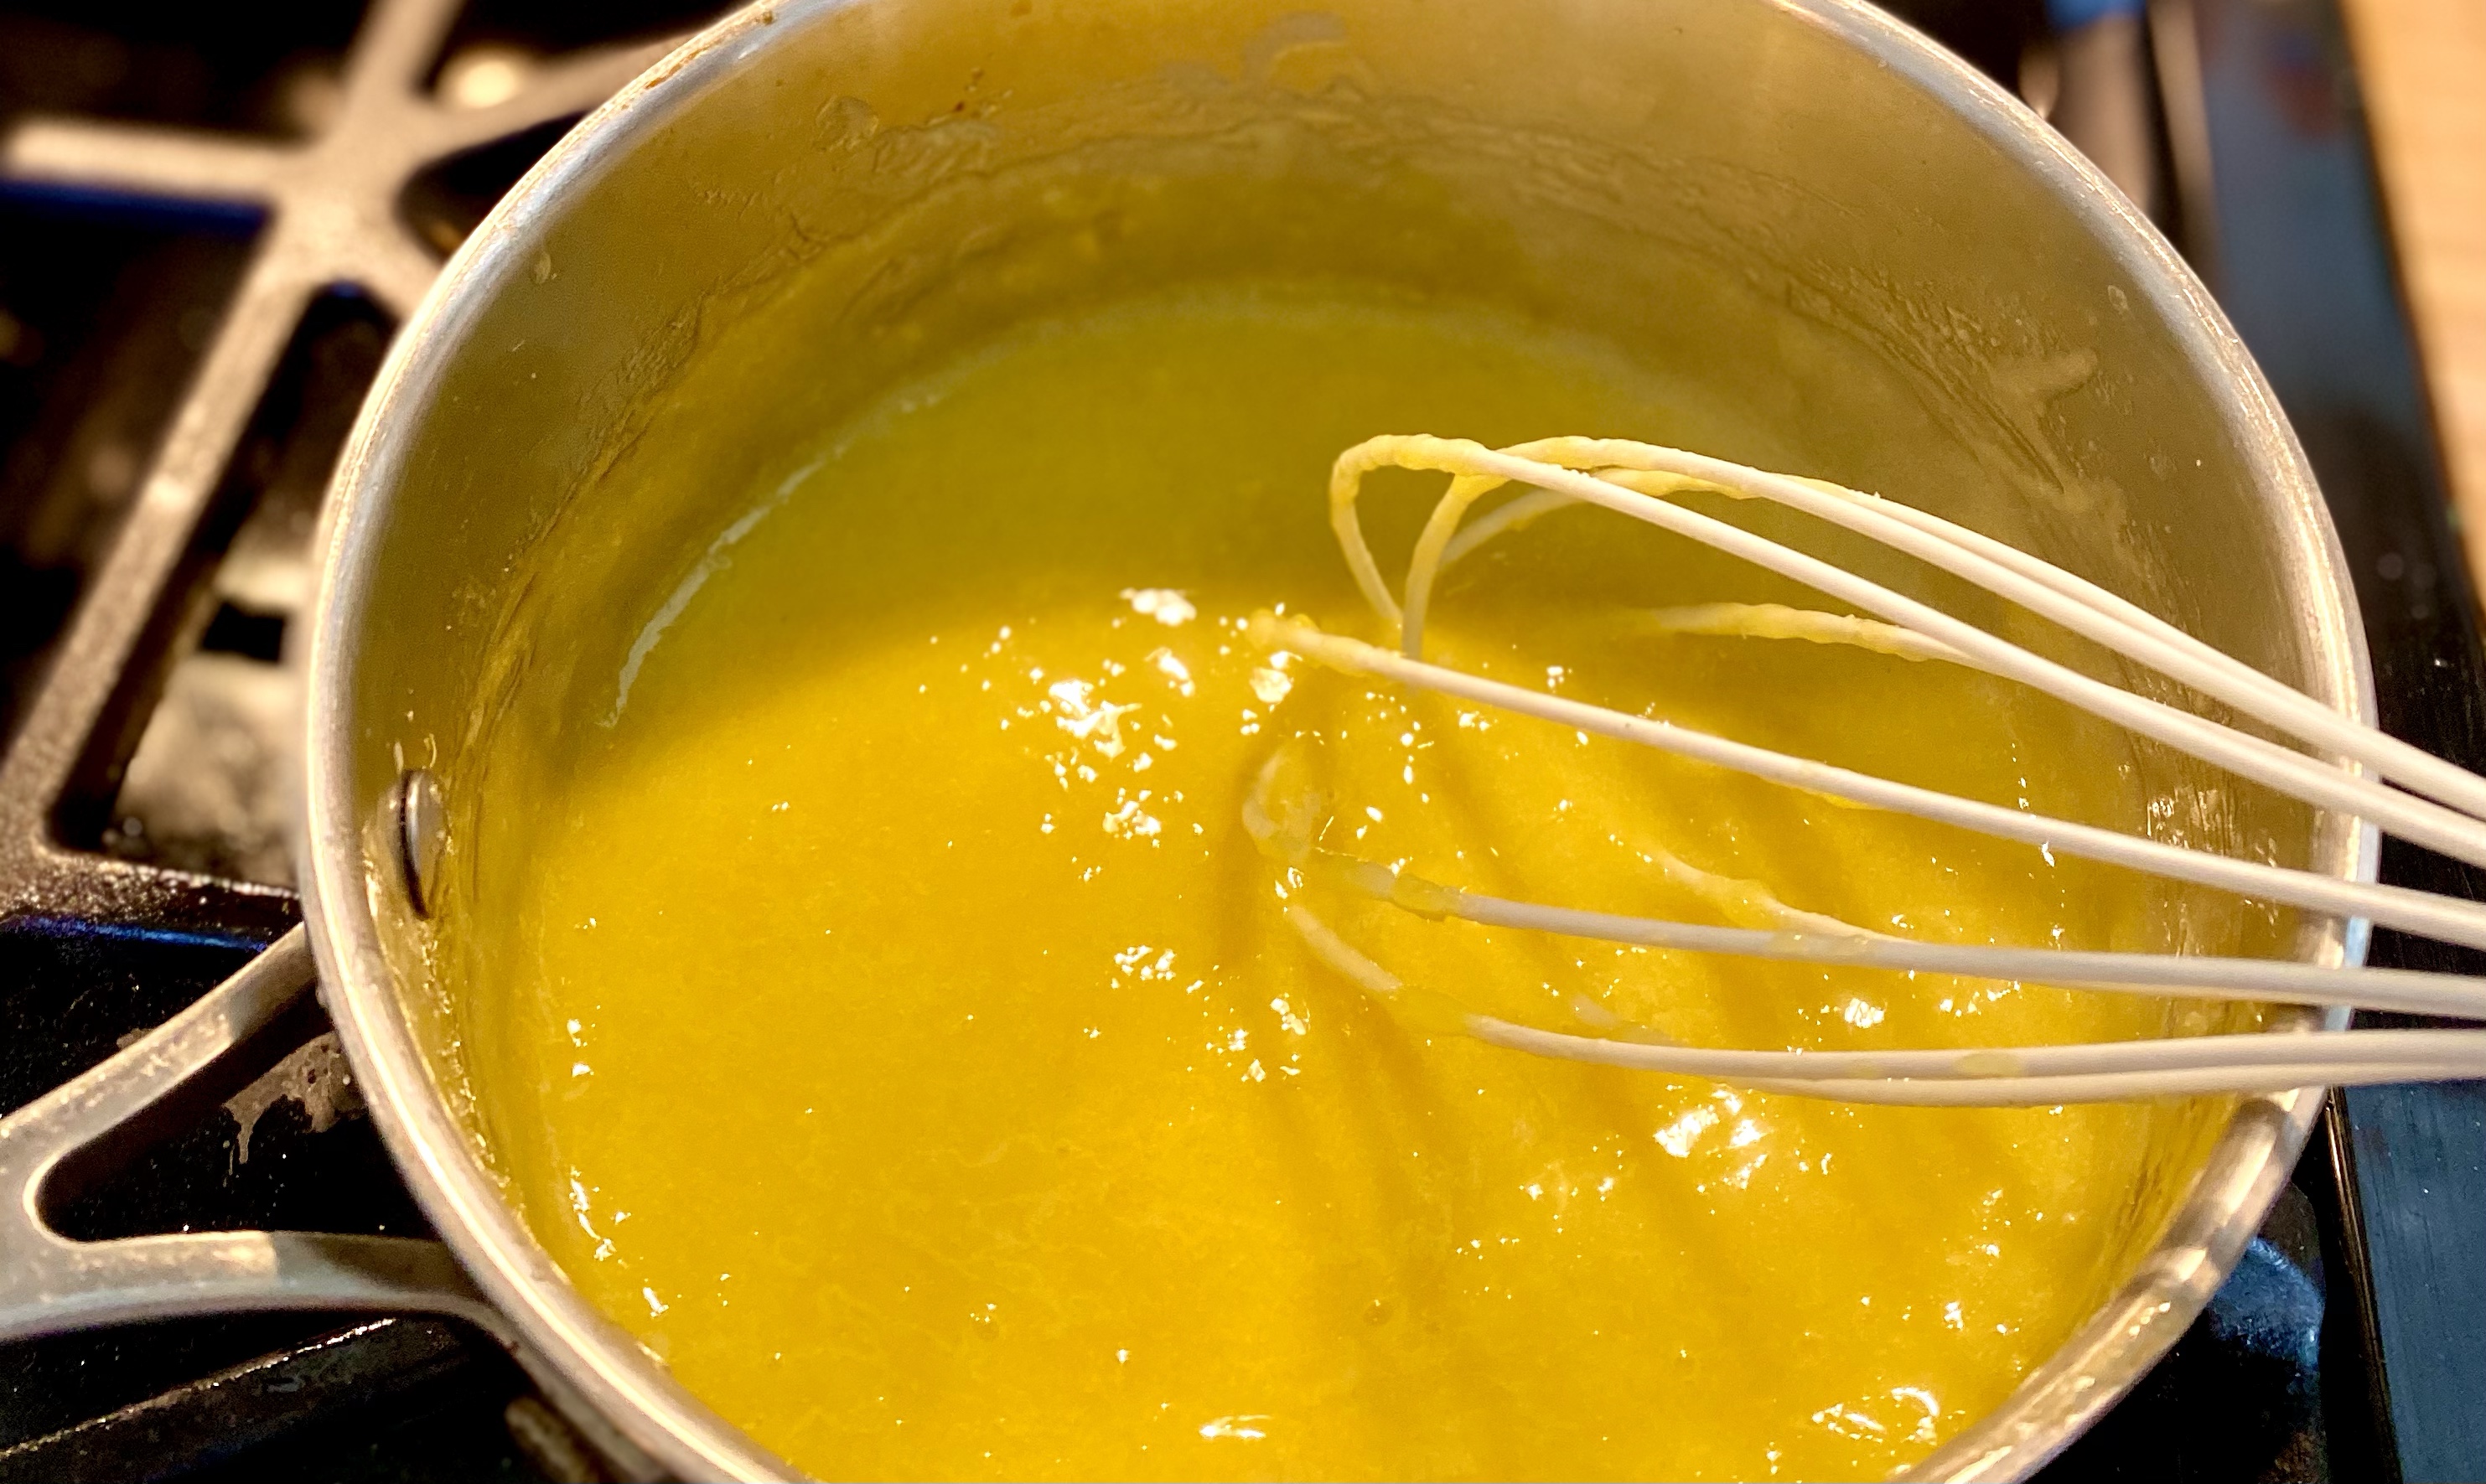
The caramel recipe, came from Epicurious and it was my first time making caramel without condensed milk, and I will say it was a trick. You put about 3/4 cup sugar into a small saucepan with six tablespoons of water, cook it while stirring for ten minutes and then add 4-5 tablespoons butter and some salt.
Once the caramel is done, you use a rubber spatula to scrape it out and pour it into a buttered pan (I used an 8-inch nonstick round layer pan). Do not use a springform pan, unless you are prepared to clean burnt caramel out of the bottom of your oven.
Putting it together
After that’s done, you layer your oranges in how you like them. I alternated very thinly sliced Cara Cara oranges and blood oranges. Some recipes suggest using a mandolin, but I use my classic global vegetable knife.

The cake
Then, I get out my medium bowl and make the Madeline batter, found here. I use a batter bowl, but you can also use a regular mixing bowl. You can use a stand mixer (if you do, be sure to use the paddle attachment and not the whisk attachment). I prefer to hand mix this cake, as it can dry out if over-blended. I do use a small electric mixer on medium speed to beat the egg portion of this recipe.
Let the cake cool and pour batter over the orange and caramel concoction and bake at 350 for 30 minutes.
Once the warm cake is sufficiently cooled (this is not a cake to cool on a wire rack, due to the caramel topping) so that you can handle the pan, slip a knife around the sides of the cake to make sure it’s loose enough to pop out.
While it cools, make the lemon curd.
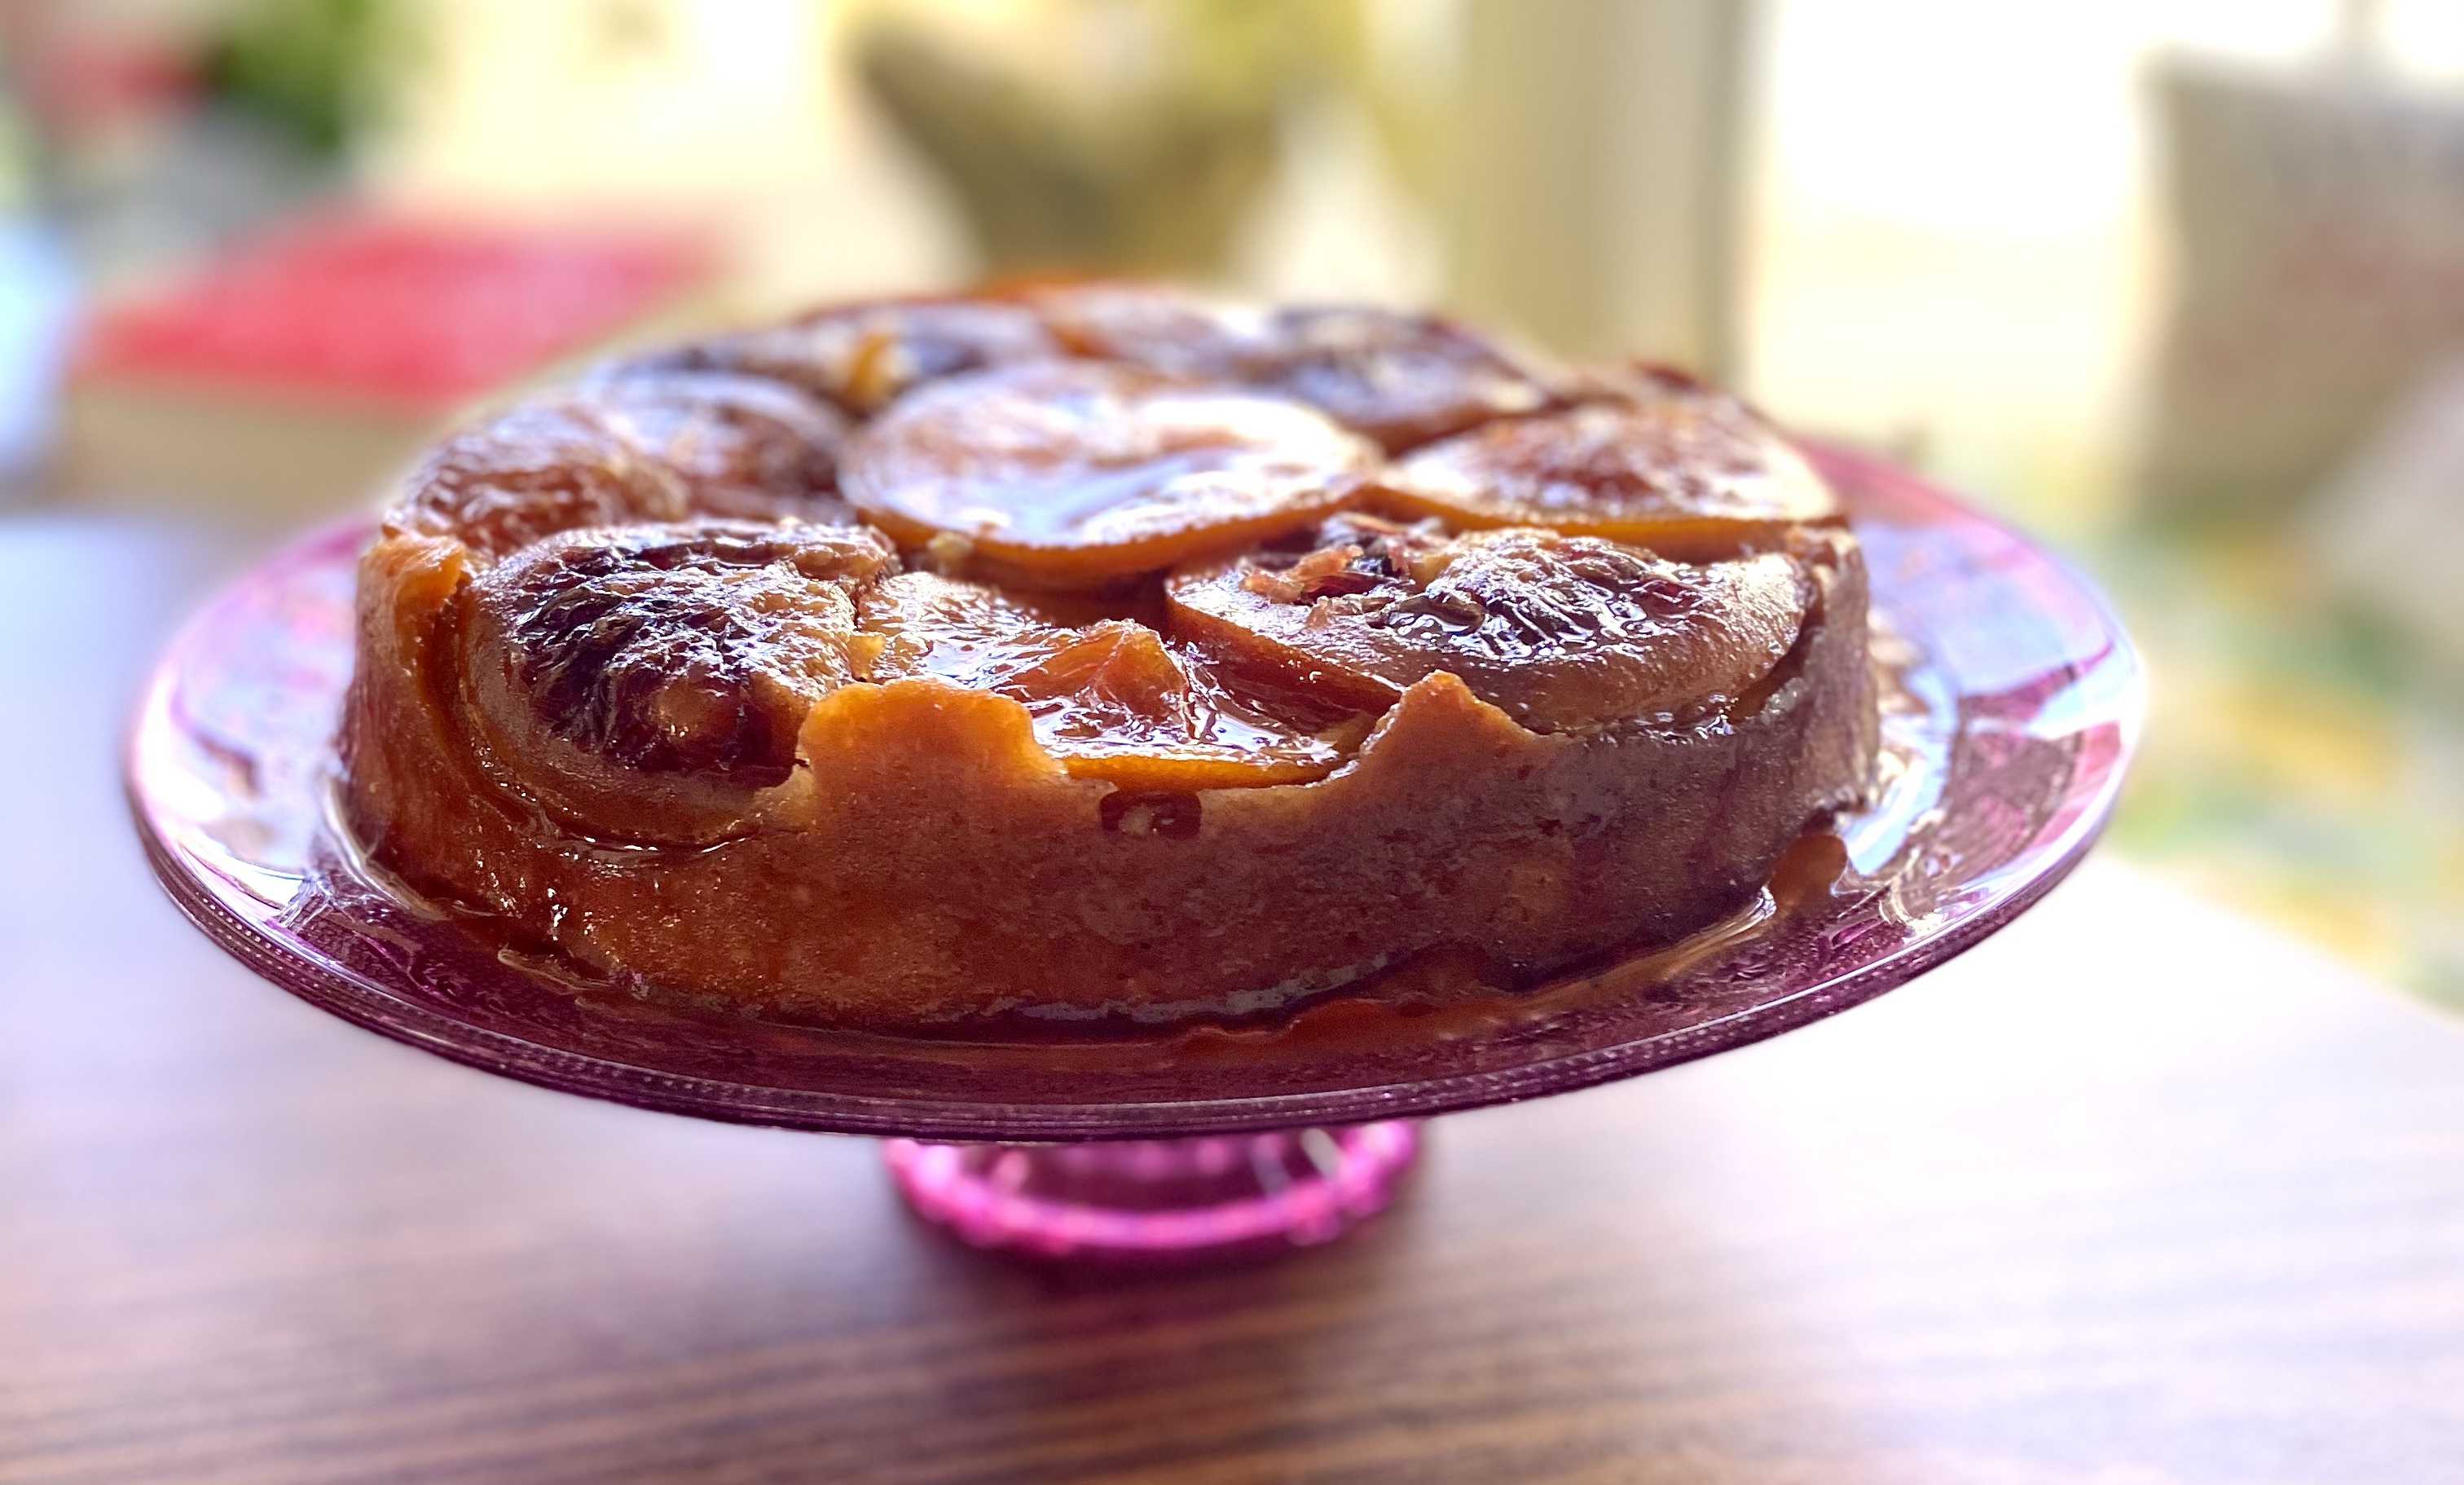
When you are ready to place the cake, spread a bit of the lemon curd onto your favorite cake plate or serving plate and place the plate over the cake pan, then flip the pan over. Release, and then stop holding your breath. It will work. The oranges and caramel will be on the top of the cake and beautiful. Just make sure the pan has cooled for at least 20 minutes.
After you’ve cut into this lemon orange cake, serve with a spoonful of the lemon curd. You can even dust it with confectioners’ sugar if you’d like. You can cover this with aluminum foil or parchment paper and store in a cool place. This is probably the tastiest way to use your citrus fruit.
When you are ready to place the cake, spread a bit of the lemon curd onto the cake plate and place the plate over the cake pan, then flip the pan over. Release, and then stop holding your breath. It will work. Just make sure the pan has cooled for at least 20 minutes.
Orange Upside-Down Cake
An indulgent, gluten-free, coconut-filled cake topped with caramel and beautiful orange slices.
- 1/2 cup gluten-free flour ((I used Pillsbury))
- 1/2 cup almond flour (finely ground)
- 1/8 tsp sea salt
- 1/2 tsp baking powder
- 1/2 cup granulated sugar
- 2 large eggs
- 1/4 cup lavender simple syrup ((regular simple syrup or maple syrup will also work))
- 1/4 cup mascarpone cheese
- 4 tbsp coconut cream
- 1/2 stick butter ((4 tablespoons))
- 1 tsp vanilla extract
- 1.5 tsp coconut extract
- 1 tsp. butter extract
- 1 cup unsweetened coconut flakes (I love Bob's Red Mill )
For the caramel
- 3/4 cup sugar
- 6 tbsp water
- 4.5 tbsp butter
- 1/8 tsp sea salt
For the orange topping
- 1 large orange (or two, if you are using different varieties (you might not use all of it))
Start by beating the eggs with a hand mixer and slowly pour in the lavender simple syrup, beating until creamy. While still mixing add the mascarpone cheese, coconut cream and butter.
Once that mixture is creamy, add in vanilla, coconut and butter extracts.
Mix together all of the dry ingredients, except the coconut flakes.
Fold the dry mixture into the wet mixture gently and stir until just blended. Add the coconut flakes and stir until just blended.
Preheat your oven to 350 Fahrenheit. Follow the directions below, adding the caramel and oranges to the pan before baking for 30 minutes, or until a toothpick comes out clean.
For the caramel
Place the sugar and water in a small sauce pan and stir on medium heat for about ten minutes, or until it is a little thicker and coats a spoon. Take it off the heat and add the salt and butter, stirring to combine.
To combine it
Lightly butter an 8-inch nonstick round pan, and pour the caramel into the pan. Layer the oranges how you want them to look. I chose a round pattern, alternating Cara Cara oranges and blood oranges.
Pour the cake over the oranges. Bake at 350 for 30 minutes, or until a toothpick comes out clean.
Wait for the pan to cool, and then make the lemon curd.
Lemon Curd
Place two egg yolks and an entire egg in a sauce pan. Whisk them. Add 3/4 cup sugar and whisk. Add the zest from two lemons and 1/2 cup fresh juice. Whisk it until creamy, and then place it on medium heat, whisking until its thick enough to coat a spoon, about 8 minutes. Stir in the butter. This part of the recipe came from Kitchen Confidante.
To plate the cake
Spread a thin layer of the lemon curd on your cake plate. Invert the plate over the cake pan, then flip it over to let it pop out onto the plate.


Leave a comment