-
Basic Chocolate Cake Donuts
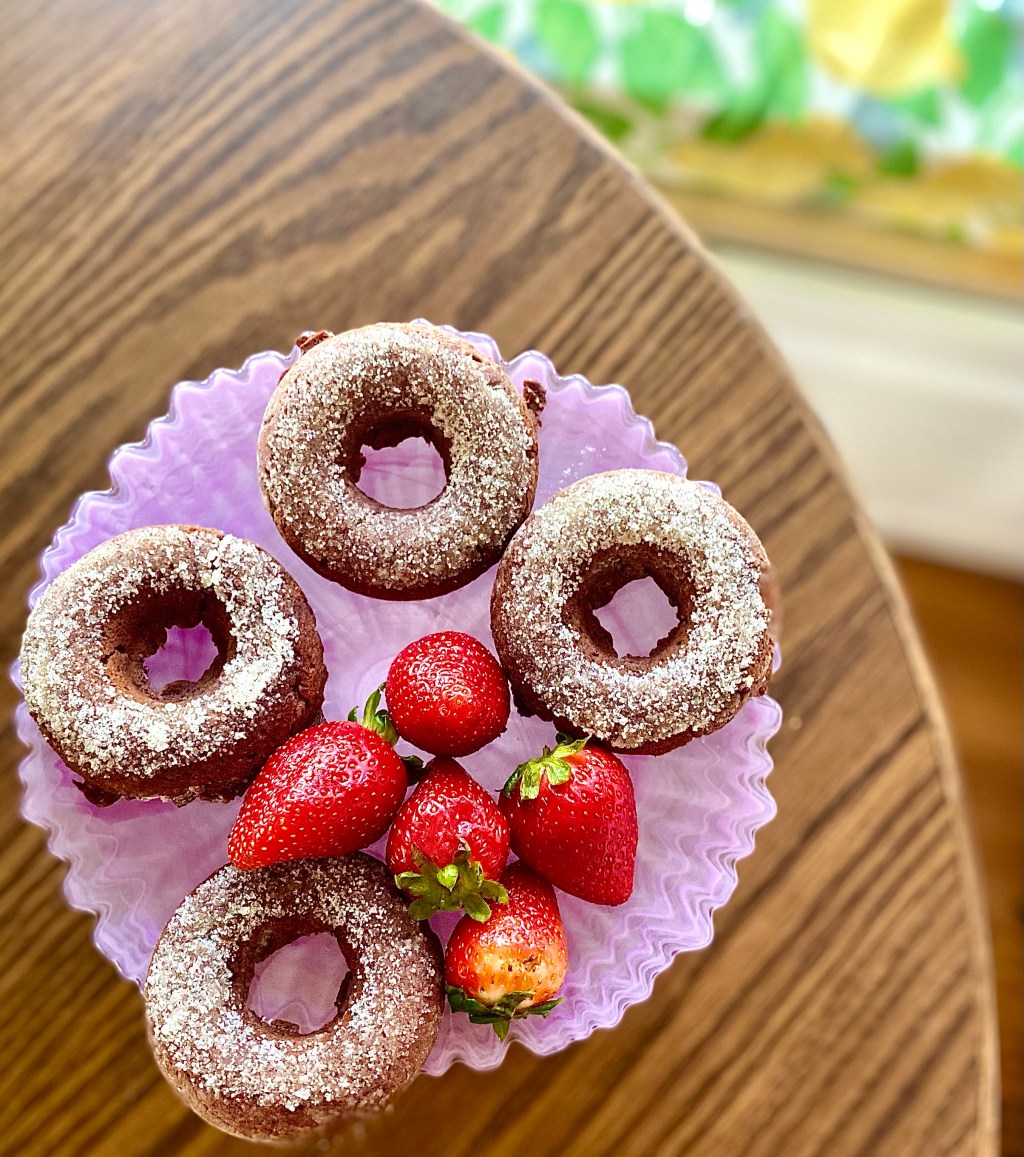
Donuts on Sunday morning are a must sometimes (especially chocolate cake donuts). My kids beg for them every week, but sometimes I’d like to get in the kitchen instead of sending them out with their dad for the baked goods.
This morning, I settled in to make these basic chocolate cake donuts with my favorite donut pan and a good cup of coffee.
This recipe is super basic, but I did add chocolate chips for a little bit of fun. When they were done baking, I dipped them in butter and sugar and served with fresh strawberries.
Here’s how to make these chocolate cake donuts:
After mixing the dry ingredients in a large bowl (I used a sifter for the flour and cocoa for a finer texture), whisk the eggs and buttermilk in a separate bowl. Add the vanilla bean paste and melted butter and whisk until foamy. Combine the wet and dry ingredients, being sure not to over mix. The dough will be very sticky and should be in a mound. Add the chocolate chips, and then spread the dough onto a very floured surface.
Let the dough sit about five minutes, and then cover with more flour and shape into a flat circle with your hands. With a rolling pin, roll the dough to about 3/4 of an inch to an inch thick. Then cut them into rounds (I used a biscuit cutter)and place them onto the pan, poking the hole out of the middle as you do. The batter is very sticky and cake, so don’t be afraid to smush it together to fit in the molds. This should make 12-18 chocolate cake donuts depending on the size of your pan and how fluffy you make them. They cook pretty evenly, so you can add more dough to each mold if you want a larger donut.
Chocolate Cake Donuts
A basic baked chocolate cake donut recipe
- 2 cups flour, sifted
- 3/4 cup cocoa powder, sifted
- 1 cup sugar
- 2 teaspoons baking powder
- 1 teaspoon salt
- 4 medium eggs
- 1/3 cup buttermilk
- 6 tbsp butter (unsalted)
- 1 teaspoon vanilla bean paste or vanilla
- 1 cup chocolate chips
- sugar and butter for dipping and dusting the finished donuts
After mixing the dry ingredients in a large bowl (I used a sifter for the flour and cocoa powder for a finer texture), whisk the eggs and buttermilk in a separate bowl. Add the vanilla bean paste and melted butter and whisk until foamy. Combine the wet and dry ingredients, being sure not to over mix. The dough will be very sticky and should be in a mound. Add the chocolate chips, and then spread the dough onto a very floured surface. Let the dough sit about five minutes, and then cover with more flour and shape into a flat circle with your hands. With a rolling pin, roll the dough to about 3/4 of an inch to an inch thick. Then cut them into rounds (I used a biscuit cutter)and place them onto the pan, poking the hole out of the middle as you do. The batter is very sticky and cake, so don't be afraid to smush it together to fit in the molds. This should make 12-18 chocolate cake donuts depending on the size of your pan and how fluffy you make them. They cook pretty evenly, so you can add more dough to each mold if you want a larger donut.


For more breakfast recipes, visit me here.
-
Fall ratatouille with sweet potatoes and herbs
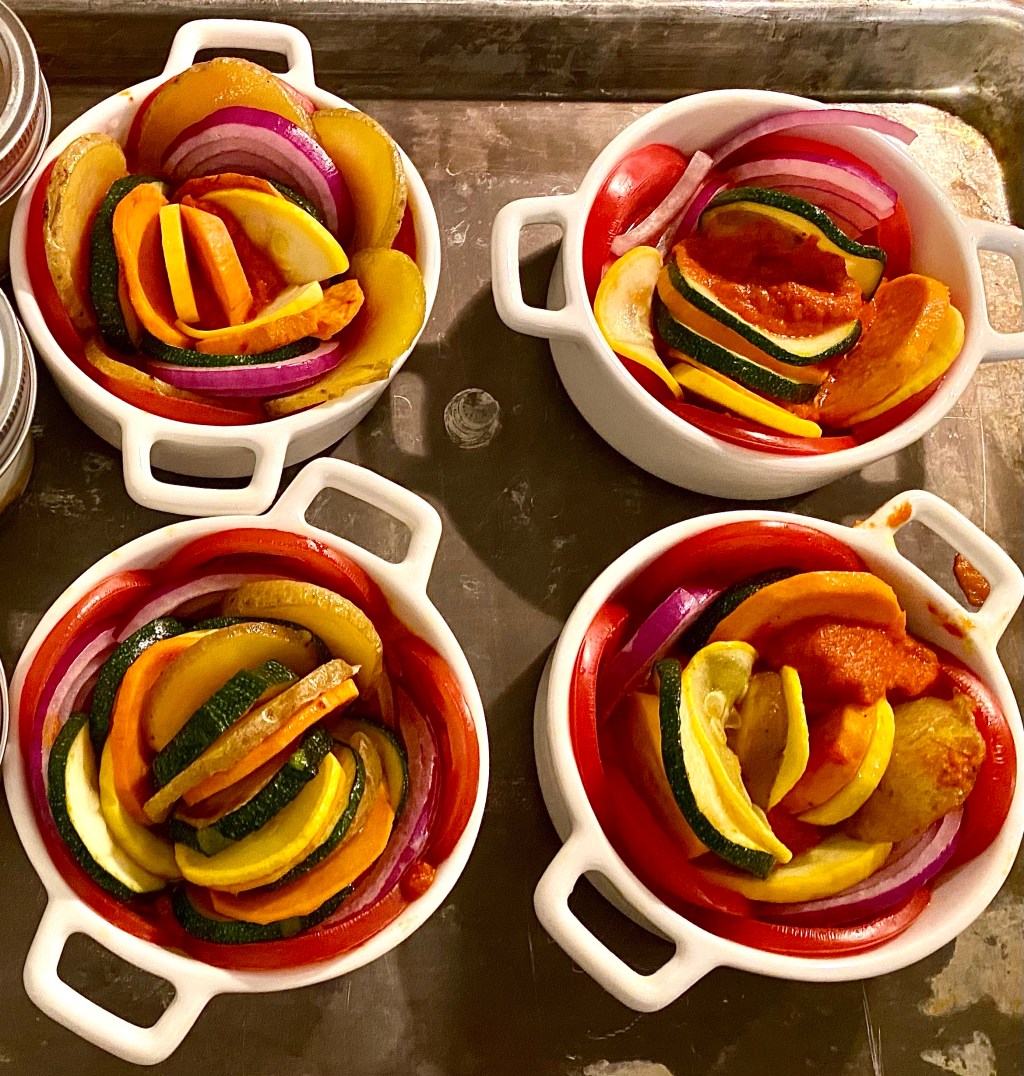
This fall ratatouille is a new favorite at our house. I made a traditional version with eggplant awhile back, and while it is a great spring dish, eggplant doesn’t really say “fall food” to me, so I made some adjustments and added sweet potatoes and Yukon gold potatoes. This made a more filling dish that can serve as a meatless main or a side with nearly anything.
If you are looking for a healthy holiday side, this would be a nice change from the usual!
Here’s how to make this fall ratatouille:

Fall Ratatouille
a buttery, herb-laden version of this classic dish with sweet potatoes
- 1 32 oz can whole, peeled tomatoes (preferably Italian)
- 2 large bell peppers, red, yellow or orange
- 6 tbsp butter
- 8 cloves garlic (or more! )
- 1 large white onion
- salt (to taste)
- 1 large handful of herbs (I used basil, oregano, marjoram and thyme )
- 2 medium sweet potatoes, peeled
- 2 large gold potatoes (or a few small ones)
- 1 large zucchini
- 1 large yellow crookneck squash
- 3 Roma tomatoes
- 1 large onion
- 3-4 tbsp avocado oil
For the sauce
Place the canned tomatoes, butter and white onion (cut in half and placed face down) in a pot. This is a variation on Marcela Hazan’s sauce, so simmer the tomatoes, butter and halved onion together for about 40 minutes, smashing the tomatoes as they soften. Rough chop the bell peppers and add them about five to ten minutes in. Add the garlic about halfway through (minced). Clean and de-stem the herbs, rough chop them and toss them in to simmer another 20 minutes or so, on low. Add salt to taste. Once the sauce tastes like you want it, take it off of the heat to cool slightly. When it is no longer boiling, remove the onion and use an immersion blender to purée all of the herbs and peppers into the sauce. Set aside.
For the casserole
While the sauce simmers, slice all of the veggies except the tomatoes and onions, and place them in a large bowl. Liberally salt them and toss, then allow to sit for ten to 20 minutes. Drain the water out and place them on paper towels to dry. In a skillet, heat up several tablespoons of avocado oil and sauté the veggie rounds lightly, working in batches. Place about a cup of the sauce in the bottom of a heavy casserole dish or a large spoonful into individual ramekins and start placing the veggies around the bottom of the pan or ramekins in layers, adding more sauce as needed. Cut the tomatoes and onions into round slices and begin to place them in the pan also.
Once all of the veggies and sauce are in the pan, bake at 400 for 30 minutes, a little longer if your potato slices are not super thin.
Ingredients:
- One large can of Italian, whole peeled tomatoes
- Two bell peppers, orange, red or yellow
- Six tablespoons butter
- Lots of garlic — I used close to 8 cloves
- One white onion
- Salt, to taste
- Herbs of your choice, several large handfuls (I used basil, oregano, marjoram and thyme)
- One large zucchini
- Two medium sweet potatoes
- Two large Yukon gold potatoes
- One large yellow crookneck squash
- Several Roma tomatoes
- One large red onion
- Several tablespoons avocado oil (amount will vary)
For the sauce:
Place the tomatoes, butter and white onion (cut in half and placed face down) in a pot. This is a variation on Marcela Hazan’s sauce, so simmer the tomatoes, butter and halved onion together for about 40 minutes, smashing the tomatoes as they soften. Rough chop the bell peppers and add them about five to ten minutes in. Add the garlic about halfway through (minced). Clean and de-stem the herbs, rough chop them and toss them in to simmer another 20 minutes or so, on low. Add salt to taste. Once the sauce tastes like you want it, take it off of the heat to cool slightly. When it is no longer boiling, remove the onion and use an immersion blender to purée all of the herbs and peppers into the sauce. Set aside.
Putting it all together:
Meanwhile, slice all of the veggies except the tomatoes and onions, and place them in a large bowl. Liberally salt them and toss, then allow to sit for ten to 20 minutes. Drain the water out and place them on paper towels to dry. In a skillet, heat up several tablespoons of avocado oil and sauté the veggie rounds lightly, working in batches. Place about a cup of the sauce in the bottom of a heavy casserole dish and start placing the veggies around the bottom of the baking pan in layers, adding more sauce as needed. Cut the tomatoes and onions into round slices and begin to place them in the pan also.
Once all of the veggies and sauce are in the pan, bake at 400 for 30 minutes. Enjoy!
More vegetable-forward recipes can be found here, here and here.
This post contains affiliate links.
-
Pumpkin ricotta caprese appetizers two ways

This pumpkin ricotta version of caprese with sausage is a truly versatile appetizer. If you aren’t a fan of pumpkin, you can omit that ingredient, but this is a savory pumpkin dish that isn’t too “pumpkin-y.”
The pumpkin and ricotta combine perfectly with the ample garlic and lemon juice cut the sweetness the pumpkin lends to the ricotta mixture. The sausage adds a ton of flavor and the cherry tomato on top is…well, the cherry on top. The basil gives it all a garden taste and pulls everything together.
Here’s how to make this pumpkin ricotta caprese appetizer with phyllo dough:
Mix together the ricotta cheese, pumpkin, goat cheese, lemon juice, garlic, salt, pepper and oil. Lie the first sheet of phyllo dough onto a greased sheet of parchment on a baking sheet. Brush it with butter, and then spread a thin layer of the cheese mixture on top. Repeat until the final layer is on top, and brush it with butter. Drop the sliced sausages on top in a regular pattern, and cover with the parmesan cheese. Bake at 400 for 12 minutes. Let it cool for about 10 minutes, then drizzle with the hot honey. Garnish with the cherry tomato and basil.
Here’s how to make it on pizza crust rounds. You can also make this on sweet potato toasts, keto cauliflower crusts, or any type of cracker. Just make the filling as above, but instead of the phyllo dough, just add the sausage piece on top and top with the cherry tomato and basil. These look extra fancy when served on a raised cake plate. Easy!

Pumpkin, ricotta and sausage appetizers
- 5 sheets phyllo dough OR one baked pizza crust
- 1 cup ricotta cheese
- 1/2 cup goat cheese crumbles
- 1/2 cup parmesan cheese
- 1/2 cup pumpkin puree
- 1 cup basil leaves, chopped
- 5 cloves garlic, finely diced
- 2 tbsp lemon juice
- 2 tbsp olive oil
- salt and pepper, to taste
- 1 link mild Italian sausage, fully cooked and sliced into thin coins
- 1 cup cherry tomatoes, sliced in half
Combine the ricotta, lemon, oil, goat cheese, pumpkin, basil, salt and pepper in a bowl and stir until thoroughly combined.
Spread the first sheet of phyllo dough on a baking sheet (lined with parchment and greased lightly). Brush it with some of the butter, and spread a thin layer of the pumpkin mixture on it. Repeat until the fifth layer of dough is on the top. Brush butter on top, then place a sliced piece of the sausage at regular intervals. Top with the parmesan. Bake for 12 minutes at 400.
Garnish each piece with halved cherry tomatoes and an extra piece of basil, and let cool about ten minutes.
Slice into equal portions, about 2 inches each.
Alternately, cut your pizza crust or sweet potatoes into 2 inch rounds. Place a dollop of the filling on top, then add your sausage. Bake, then add the half cherry tomato and basil on top.
For more snacks, click here.
-
Pumpkin parfait with white chocolate

Who doesn’t love a good pumpkin parfait dessert? This white chocolate pumpkin parfait is lighter in flavor than pumpkin pie, lighter overall than a pumpkin cheesecake, but equally as indulgent as both of those desserts.
This is easier to make than most desserts. It’s no-bake, and includes one of my favorite short cuts — boxed pudding mix. I also add two kinds of baking extracts for extra flavor, vanilla and almond. A touch of sea salt also cuts the sweetness and makes this dessert truly decadent without being overwhelming.
Here’s how to make this pumpkin parfait with white chocolate:
First, make the white chocolate pudding mix (Hershey’s is the best version of this), with 1/2 cup less milk than normal, to make it thicker. I use whole milk, but coconut or almond would work as well if you are dairy-free. Add the pumpkin and cream cheese and blend until smooth. Make the whipped cream, and then layer the two into small jars, cute cups, or ramekins. You could make the whole thing in a large trifle dish if you’d rather.
Crumble the white chocolate pieces and sprinkle on the top. I added pie crust leaves for garnish and crunch, but you could add crumbled vanilla cookies or graham crackers instead. Toffee would also be great on this!
White Chocolate Pumpkin Parfait
- 1 package Hershey's white chocolate pudding mix
- 1.5 cups whole milk (You can sub for coconut or other non-dairy milk if desired)
- 1/2 cup pumpkin puree
- 4 oz cream cheese (1/2 a block) (softened)
- 1 tsp vanilla extract
- 1/8 tsp sea salt
- 1 cup heavy whipping cream
- 1/4 cup sugar
- 1 tsp cinnamon or pumpkin pie spice
- 1/2 tsp almond extract
For the pumpkin filling:
First, make the white chocolate pudding mix (Hershey's is the best version of this), with 1/2 cup less milk than normal, to make it thicker. I use whole milk, but coconut or almond would work as well if you are dairy-free. Add the pumpkin and cream cheese and blend until smooth. Add 1/2 the vanilla and a pinch of the sea salt and mix thoroughly.
Whipped Cream
Add the cream to a large bowl and whip with electric beaters until peaks form. Add the sugar, a pinch of salt, half of the vanilla and the almond extract and continue to beat until it's in whipped cream form.
Putting it together
Layer the two mixtures into small jars, cute cups, or ramekins. You could make the whole thing in a large trifle dish if you'd rather. I like to do pumpkin, whipped cream, pumpkin, whipped cream, with the whipped cream ending up on top.
To garnish: you can add white chocolate chips or cookie crumbles, or even little leaves made of pie crust. Toffee would also be great on this!

White Chocolate Pumpkin Parfait For more desserts, click here.


-
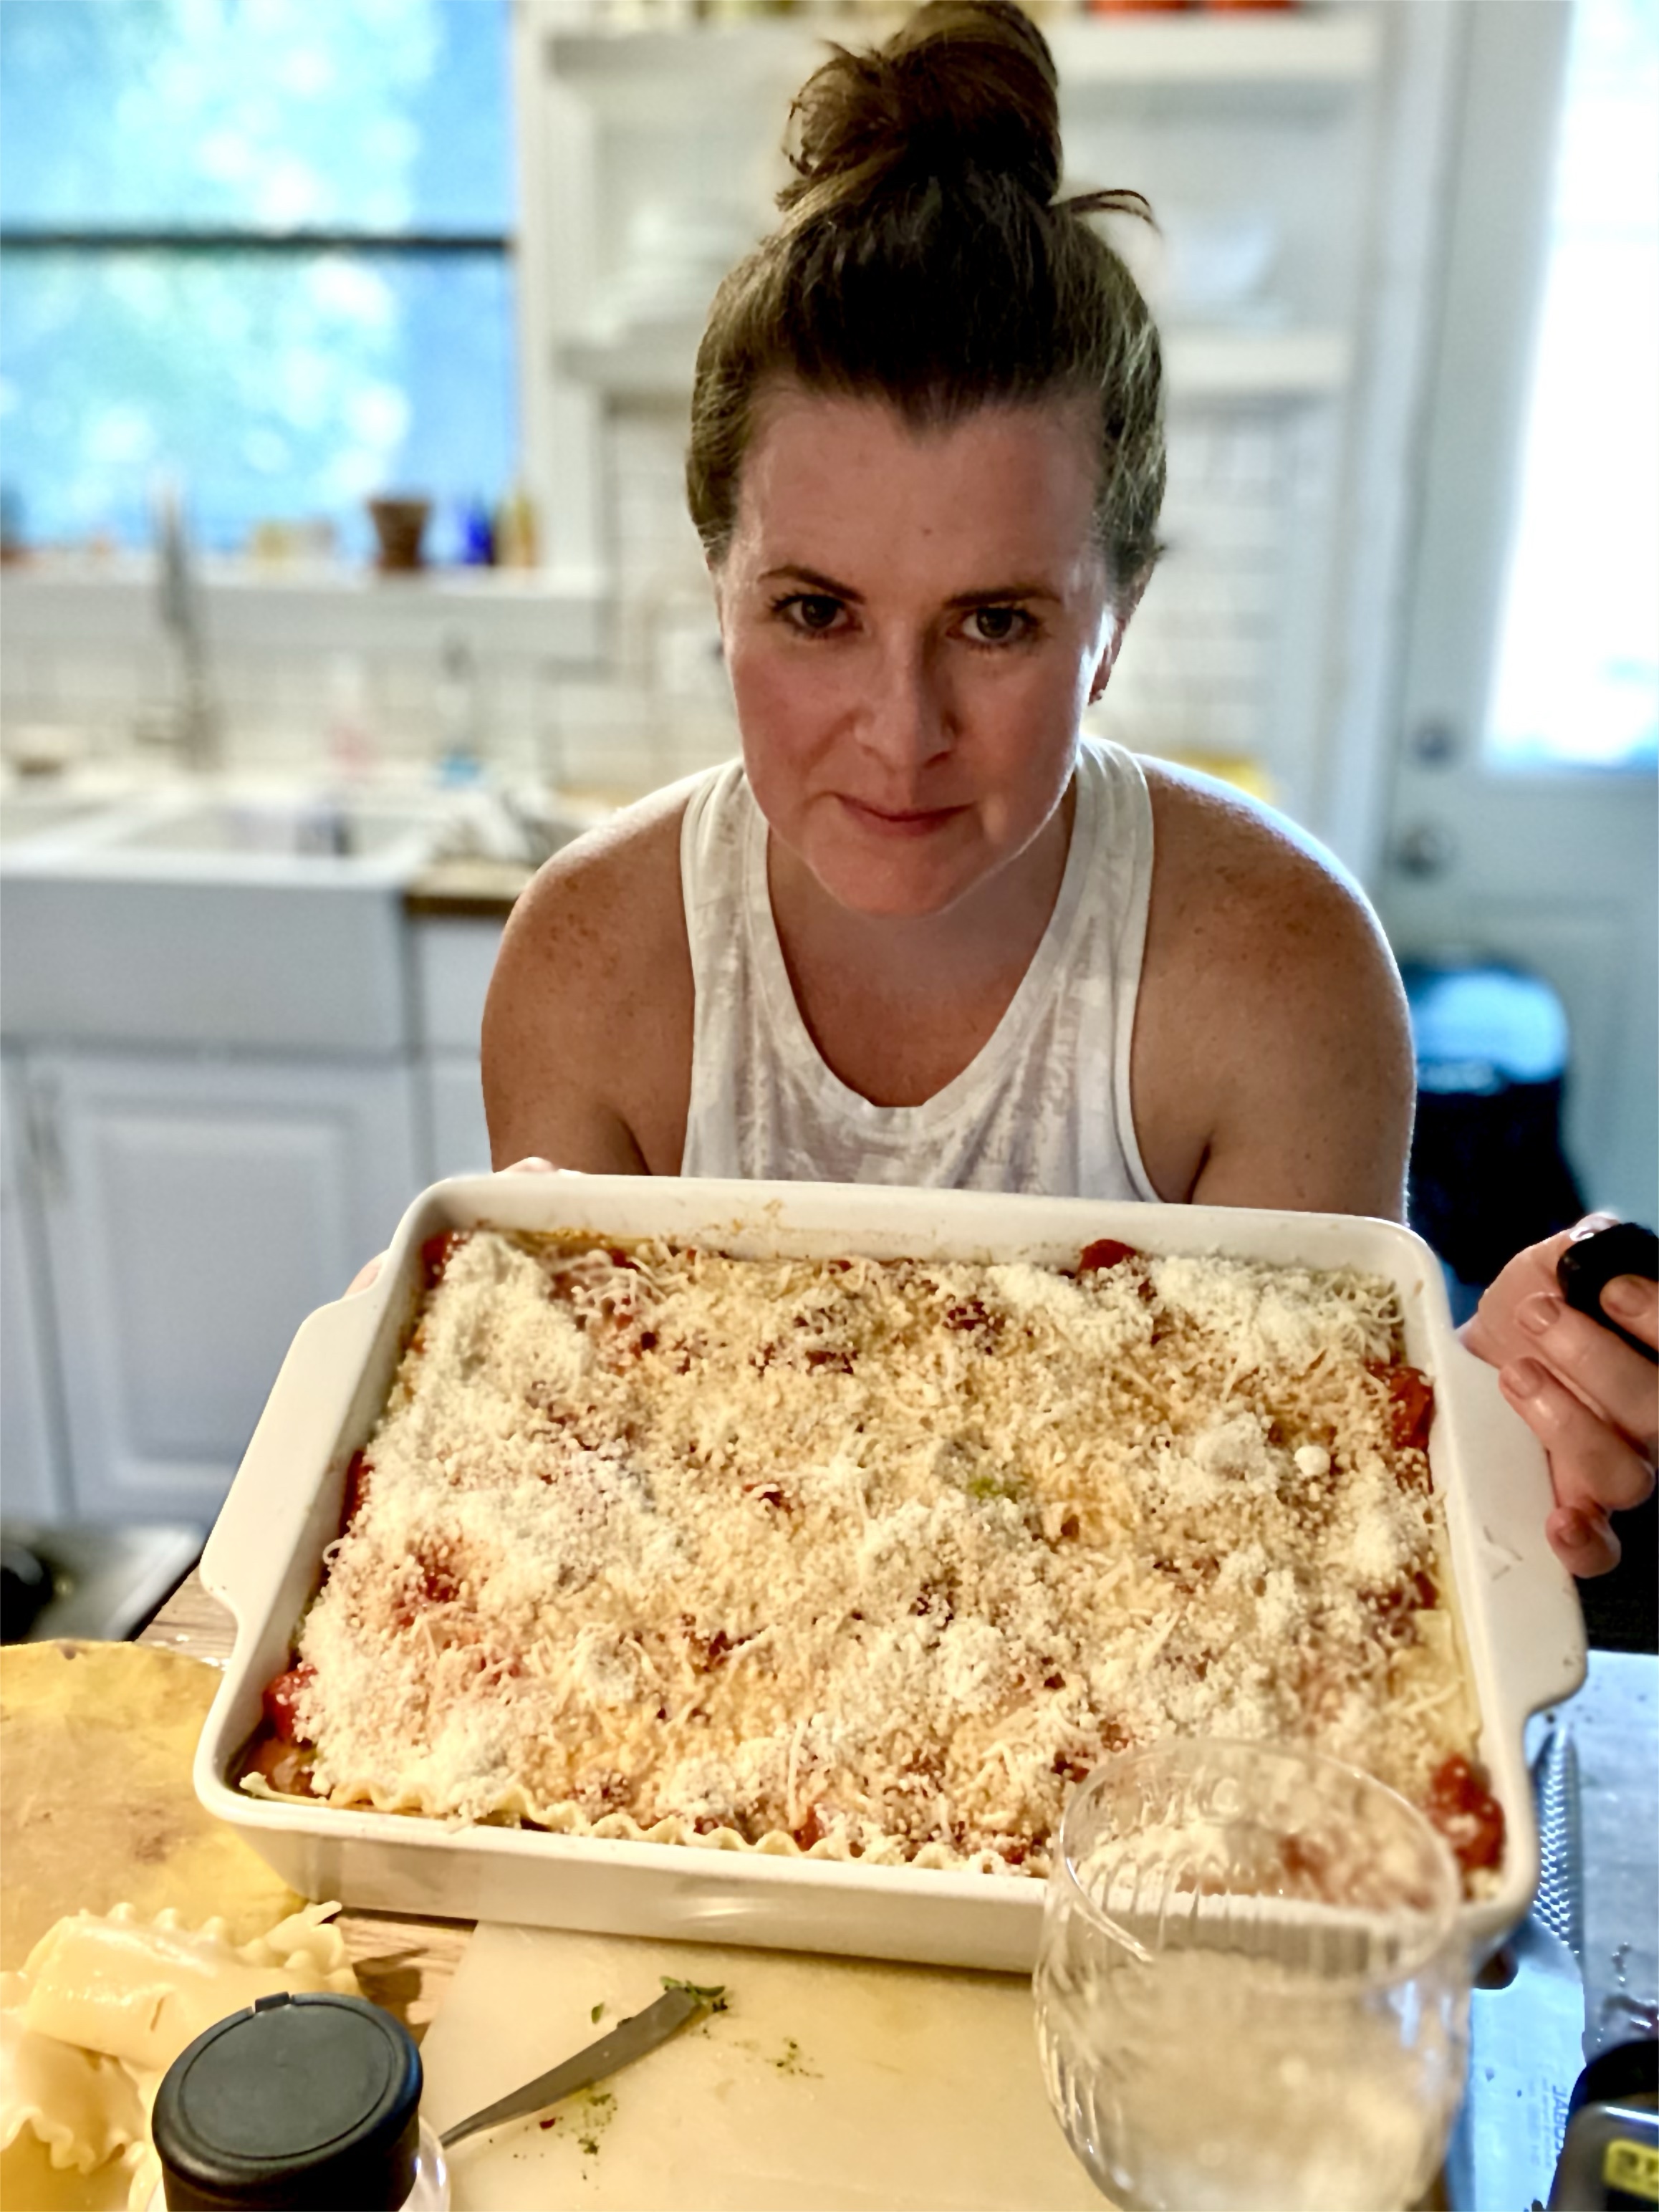
Pesto sausage lasagna with homemade sauce (and tons of herbs)
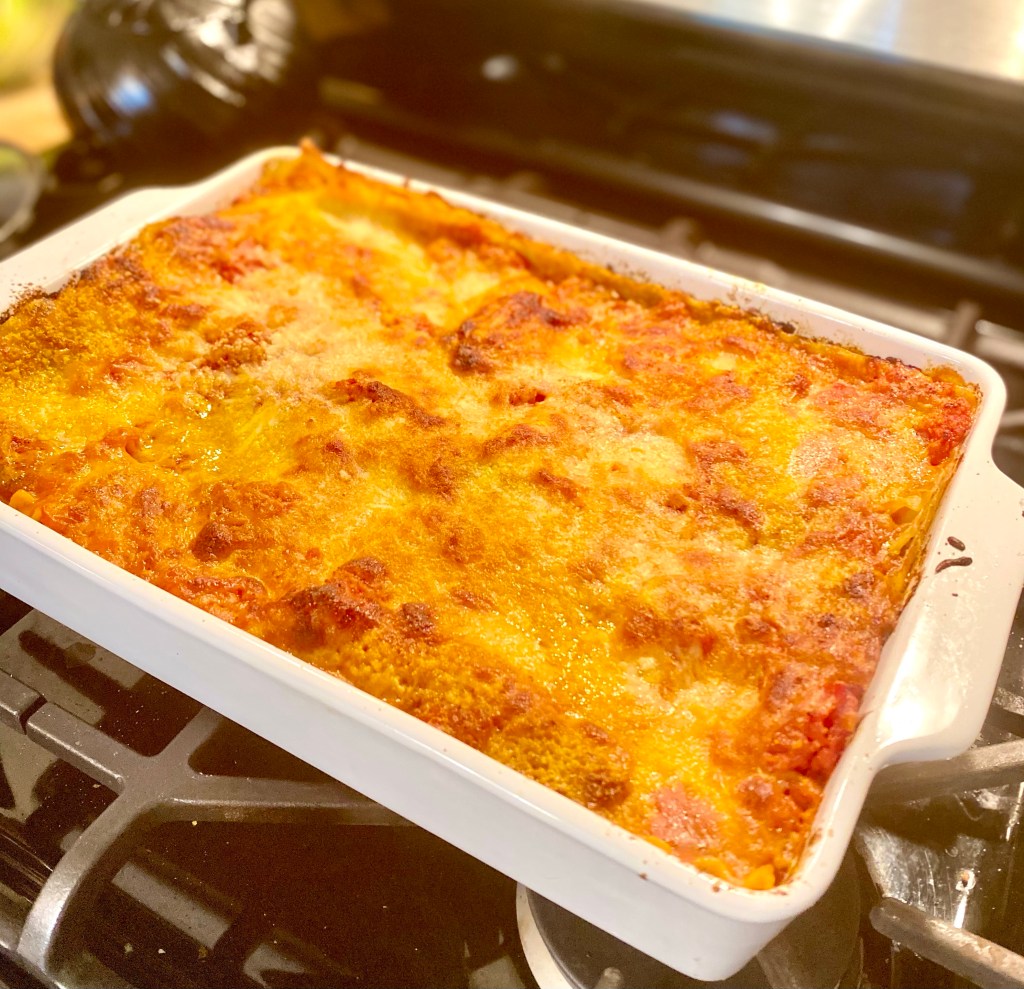
This pesto sausage lasagna is definitely a bit more complicated than my usual recipes, but still not too difficult! I wanted to try my hand at the dish and I had mountains of herbs to use, so I put together a pesto sauce to mix into the meat mixture. I also used Marcela Hazan’s sauce technique, just with different proportions. If I were going to improve this recipe I’d say increase the sauce by another 1/3 of the recipe.
Here’s how to make this pesto sausage lasagna:
Ingredients:
1 10 0z package of lasagna noodles (can use gluten free if you wish)
For the sauce:
- Two large cans Italian whole peeled tomatoes
- One stick of butter
- One onion
- Salt and pepper to taste
For the filling:
- One lb. turkey sausage
- Salt and pepper to taste
- Two tablespoons garlic
- A large bundle of herbs — I used basil, oregano and thyme. I used a big heap from my garden but if you are using herbs from the store go for fresh and double what you would usually use.
- One onion, chopped finely
- One 16 oz container of ricotta cheese
- Mozzarella and Parmesan to taste (probably about a cup each)
Directions:
For the sauce, peel one onion and chop it in half lengthwise. Place the onion halves face down in a sauce pan. Add the two cans of tomatoes and bring to a boil. Lower the heat to a simmer, smashing the tomatoes down with a wooden spoons. Add the stick of butter (cut into pieces), and allow them to slowly melt into the mixture. Salt to taste. Slow to simmer at least forty minutes. Remove the onion halves and discard.
For the filling, dice the other onion finely. Add it to a tablespoon of olive oil in a skillet and sauté until translucent, about five minutes. Add the pound of sausage, breaking into tiny pieces and allowing to sauté slowly. While it’s cooking, take the heap of herbs and toss them into a high speed blender with two tablespoons of garlic (or about 8 cloves) and about 1/4 cup olive oil, or more as you need it. Blend into a fine pesto-like paste.
Add the herb mixture to the meat mixture and stir until combined. The mixture will be green.
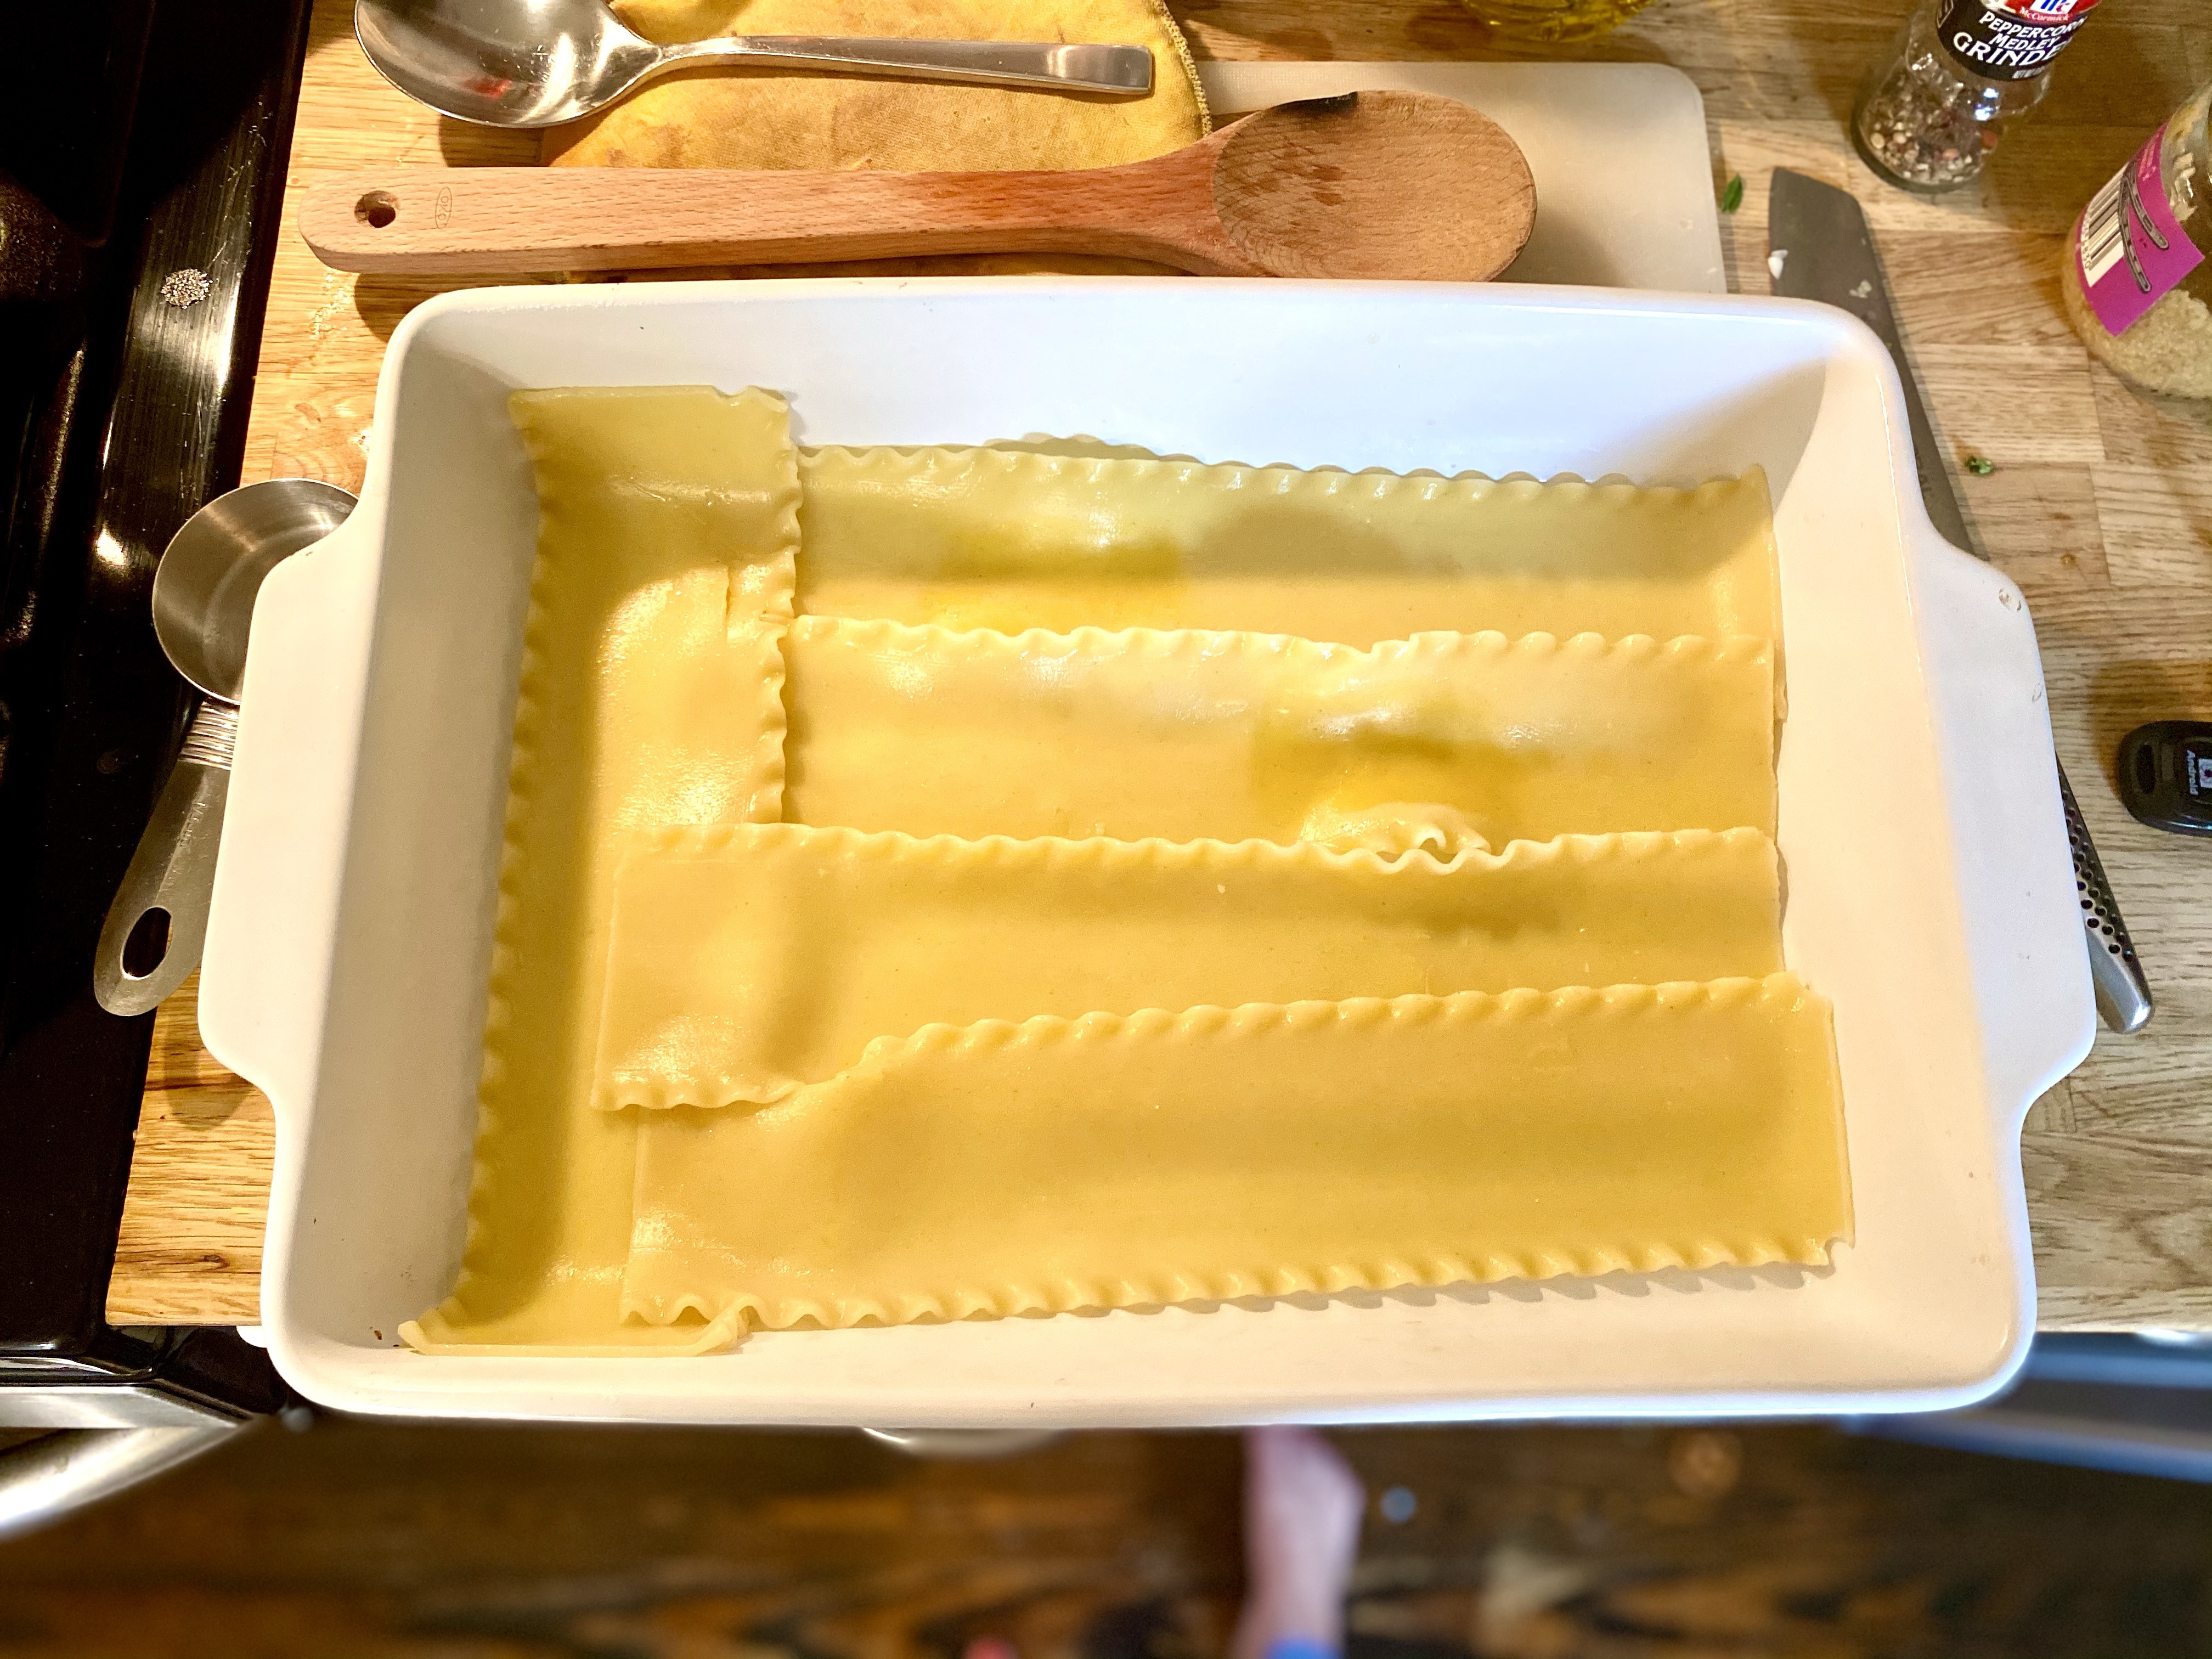
While the meat and sauce simmer, boil a large pot of water and add the lasagna noodles. I always add about a tablespoon of oil and a teaspoon of salt to my pasta water. You’ll want to watch these noodles and stir closely and carefully, because when lasagna noodles stick together they are difficult to work with!
Once the noodles are done, turn off the heat on the other two pans and let everything cool just a bit. Preheat the oven to 400 degrees Fahrenheit, and grab a large casserole dish. Lay a layer of noodles across the bottom of the pan. Add about a cup of the sauce, and then spoon about 1/2 of the meat mixture on top. Then spoon about half of the ricotta in dollops, spreading as evenly as you can. Add about another half cup of sauce. Add some mozzarella, about a half cup (or more). Repeat this process. After you have the second layer, add one last layer of noodles, and the remaining sauce. Top with the remaining mozzarella and as much Parmesan as you can stand. Bake the whole dish for about 30 minutes. Let it stand for ten minutes before serving. Enjoy!
Pesto Sausage Lasagna
- 1 package lasagna noodles (10 oz) ( )
- 30 oz whole peeled tomatoes (two cans)
- 1/2 cup butter (1 stick)
- 1 large onion
- salt to taste
- pepper to taste
Filling
- 1 lb turkey sausage
- 2 tbsp garlic (five or six cloves, minced)
- 2 cups herbs (I used basil, oregano and thyme. I used a big heap from my garden but if you are using herbs from the store go for fresh and double what you would usually use.)
- 1 large onion, chopped finely
- 16 oz ricotta cheese
- 1 cup mozzarella, shredded
- 1 cup parmesan, shredded
- salt to taste (about a teaspoon)
- pepper to taste
For the sauce, peel one onion and chop it in half lengthwise. Place the onion halves face down in a sauce pan. Add the two cans of tomatoes and bring to a boil. Lower the heat to a simmer, smashing the tomatoes down with a wooden spoons. Add the stick of butter (cut into pieces), and allow them to slowly melt into the mixture. Salt to taste. Slow to simmer at least forty minutes. Remove the onion halves and discard.
For the filling:
Dice the other onion finely. Add it to a tablespoon of olive oil in a skillet and sauté until translucent, about five minutes. Add the pound of sausage, breaking into tiny pieces and allowing to sauté slowly. While it’s cooking, take the heap of herbs and toss them into a high speed blender with two tablespoons of garlic (or about 8 cloves) and about 1/4 cup olive oil, or more as you need it. Blend into a fine pesto-like paste. Add the herb mixture to the meat mixture and stir until combined. The mixture will be green.
Putting it together
While the meat and sauce simmer, boil a large pot of water and add the lasagna noodles. I always add about a tablespoon of oil and a teaspoon of salt to my pasta water. You’ll want to watch these noodles and stir closely and carefully, because when lasagna noodles stick together they are difficult to work with! Once the noodles are done, turn off the heat on the other two pans and let everything cool just a bit. Preheat the oven to 400 degrees Fahrenheit, and grab a large casserole dish. Lay a layer of noodles across the bottom of the pan. Add about a cup of the sauce, and then spoon about 1/2 of the meat mixture on top. Then spoon about half of the ricotta in dollops, spreading as evenly as you can. Add about another half cup of sauce. Add some mozzarella, about a half cup (or more). Repeat this process. After you have the second layer, add one last layer of noodles, and the remaining sauce. Top with the remaining mozzarella and as much Parmesan as you can stand. Bake the whole dish for about 30 minutes. Let it stand for ten minutes before serving. Enjoy!
For more dinner ideas, visit me here.


-
Negroni cocktail with honey and rosemary
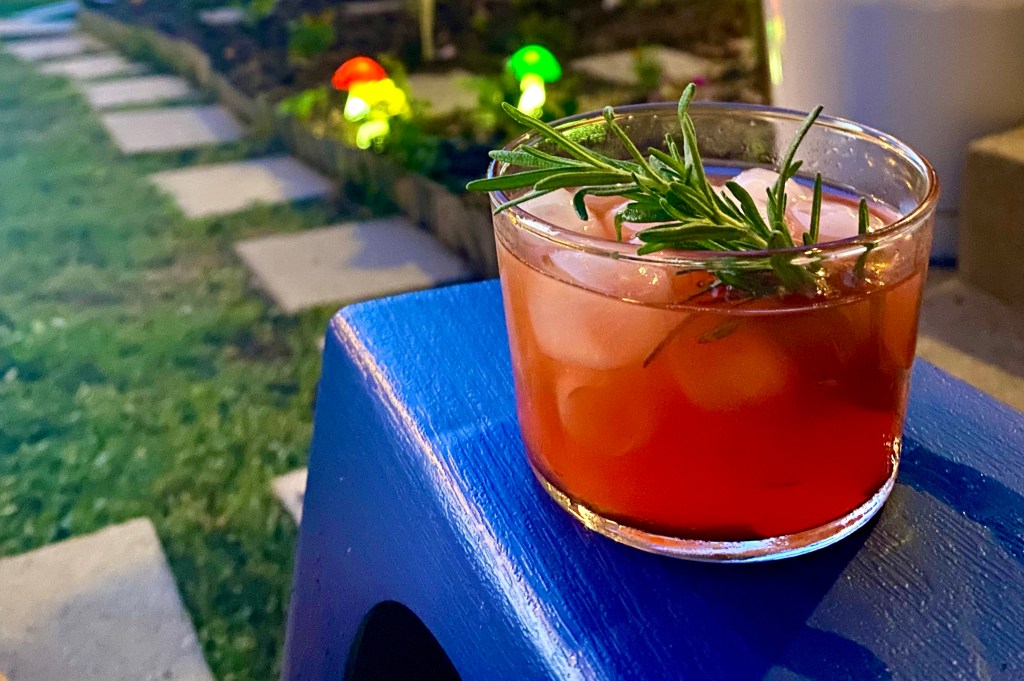

A Negroni is one of those classic cocktails that doesn’t really need improvements, but I love to experiment and came up with a version I like. This Negroni cocktail has some sweetness, subs sweet vermouth for a dry Sauvignon blanc or vermouth, and has the added flavors of rosemary and lime to bridge the gap between summer and fall cocktail season.
This is the perfect drink for sitting on the porch at dusk listening to the sounds of the evening. Here in Texas it just started cooling down (to below 90 degrees!) and sitting outside is a must. I like to sit where I can gaze at my newly planted garden and smell the freshly cut grass while I drink it.
The bitterness of the Campari pairs perfectly with the sweetness of the honey syrup, and the lime juice sets it off just right. The rosemary complements all of the flavors and tastes like the beginning of autumn.
Here’s how you make this Negroni cocktail:
Add ice to a small cocktail glass. Then add:
1.5 oz gin (I used Tanquray)
1 oz honey syrup (recipe here)
1 oz Campari
2 oz dry white wine or vermouth
1 oz lime juice
Stir all ingredients, and garnish with a sprig of rosemary. Enjoy it outside!
For more cocktail recipes, visit me here.
-
Edible Crops to Plant in Your Fall Garden
It’s time to start planting your fall garden! Gardening is my second favorite activity (to cooking). There is nothing like deciding what to have for dinner and heading into my front yard to pluck the ingredients. My kids like to join in too — they love to try each kind of lettuce and then spit it out and tell me it’s gross (joke’s on them- they’re trying it!). They especially adore pulling carrots they’ve planted and helping me pick green beans, cherry tomatoes or blackberries. Below I’ve outlined the things you can plant right now for a productive fall garden. I like to plant some of what I want now and save the rest for later in the month so my harvest is stretched out a bit longer. I’ll also start some seedlings so I can stretch my fall garden to a winter garden.
Fall is pretty forgiving in Texas, so you can try things that may not be traditional for planting so late (like the pie pumpkin patch I am attempting) but if you want to be really precise, check out the Almanac planting calendar.
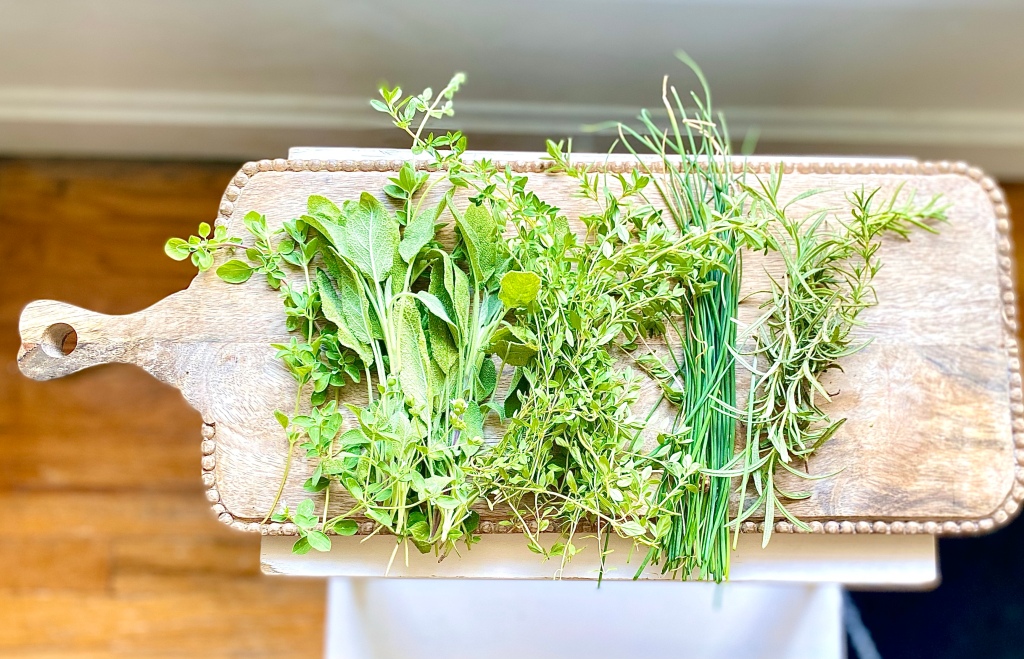
Herbs
- In my garden, herbs perform better than any of the other edible crops. I plant everything I can get my hands on that will fit in my small space — cilantro, oregano, basil, lavender, dill, and more. And you bet I use them every day, like in this gin and rosemary cocktail.

Root Veggies
2. Root veggies, like carrots and radishes, are a real crowd pleaser if you have kids who like to help in the garden. There is something so satisfying about watching them pull up veggies that they planted and will actually eat! You must till your soil deeply for success and sow them very shallow, not more than 1/4 of an inch. Edible crops like these can be hugely satisfying and a great way to involve the kids in cooking and eating healthy.

Beans and Peas
3. Beans and peas are so easy, they are the go-to for kindergarten teachers to have classrooms full of 5-year-olds plant in cups with wet paper towels. Seriously, if you have a little bit of decent soil, a trellis of some sort, sunlight and water, you will be kept in fresh beans/peas/snap peas all spring and sometimes into the fall if your summers are mild. Plant more than one variety for the best crop, and be sure to harvest these as they become ripe to allow the plants to produce as many as possible.

Greens
4. Lettuces, chards, kales, cabbages and other greens tend to do well in cooler early spring weather, and may even survive one last frost. I’ve already done spinach and several lettuces and will get cabbage and chard in the ground towards the end of March. And you’ll have plenty for this classic Italian soup.

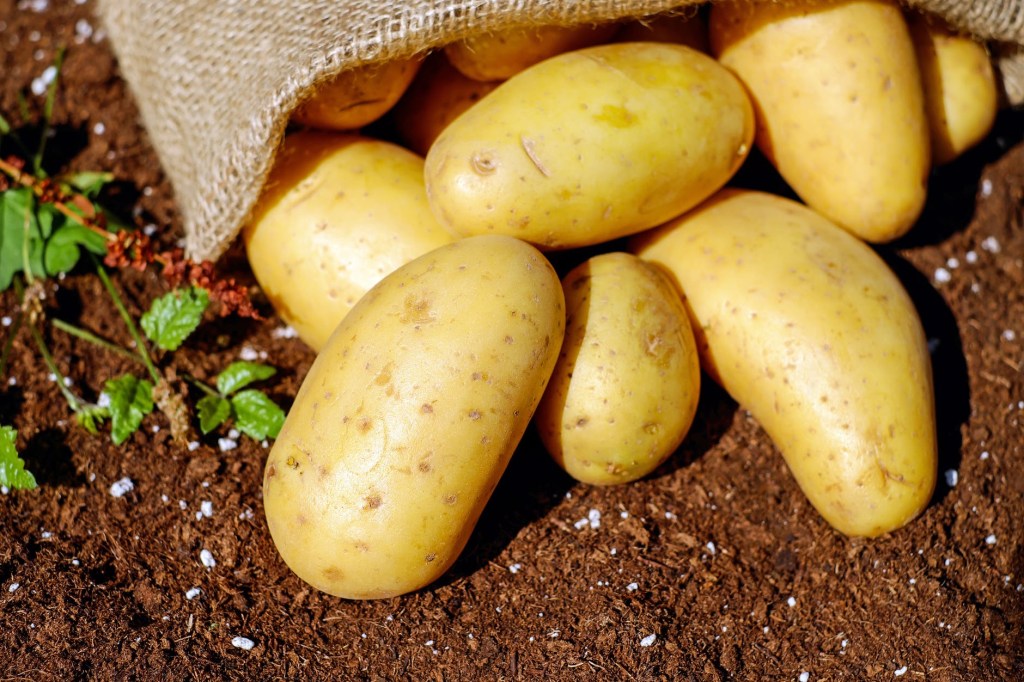
Potatoes
5. Potatoes are another fun one because they are deceptively easy. They usually get planted in the early spring, but will sometimes perform well in autumn too. I use a grow bag, which eliminates the need for laborious digging to harvest. You can buy seed potatoes in the spring, but they are unavailable for fall planting (typically). I save a potato from a bag of organic gold or red potatoes and let it sprout on my windowsill (place the potato in a cup of water halfway up the side of the potato, using toothpicks to keep it above the water line). Once it sprouts, cut it into slips and plant them in your grow bag. We had tiny, fresh, yummy gold potatoes for weeks. Roast them in duck fat like I do here.
I know this varies a bit based on what zone you are in, but most of these are fairly common to North America for this time of year (especially if you have cold frames or a greenhouse for your seedlings). Be sure to know your first frost date and plan accordingly for cold frames or blankets to protect tender greens or fruits.
Here are a couple of links to help you determine what’s right for your garden and your area. I also love Garden Betty for inspiration and tips!
Happy digging!
-
The best chocolate brownies with hidden veggies
Brownies are asked for all the time in my house. It is difficult to get just the right combo of chewiness and fluffiness – the ratios have to be just right to get them how you like them. I have probably made 20 different brownie recipes and experimented with several of my own. These brownies are a little chewy, a little cakey, very moist, and has a sweet and saltiness I love. It also includes my favorite chocolate bar in the world — Cadbury Dairy Milk — and two cups of spinach, which serves to cut the sweetness, add moisture, and force some nutrition into my picky children. If you have picky eaters like I do, these brownies feel like winning.
For more desserts, click here.
Ingredients for the brownies
- Two sticks of unsalted, grass fed butter. (Click here for the one I like)
- One large Cadbury Dairy Milk Chocolate bar
- 1 cup organic semi-sweet chocolate chips
- 1 cup coarse sugar
- 1/4 cup gluten-free flour blend
- 1/4 cup oat flour
- 2 teaspoons vanilla extract
- 1 teaspoon butter extract
- 1 teaspoon almond extract
- 3 large eggs
- 2 cups fresh spinach
- 1/2 cup unsweetened raw cacao powder
- 1 teaspoon baking powder
- 1 teaspoon sea salt
Directions:
Preheat the oven to 350 and prepare your pan. I like to use a 9×13 Pyrex lined with parchment and sprayed with coconut oil spray. Melt the butter and chocolate together in the microwave. Stir to mix it. Place the spinach in a blender and pour the butter mixture over it. Blend until totally smooth and there are no chunks of spinach.
Crack the eggs into a batter bowl and whisk lightly until they are completely blended. Slowly whisk in the chocolate/butter/spinach mixture. Once blended, slowly add in the sugar, flour, oat flour, cocoa powder, baking powder and salt. Add the extracts, and mix just until blended (don’t over mix). You can do this by hand or in a stand mixer like this one.
Pour the mixture into the pan and spread evenly. Bake about 28 minutes or until a toothpick comes out clean (check it at 25 minutes because ovens vary).
Allow the brownies to cool at least 30 minutes. These do crumble a little bit when warm, so send the kids outside to enjoy them!
The best chocolate brownies with hidden veggies
- 2 sticks unsalted, grass-fed butter
- 1 large Cadbury Dairy Milk Chocolate bar
- 1 cup semi sweet organic chocolate chips
- 1 cup coarse sugar
- 1/4 cup gluten free flour blend
- 1/4 cup oat flour
- 2 tsp vanilla extract
- 1 tsp butter extract
- 3 large eggs
- 2 cups fresh spinach
- 1/2 cup unsweetened cocoa powder or cacao
- 1 tsp sea salt
Preheat the oven to 350 and prepare your pan. I like to use a 9×13 Pyrex lined with parchment and sprayed with coconut oil spray. Melt the butter and chocolate together in the microwave. Stir to mix it. Place the spinach in a blender and pour the butter mixture over it. Blend until totally smooth and there are no chunks of spinach.
Crack the eggs into a batter bowl and whisk lightly until they are completely blended. Slowly whisk in the chocolate/butter/spinach mixture. Once blended, slowly add in the sugar, flour, oat flour, cocoa powder, baking powder and salt. Add the extracts, and mix just until blended (don't over mix). You can do this by hand or in a stand mixer like this one.
Pour the mixture into the pan and spread evenly. Bake about 28 minutes or until a toothpick comes out clean (check it at 25 minutes because ovens vary).
Allow the brownies to cool at least 30 minutes. These do crumble a little bit when warm, so send the kids outside to enjoy them!


-
School lunch: pack what they will eat

Sarah McClellan-Brandt
A slightly different version of this article originally ran in the Fort Worth Business Press.
School lunch has come a long way since the rectangular pizza slices and marshmallow Snoballs of my youth in the 80’s and 90’s. Schools try to make the meals balanced and offer a much wider range of choices. But that doesn’t help my household, as I have been blessed with the pickiest eaters on the face of the earth (they will not eat the “school lunch”). I attribute this to karma for saying things in my pre-parent days like “my kids will never eat Mac n’ cheese from a box.” How’d that work out for you, decade-ago Sarah?
It didn’t work out, and now boxed mac is a staple in our household. And weekday school lunch has been … let’s just say a challenge. Mine (Kindergarten and third grade) refuse to eat the school lunch, one kid won’t eat fruit and one kid won’t eat cheese. Sandwiches get squished into art projects, and at the end of the day it’s obvious the first thing they ate was the dessert, and maybe not much else. When they get home on an empty stomach they are crabby and evenings don’t go well. Nights and mornings consist of me trying to `make two entirely separate lunches that pack nutrition and something they will actually eat, and by the end of the year I’m basically tossing some Lunchables in their bags and calling it a day. This hurts my food-blogger heart because these pre-packaged, highly-processed cheese and cracker trays are, let’s just say, not super flavorful.
I haven’t even touched on how wasteful the lunches I pack can be… we go through boxes on boxes of sandwich bags and foil every month just to keep everything fresh for a few hours a day. I’ve tried the reusable bags and they are ok, but don’t always fit everything I want to put in them and they are hard to clean.

School lunches in bento boxes So this year I am trying something different. I bought bento boxes with four compartments. A traditional sandwich can go in the large one, or a wrap, or just some meats and cheeses. You could even go with a pasta or casserole if they don’t mind having it cold. Smaller snacks fit into the other compartments and small Tupperwares contain dressings or liquid items if you have to have them. These also enable me to pack things specifically geared towards being easy for them to eat — lunch in public school is 30 minutes from start to finish and it’s not always enough time for tiny fingers to manage packages or extra containers. With the bento box, they can just open it and dig in, and so far this year they’ve eaten almost every bite, every day, which is not normal for these two.
I know you were waiting for me to tell you about the vegan paleo veggie wrap I invented for their lunches and how they love it. But that’s definitely not the point of this column. The lunches I pack are not the healthiest — they’re not unhealthy, but we pack regular bread and snacks they love like Goldfish and make-your-own s’mores. It’s not about packing them the healthiest things, it’s about packing something they can and will eat quickly that will fuel them for the rest of their day so they can learn and play.
Blogger Jennifer Anderson of “Kids Eat in Color” suggests putting something from food groups with different colors, and talking about how the colors benefit you. For example, instead of saying “apples are good for you” she suggests saying “red food gives you a strong heart.” She also wrote a blog post about making lunches pretty, and I could not agree more. It’s because they will eat them if they look good, and from my perspective, lunchtime is when they have a little bit of home with them in the midst of their crazy days and I want them to love it.
For more lunch ideas, visit me here.
-
Best burger recipe

This burger recipe has been our favorite for years. I’ll tell you upfront, the secret ingredient is the cumin. It’s not a super-common ingredient for a hamburger but it’s not so off-the-wall that you’d taste it and think it’s weird, but just different enough to make you ask what it is.
This burger recipe is super easy: just mix the eggs and spices with the meat and grill how you like it. Whether or not you use a lettuce wrap, a bun, ketchup or spicy sriracha sauce is up to you! We like to grill ours on an outdoor griddle, but a regular grill, griddle pan in the oven or even an air fryer will still give you a great meal with this recipe. You can even cook these in a basic frying pan for great results.
We like to use grass-fed beef, and this kind is affordable and good. Whether its grass-fed or not, try to find beef with a higher fat content, as it makes the burger juicier and less likely to become dry. If all you have on hand is lean beef, try adding a couple tablespoons of avocado oil to this recipe and make sure to grease your pan or griddle for the best results.
When it comes to the bun, I love a brioche version with this. The sweetness goes perfectly with the spice from the cumin and just meshes well. I also like to do a lettuce wrap from time to time, and butter lettuce is my favorite for that.

Classic hamburger recipe
- 2 lbs grass-fed ground beef
- 2 eggs
- 1 tsp salt
- 1/2 tsp steak seasoning
- 1 tbsp cumin
- 1 tbsp garlic (crushed cloves or paste)
Mis the eggs and spices in a bowl.
Add the ground beef.
Mix thoroughly.
Form into 8 patties.
Grill to your preference. Add cheese of your choice!
For more dinner recipes, click here.
Modern Hippie Kitchen
Recipes and Kitchen Blog
